Oracle GoldenGate Veridata is a high-speed, data-comparison and repair solution that identifies, reports on, and fixes data discrepancies between heterogeneous databases without interrupting ongoing business processes automatically. It provides an easy-to-use yet powerful solution for identifying out-of-sync data before it negatively impacts the business.
I had written few articles about it. If you are new to Oracle GoldenGate Veridata, then check the link below.
https://www.oracle-scn.com/what-is-oracle-goldengate-veridata/
To know how to install and configure Oracle GoldenGate Veridata, below is the link for that.
https://www.oracle-scn.com/oracle-goldengate-veridata-122-step-by-step-installation/
To know how to size Oracle GoldenGate Veridata, below is the link.
https://blogs.oracle.com/dataintegration/post/how-to-size-oracle-goldengate-veridata
From the above articles, you will come to know,
-
(a)What is Oracle GoldenGate Veridata?
(b)How to install and configure Oracle GoldenGate Veridata?
(c)How to size Oracle GoldenGate Veridata?
This article explores the process of comparing data between two tables using Oracle GoldenGate Veridata. I will provide a detailed explanation of the necessary configurations involved in this task.
To compare data between the source and target in OGG Veridata, four essential configurations must be established and set up.
-
1. Connections
2. Groups
3. Compare Pairs
4. Jobs and Repair
Connections
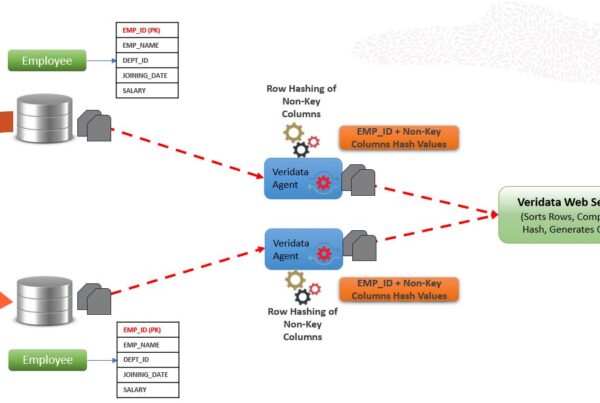
Establish a connection to both the Source and Target databases housing the data you wish to compare. The Veridata Server utilizes this connection information to communicate effectively with the Veridata Agent.
Groups
A Group serves as a logical container for one or more compare pairs. A group is associated with a set of connections to the source and target data.
>Compare Pairs
The logical connection between a Source table and a Target table is referred to as a Compare Pair, established to facilitate the comparison of their respective data. Compare Pairs are linked to Groups.
Jobs
To run Compare Pairs, you must create a Job. The Job configuration determines which compare groups are processed.
Let’s establish and set up the Connection, Group, Compare Pair, and Job to conduct a data comparison between the source and target table, EMPLOYEE.
After providing the credentials, you will be landing into the Home Page of Veridata.
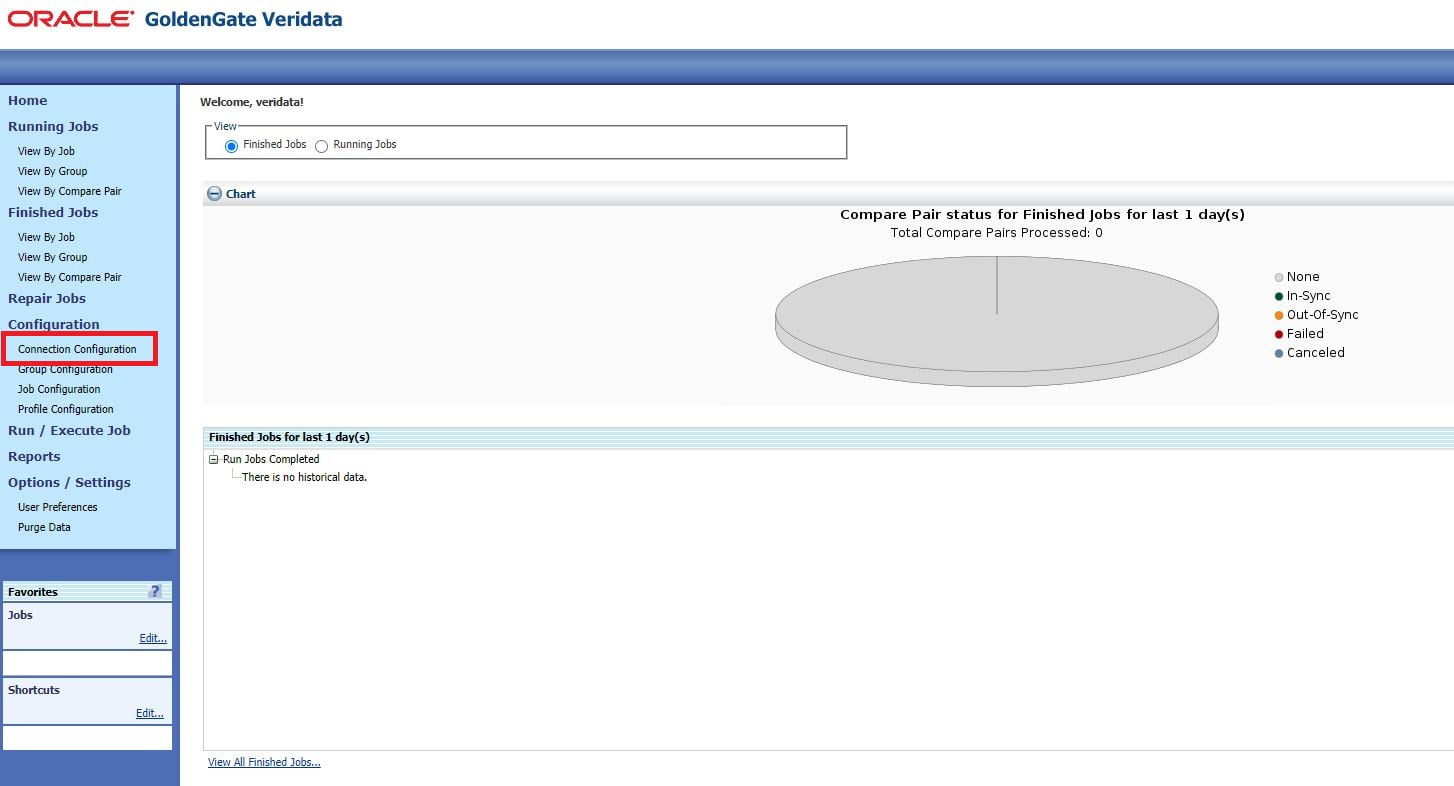
1. Create Connections
We need to create connections to the source and target database which contains the data to compare.
Click on the “Connections Configuration” in the left side panel.
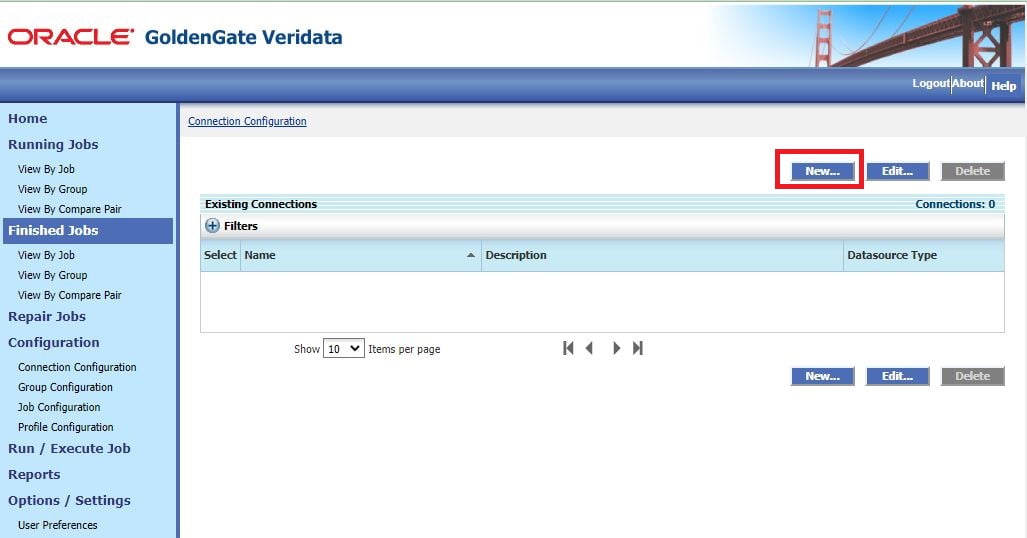
Click on the “New” button.
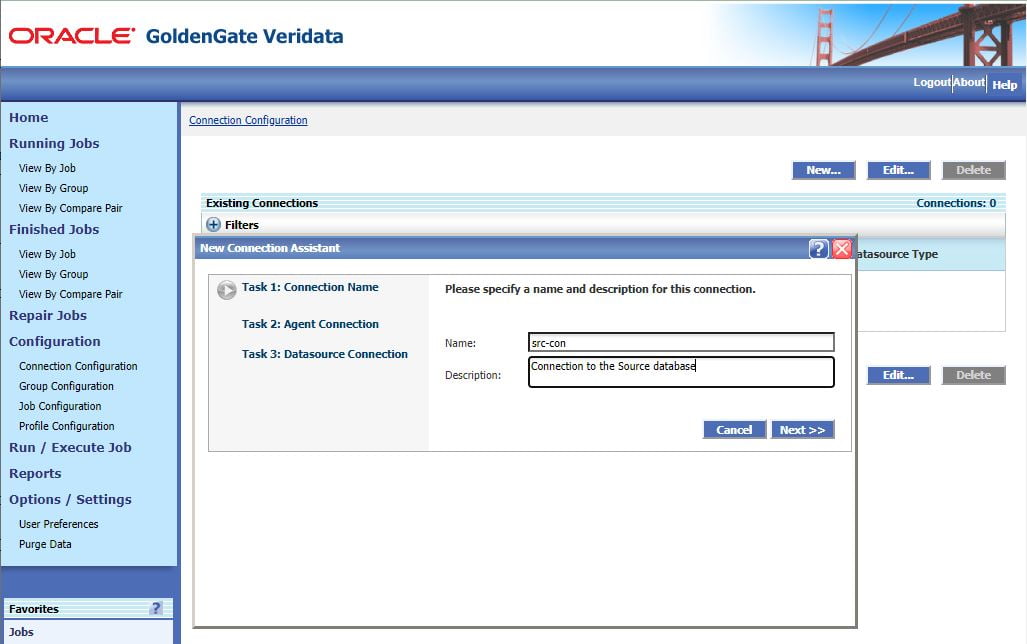
Provide the connection name and description. Click on Next button.
Provide the agent details like Hostname/IP Address and Agent Port. After providing these two details, once you click on “Verify”, the “Datasource Type” will be automatically detected.
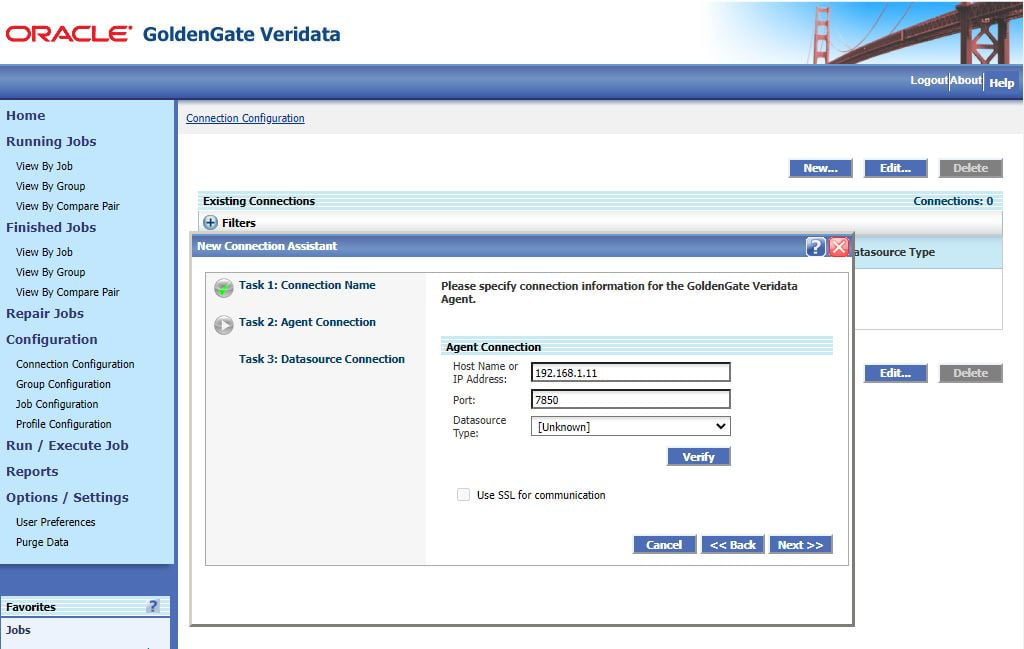
We also provide a secured communication between the Veridata server and Agent. If you want to use it, please check the “SSL” check box.
Click on verify button to check the connection.
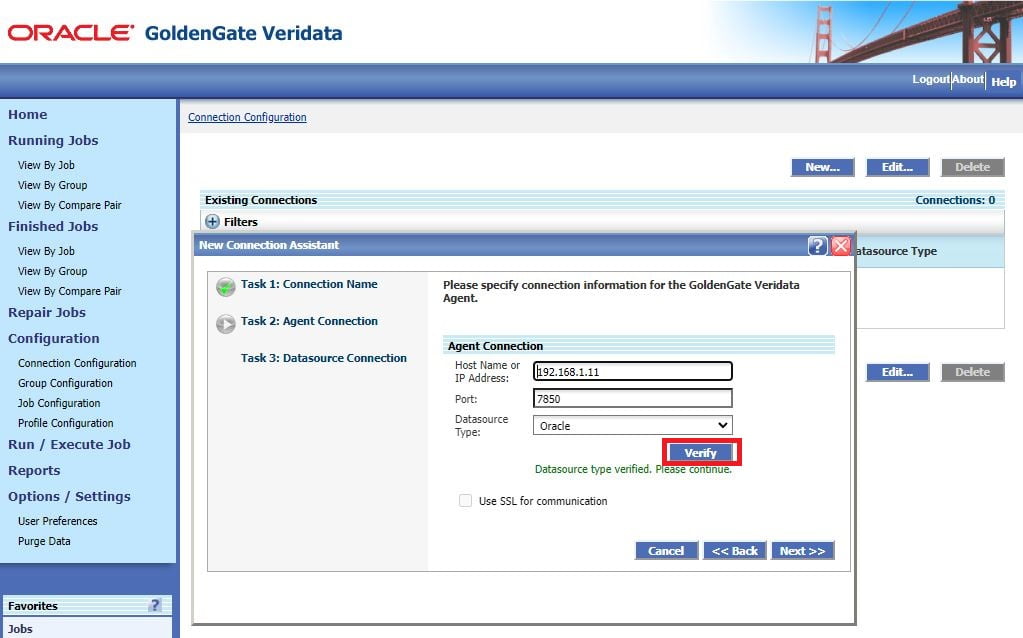
You see a message “Datasource type verified. Please continue”. Click on Next button.
Provide the Datasource connection user details. We can use different users to compare and repair data. I am using the same user for both the activity.
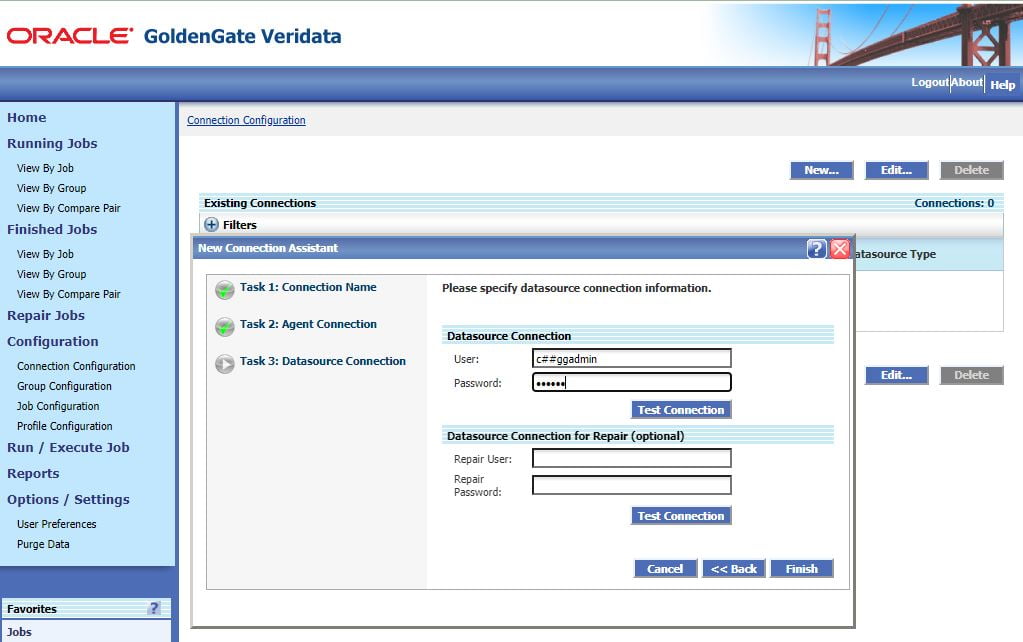
Click on “Test Connection” button to check the connection. You should get a message “The Datasource connection is successful”.

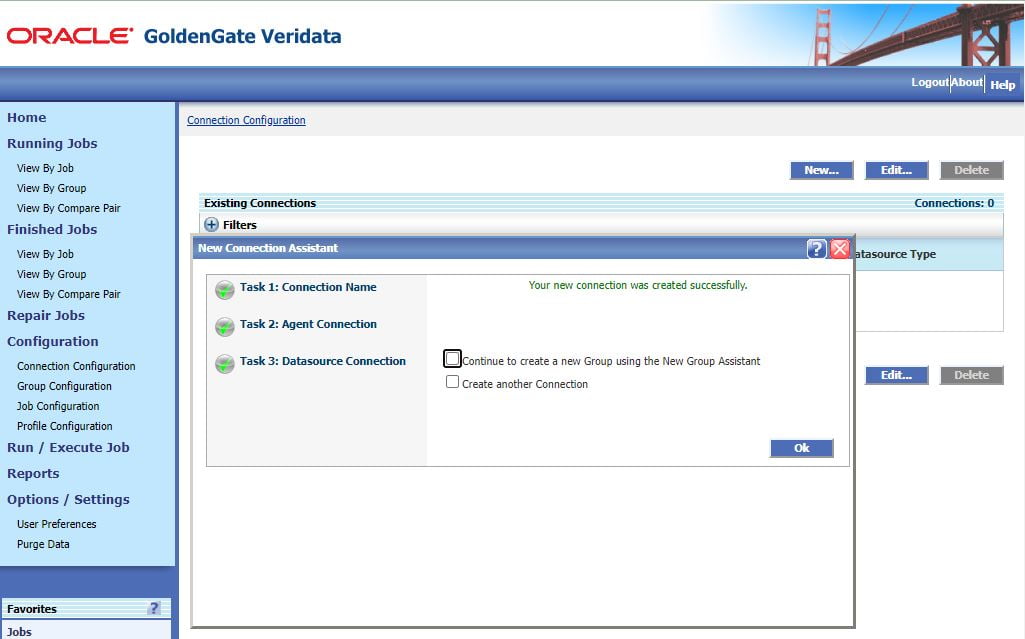
Click on “Finish” button.
You get couple of options after clicking “Finish” button. You can either continue to create Group or if you want to create another connection.
Click on “Finish” button.
You get couple of options after clicking “Finish” button. You can either continue to create Group or if you want to create another connection.
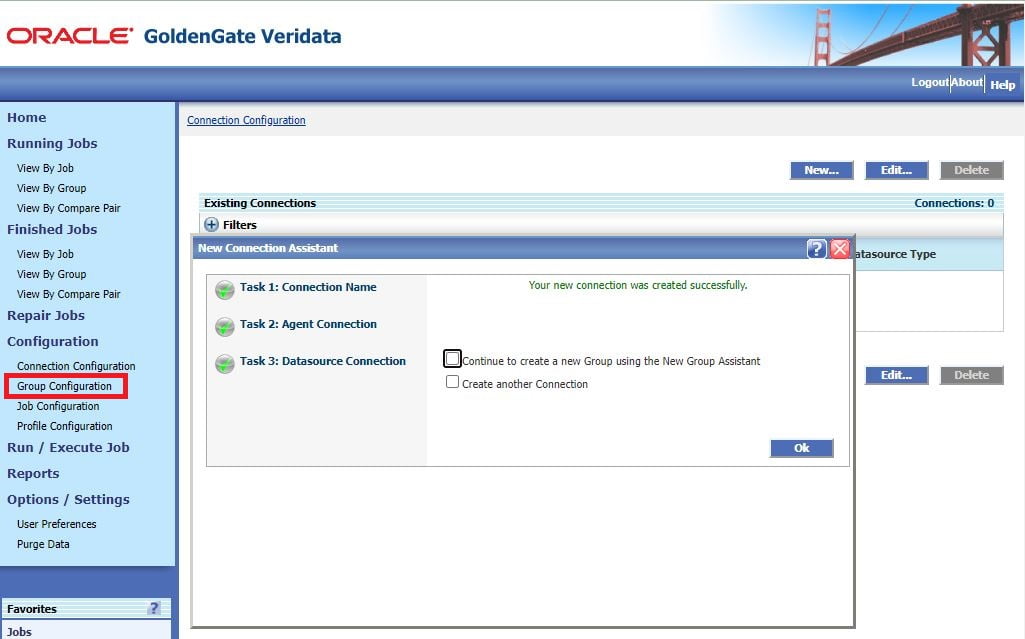
The Group also can be created by cliking the “Group Configuration” on the left side panel.
I have selected again the option of creating connections to create target connection. The steps are same, so skipping it.
However, I am proceeding with option 1 from the screen to create Group.
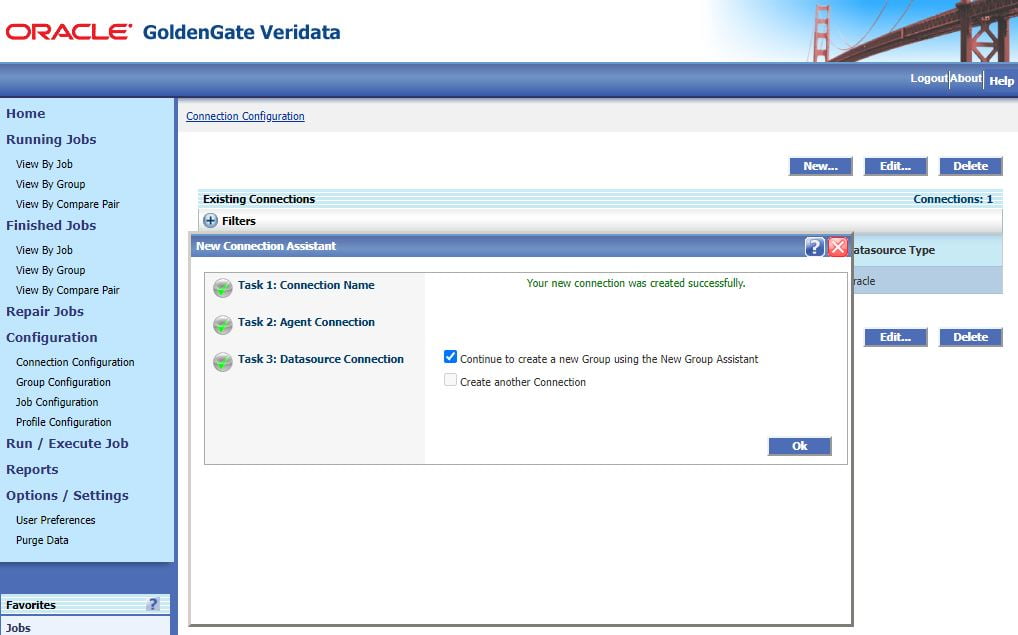
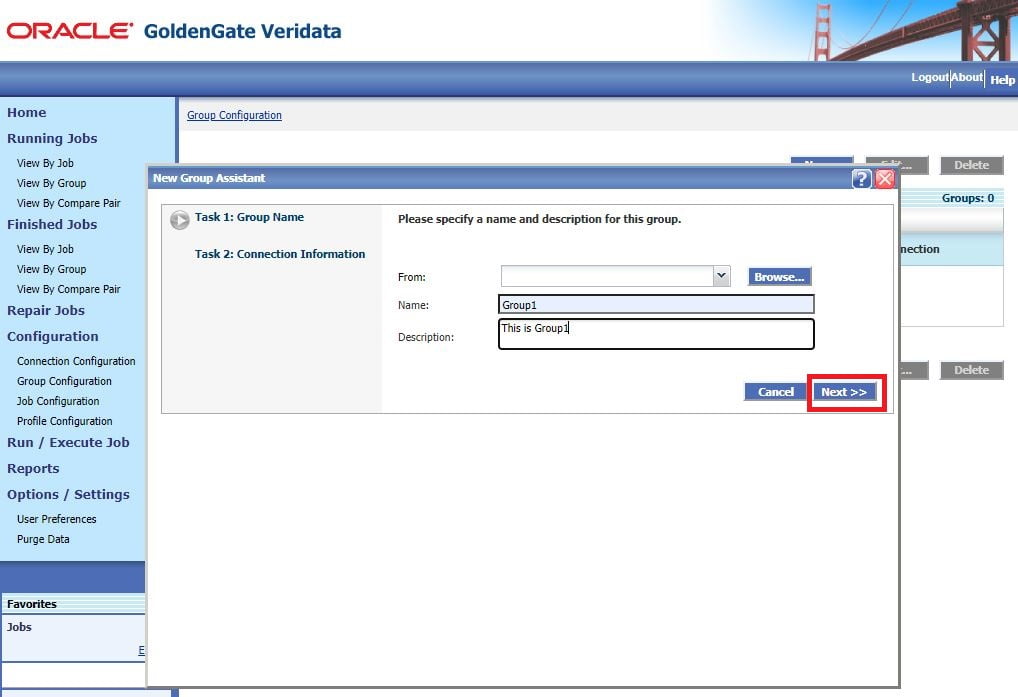
2. Group Configuration
Provide the Group details and click on Next button. I have provided a sample description as “This is Group1” :-)
Provide the Source and Target connection names.
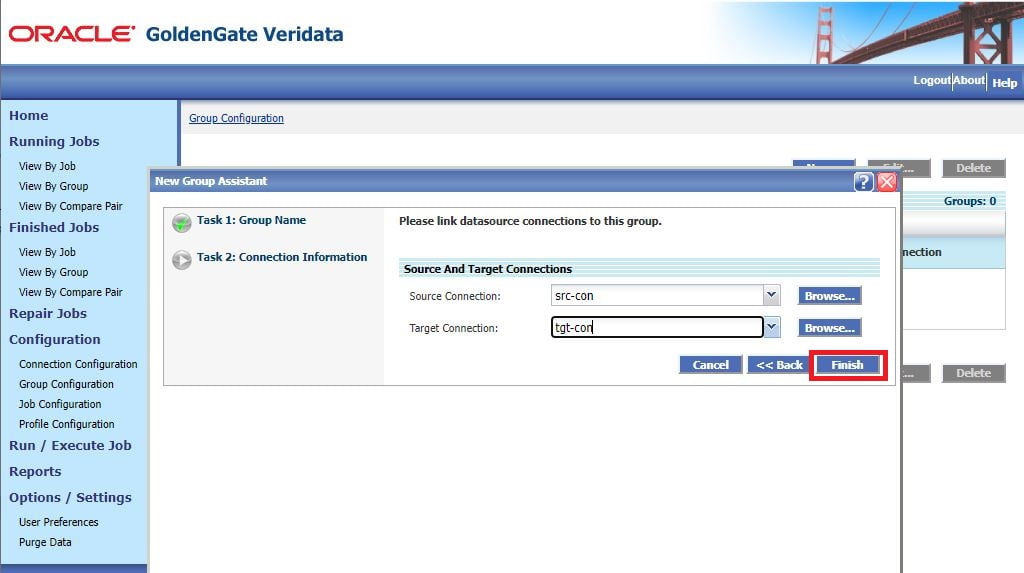
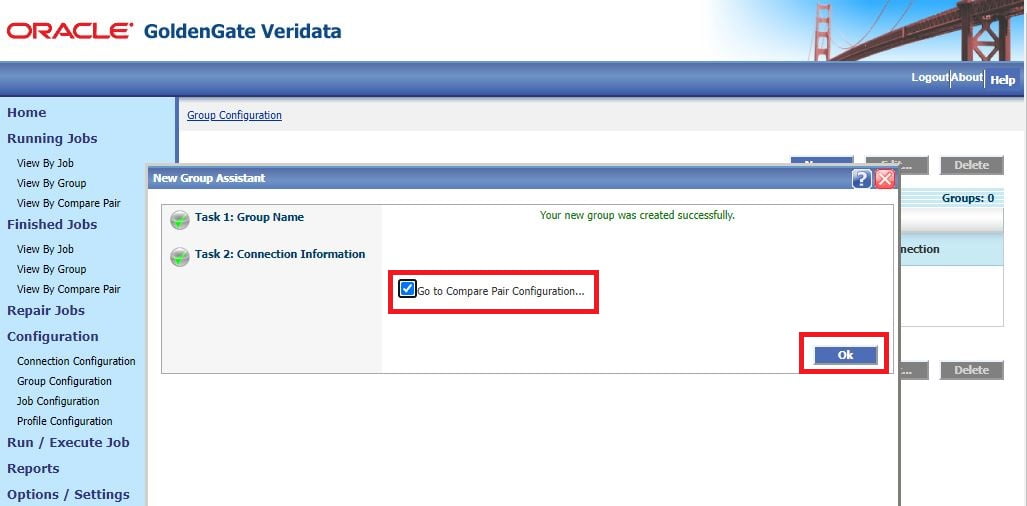
Once you click on “Finish” button, it will ask to configure the Compare Pair. Yes, we need to create or configure Compare Pair and hence select the option and click on Ok button.
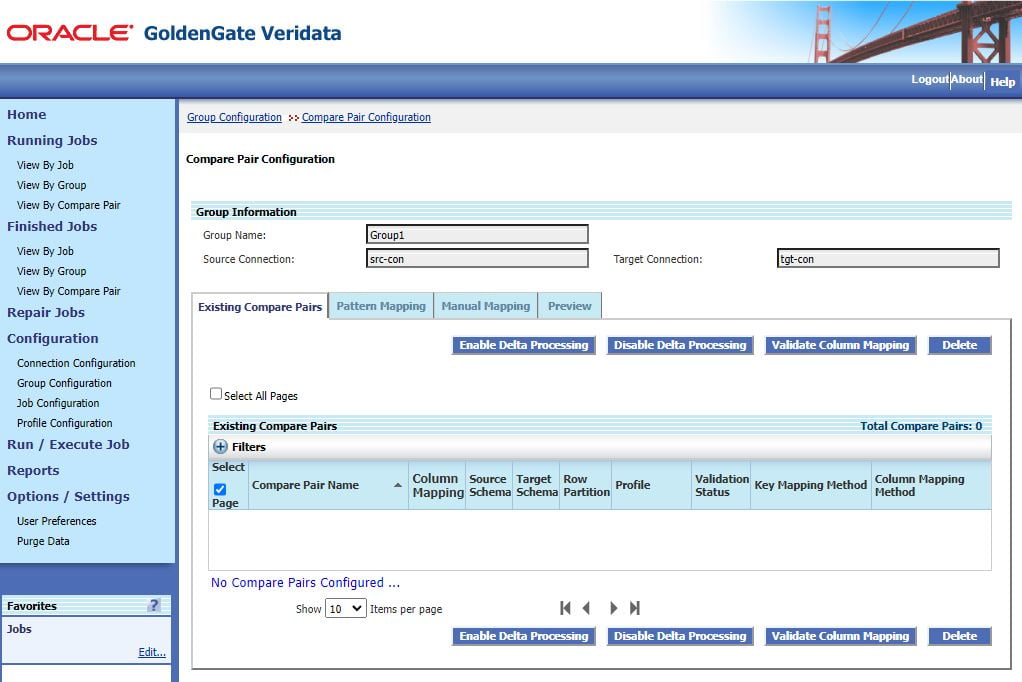
Generate Compare Pairs for the Group
This is the page for Compare Pair configuration. It will list all the existing compare pairs belonging to this group. Since, this is a new group created, we haven’t associated any compare pairs to it. Let’s create compare pair now.
Note: Provide the Datasource information as requested.
There are two types of mapping here.
-
a. Pattern Mapping
b. Manual Mapping
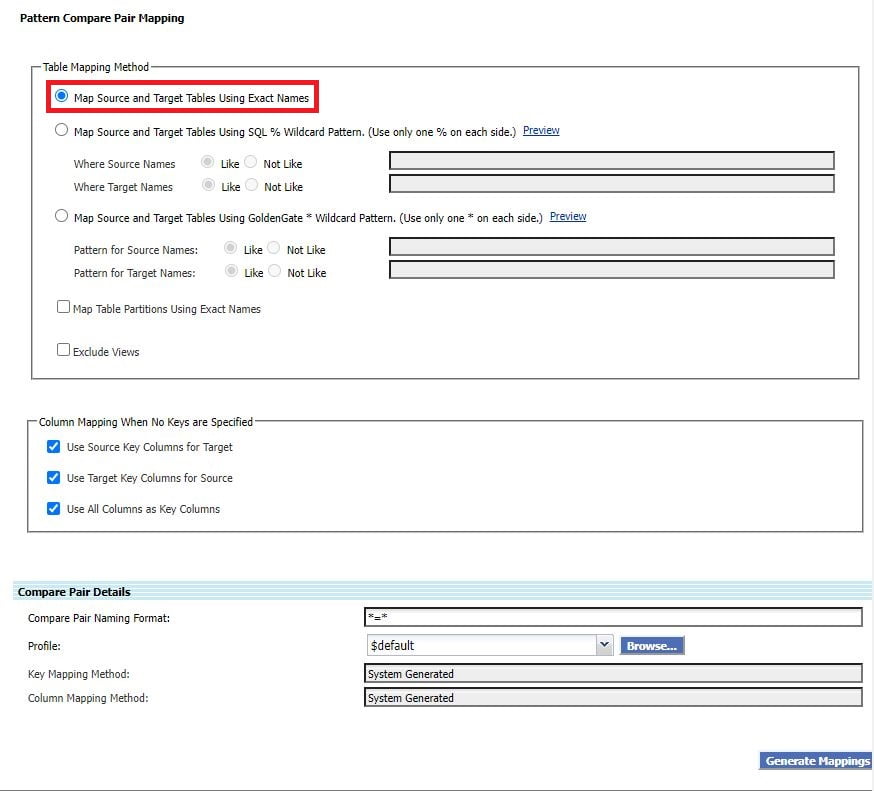
a. Pattern Mapping
This creates the compare pairs automatically by providing various filters for us. You can see various Table Mapping methods available in the screen.
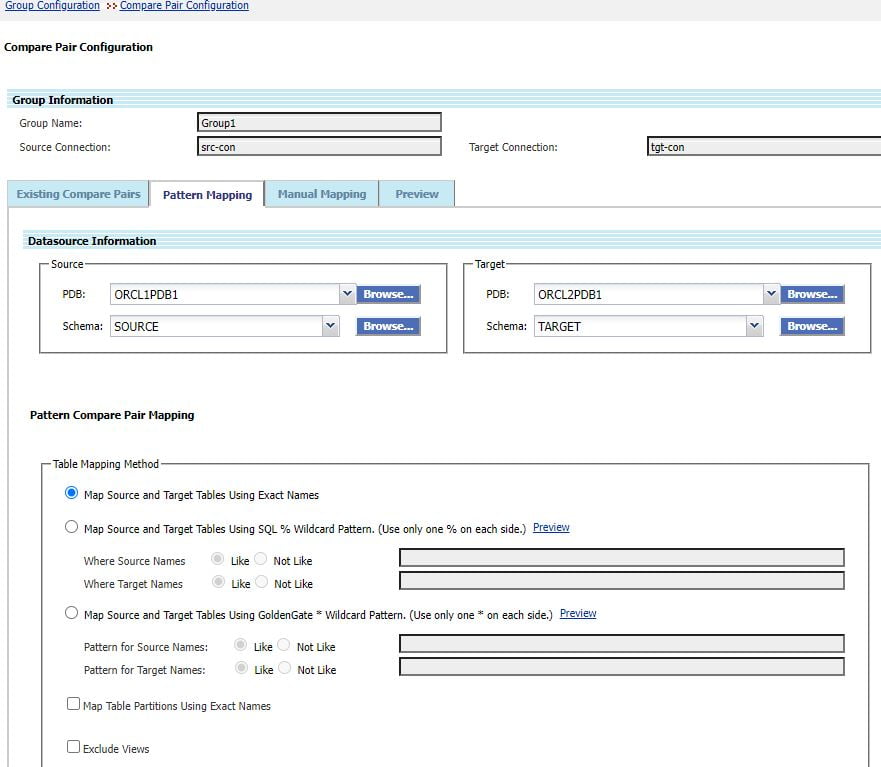
For example, I just selected the first option (default) and clicked on “Generate Mappings” button in the bottom of the screen.
Keep the remaining choices unchanged. We will discuss these alternatives in our upcoming article.
You could see the compare pairs generated for the tables with exact names in source and target databases. This can be viewed in the “Preview” tab.
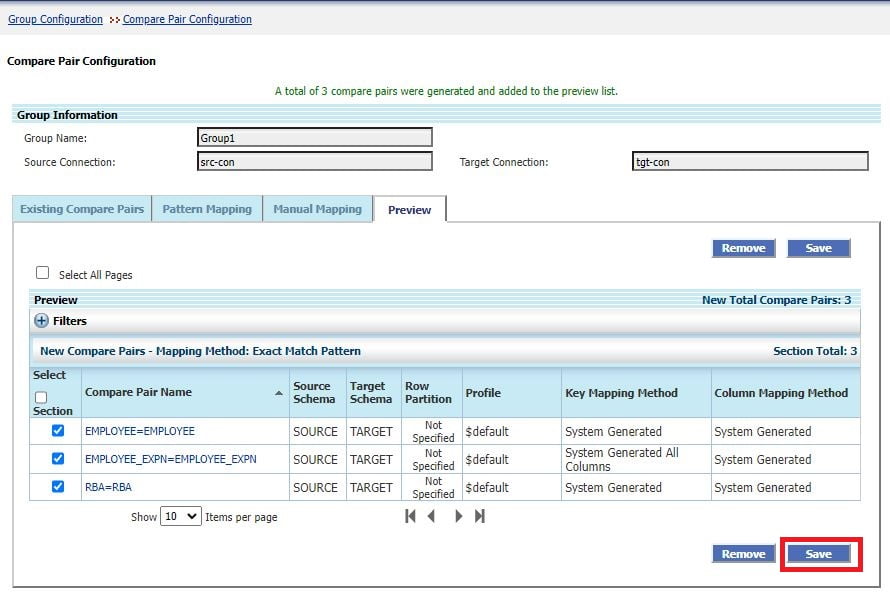
You can go ahead and click on “Save” button so that the compare pairs generated will be created. This is one option.
a. Manual Mapping
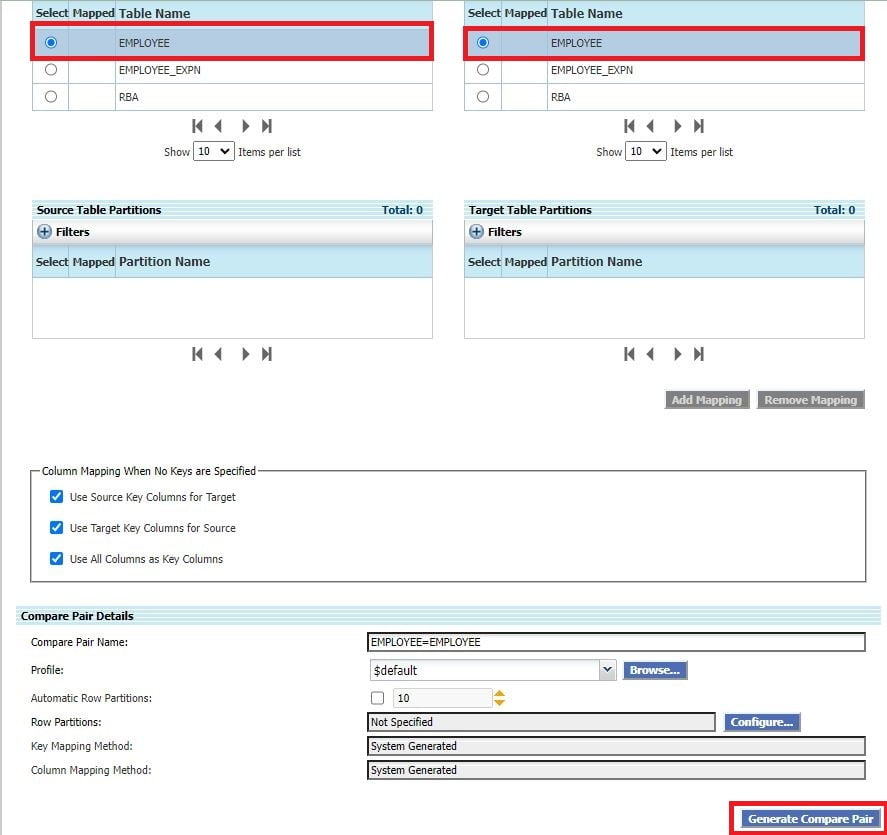
This is the Manual Mapping tab info. This method allows us to create or generate the compare pairs manually by selecting each table from source and target.
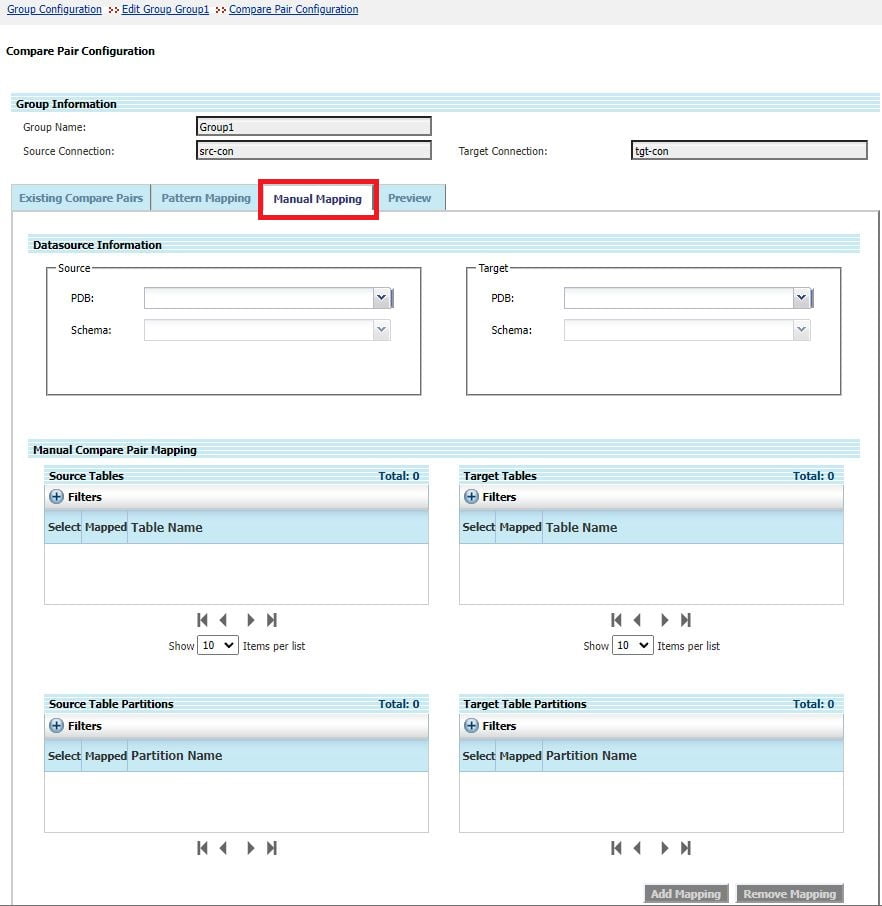
One scenario I could explain here is, if we want to compare the data between source and target tables which have different names, then this option can be used.
Provide the Datasource information as requested.
Once you provide the details, automatically the source and target tables will be listed below.
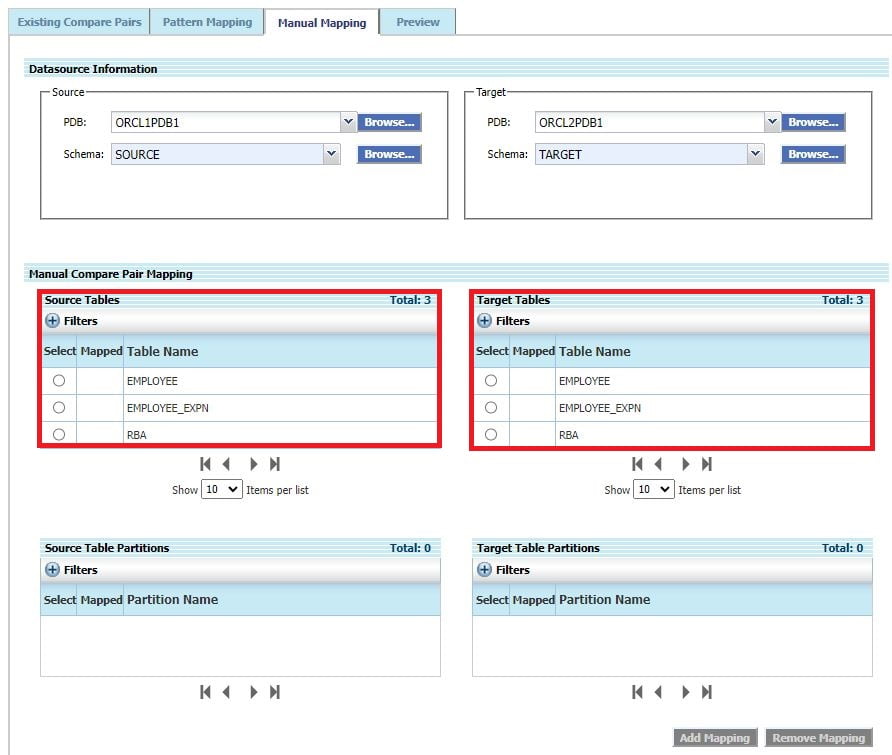
Now select the tables and click on the “Generate Compare Pair” button in the bottom.
You could see a message “The compare pair was added to the preview list”.
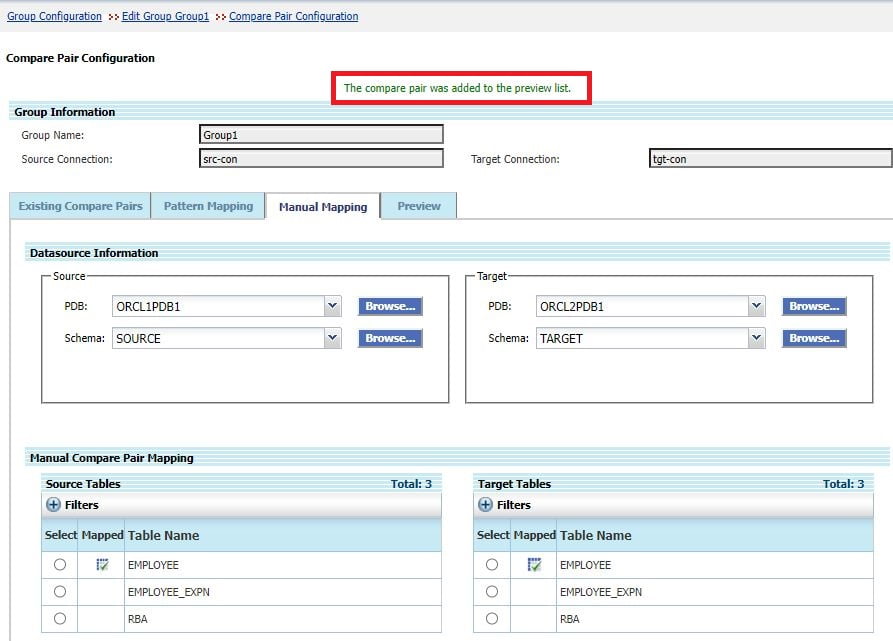
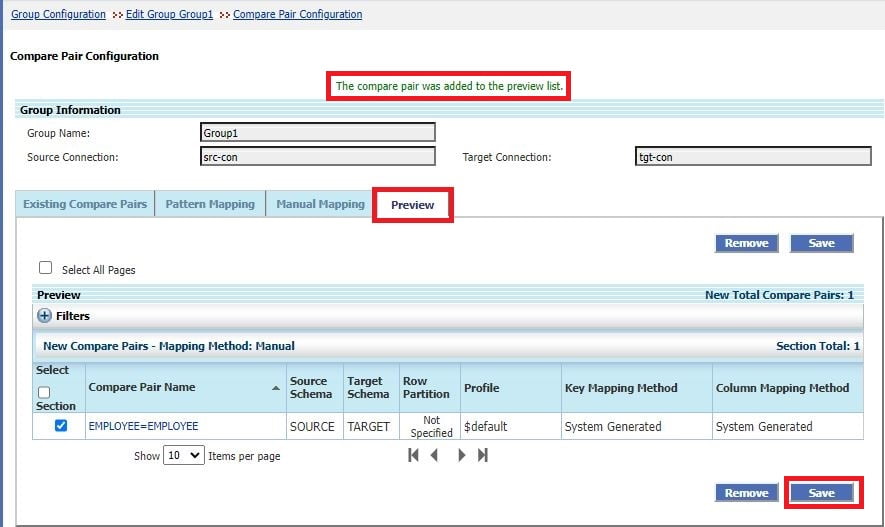
Now click on the Preview tab to view the generated compare pair.
Check the details and click on “Save” button. You will see a message “1 compare pair(s) saved.
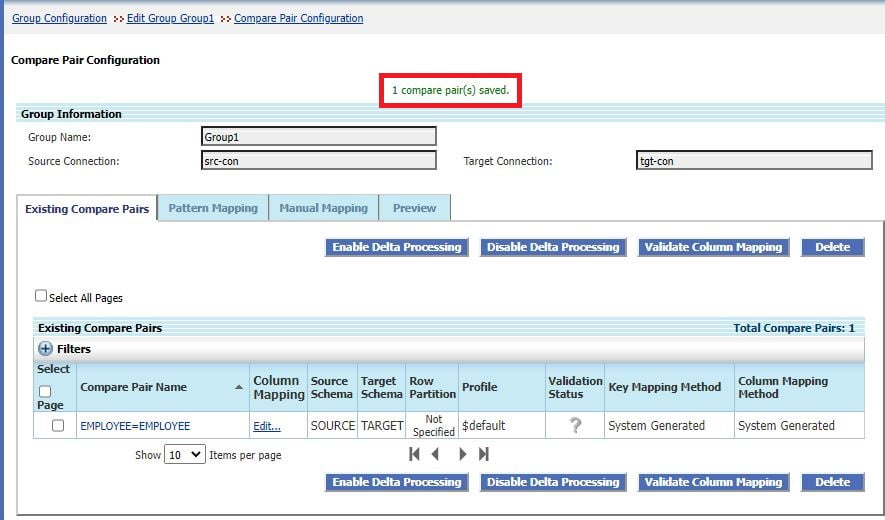
You can validate the column mappings of the table by selecting the compare pair(s) and clicking on “Validate Column Mapping” button.
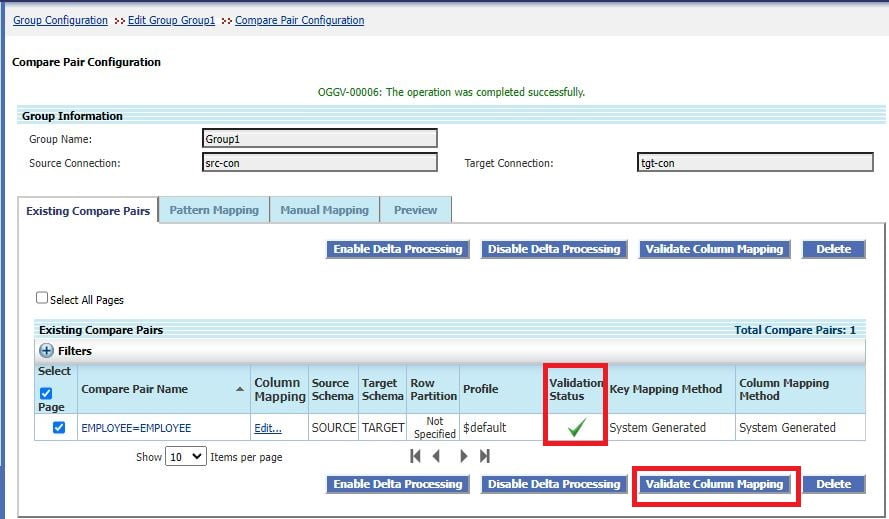
We have created the compare pair for the table EMPLOYEE. To compare the data, we need to configure the job first.
4. Configure Job and Execute
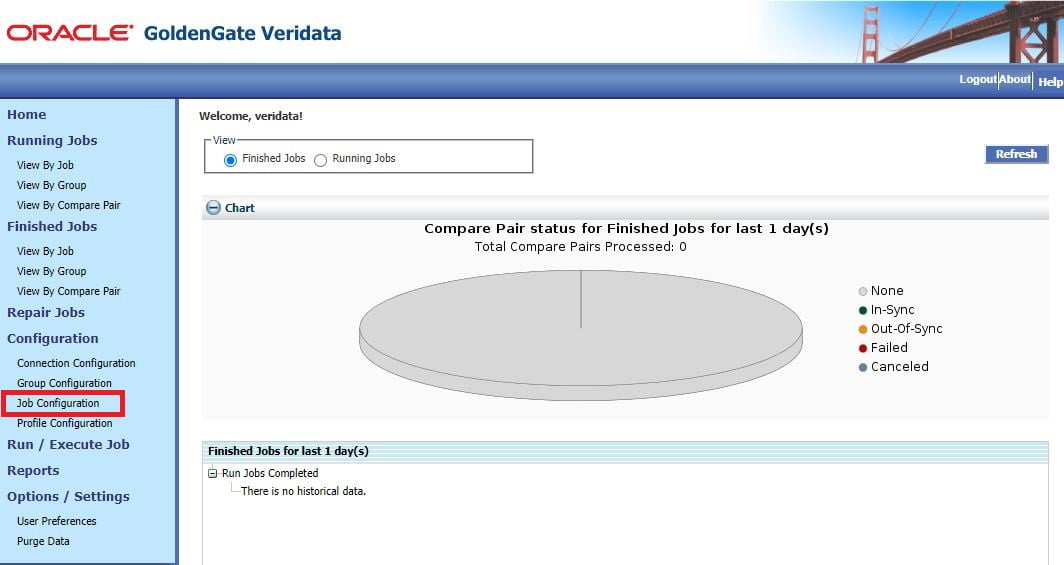
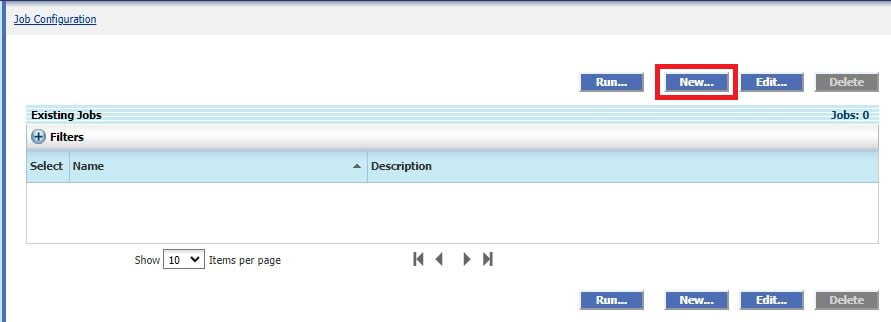
Click on the “Job Configuration” in the left side panel.
Click on “New” button to create a new job.
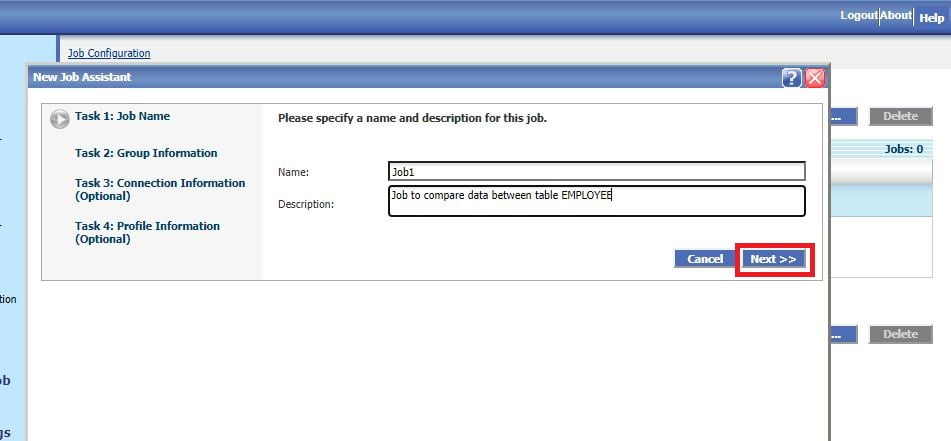
Provide the details and click on “Next” button.
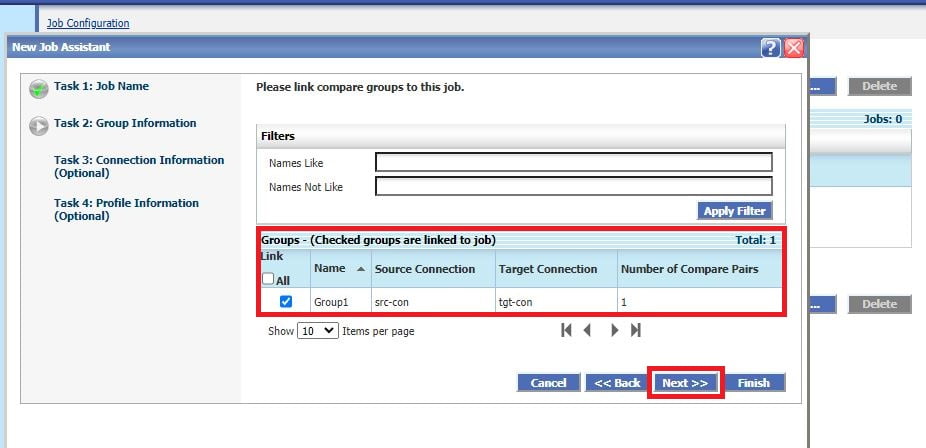
Select the group and click on “Next” button.
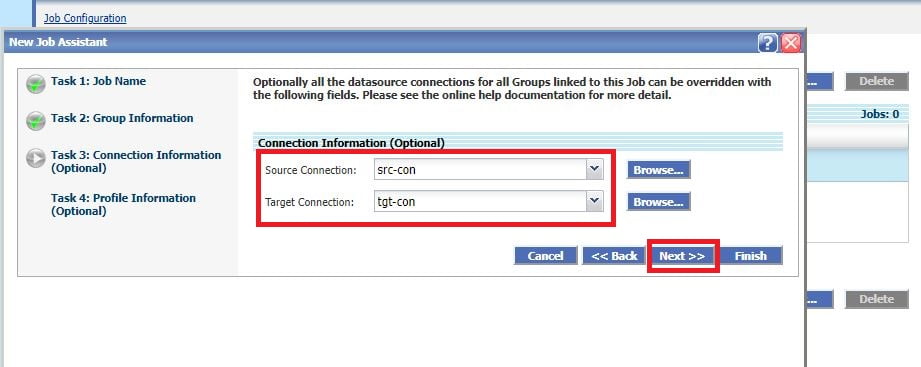
This is optional, however, I have just provided the connection details and click on “Next” button.
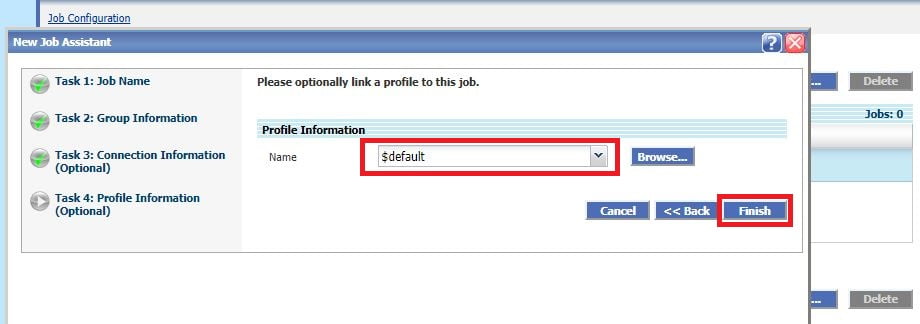
The default profile will be selected automaticall. Just leave it and click on “Finish” button. I will explain about the profiles in my upcoming articles.
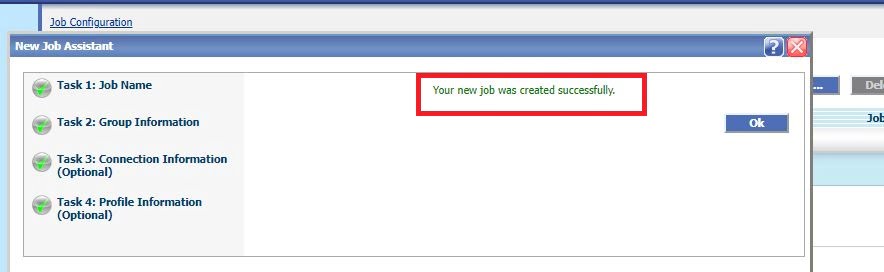
The job has been created successfully.
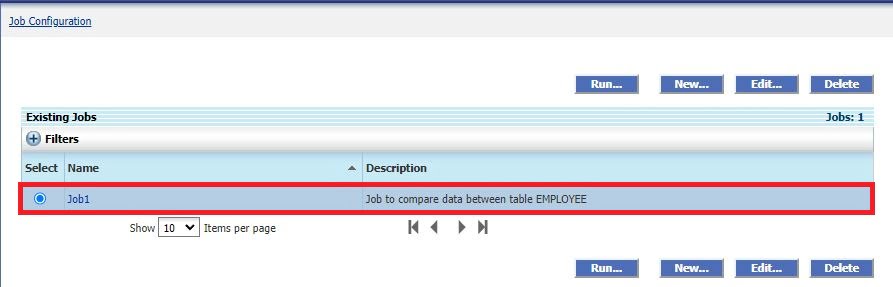
Now, let us compare the data of EMPLOYEE table between source and target.
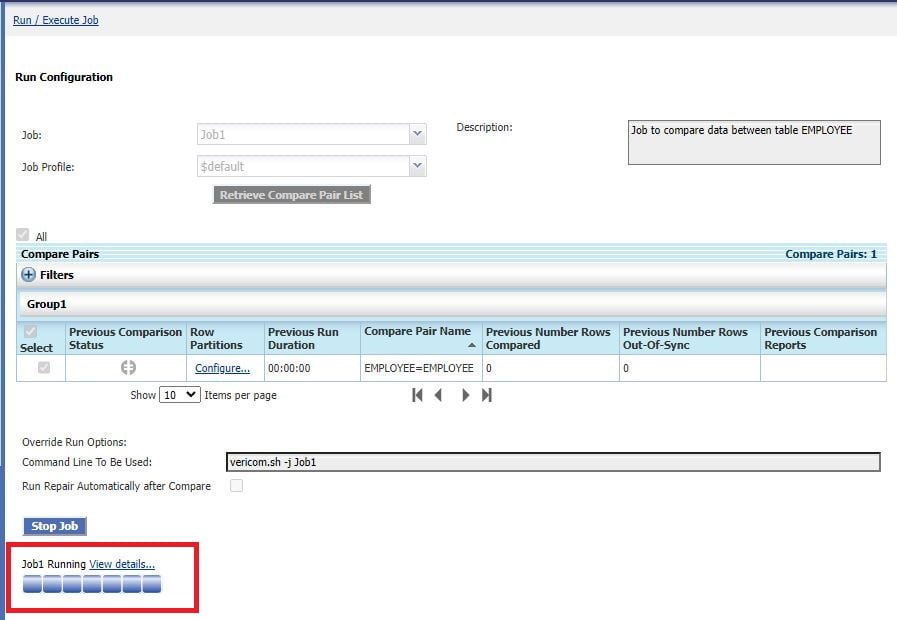
Click on the “Run / Execute Job” option from the left side panel.

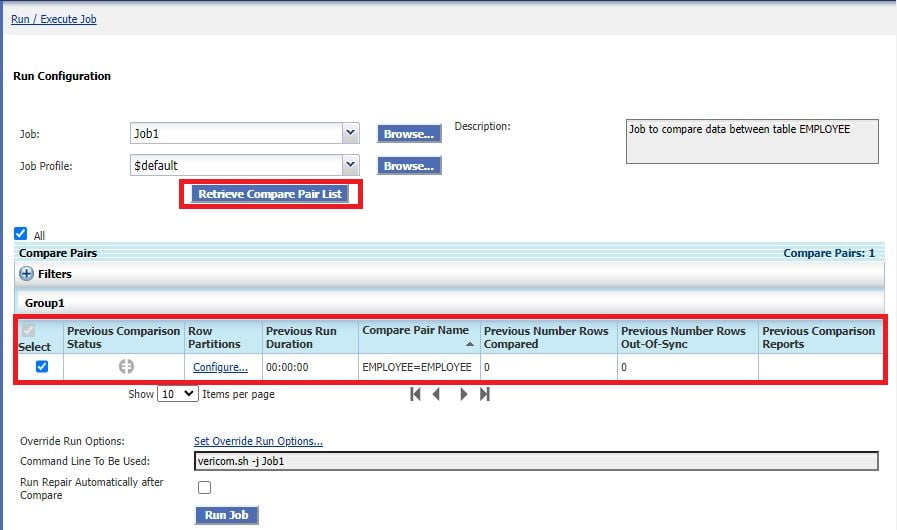
Select the job name from the dropdown list.
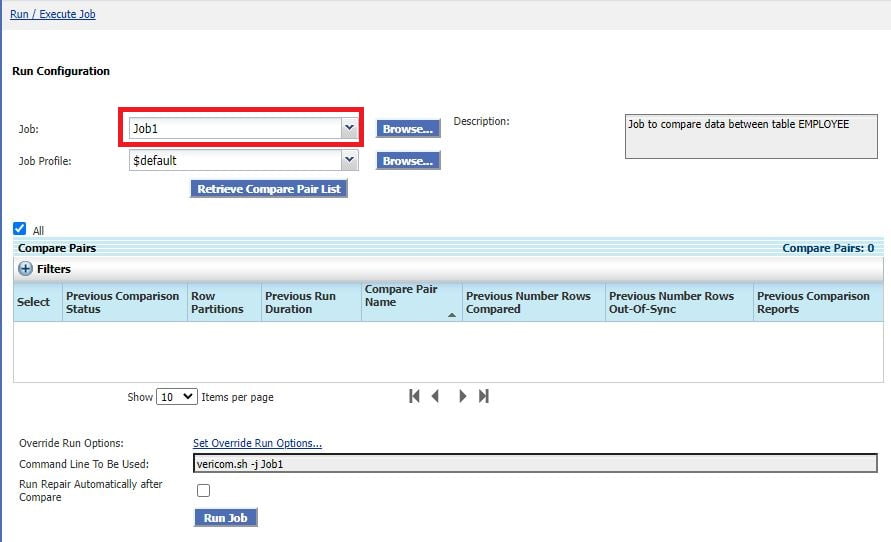
Click on the “Retrieve Compare Pair List” button. It lists the compare pairs associated with that job in the below table.
Click on the “Run Job” button.
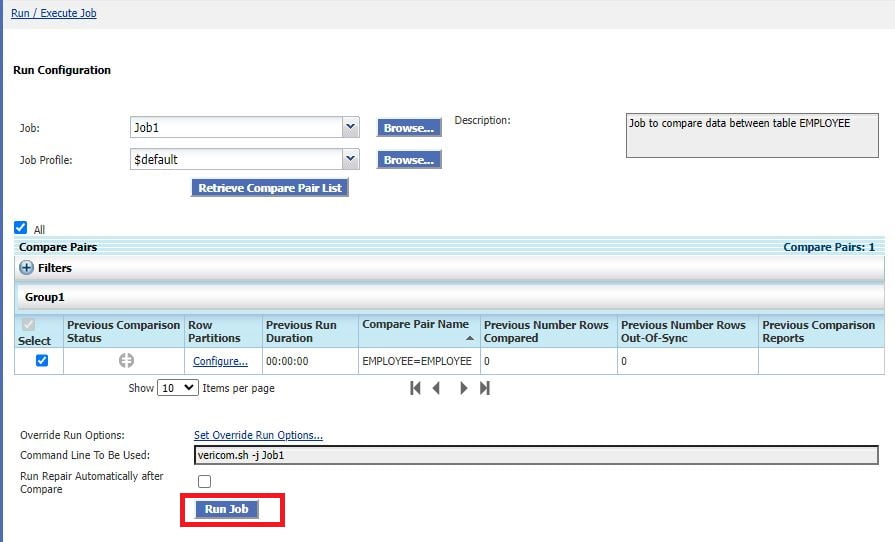
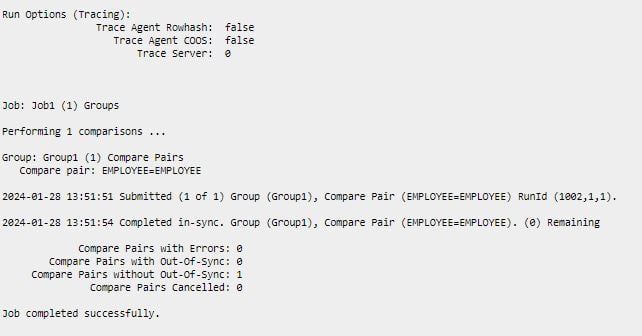
You can see the job has started and it is running.
Also, you can view the running jobs in the “Running Jobs” page by cliking it from the left panel.
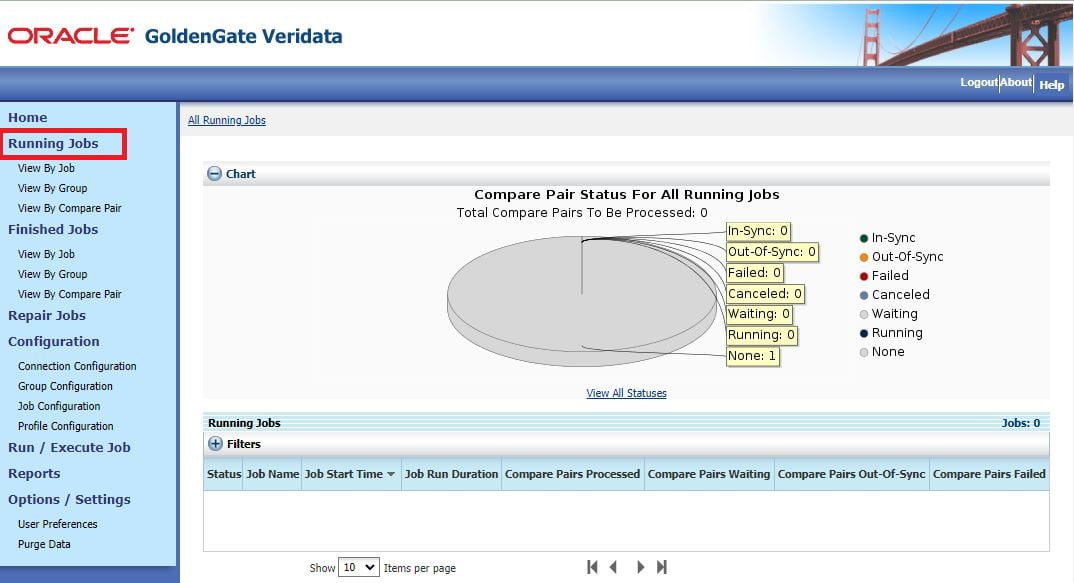
Since the EMPLOYEE table is small and the comparison got completed soon. If you are comparing a huge table, then you can monitor the job in this “Running Jobs” page.
The finished jobs can be see from the “Finished Jobs” page in the left panel.
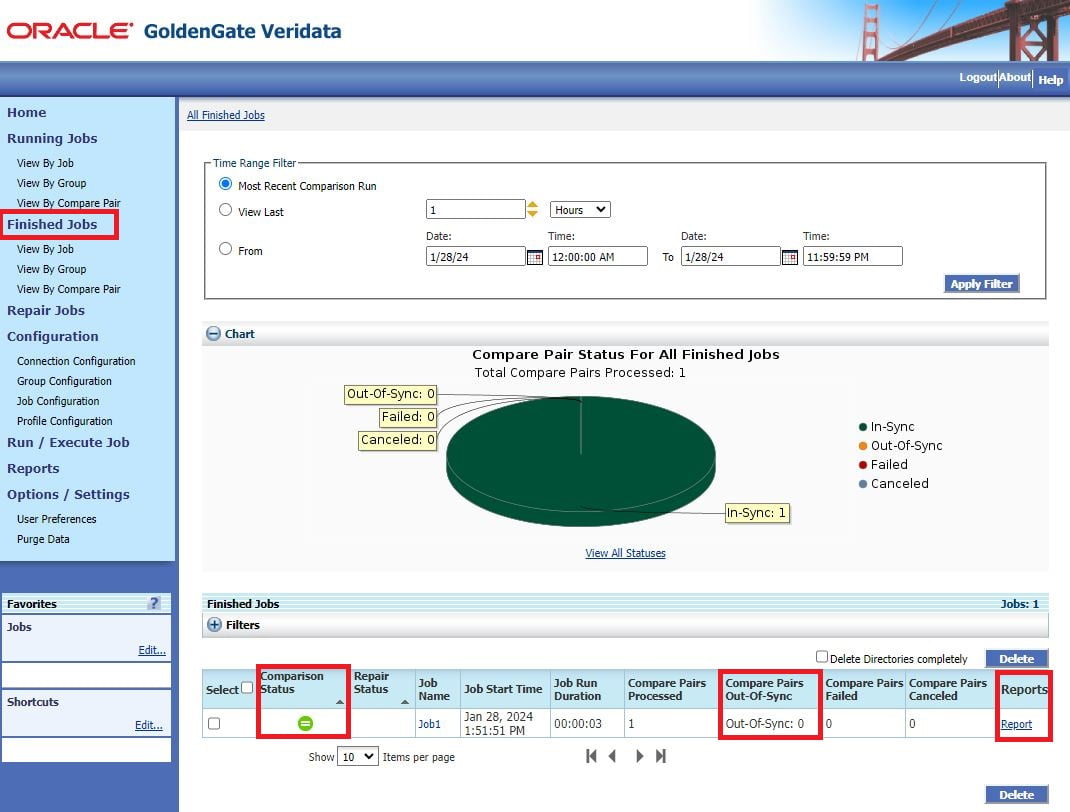
The job has been completed successfully. The comparison status icon with equal (=) sign indicates that all the rows are in sync in EMPLOEE table.
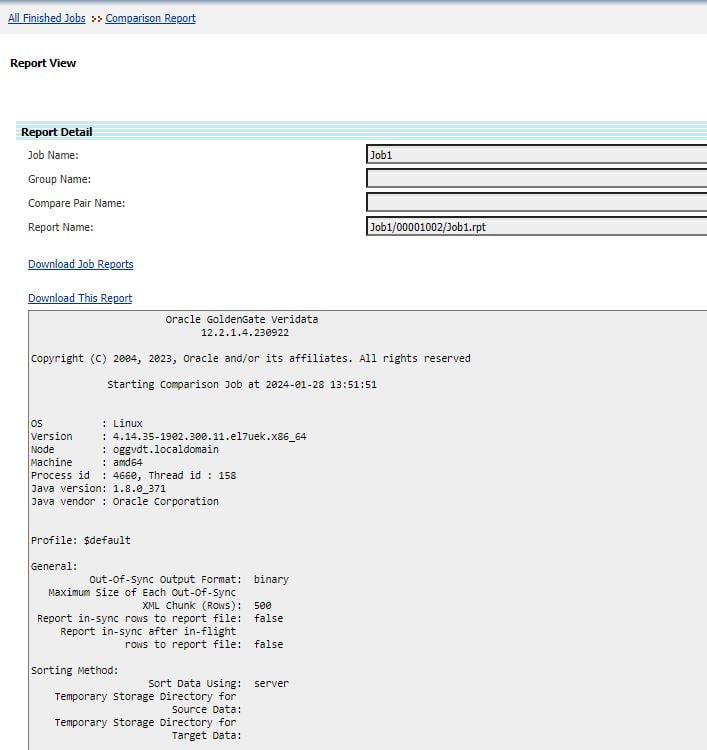
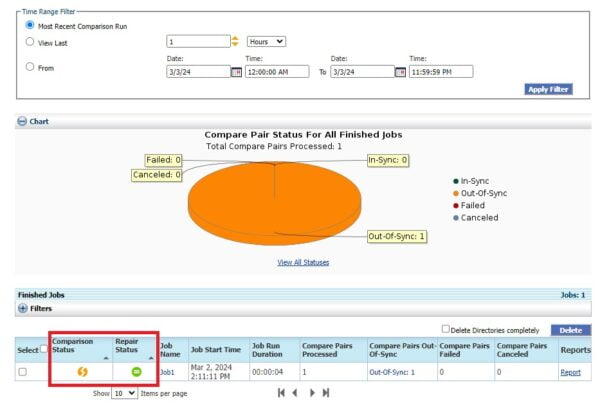
You can also view the complete report of the job by clicking on the “report” hyperlink in the table.
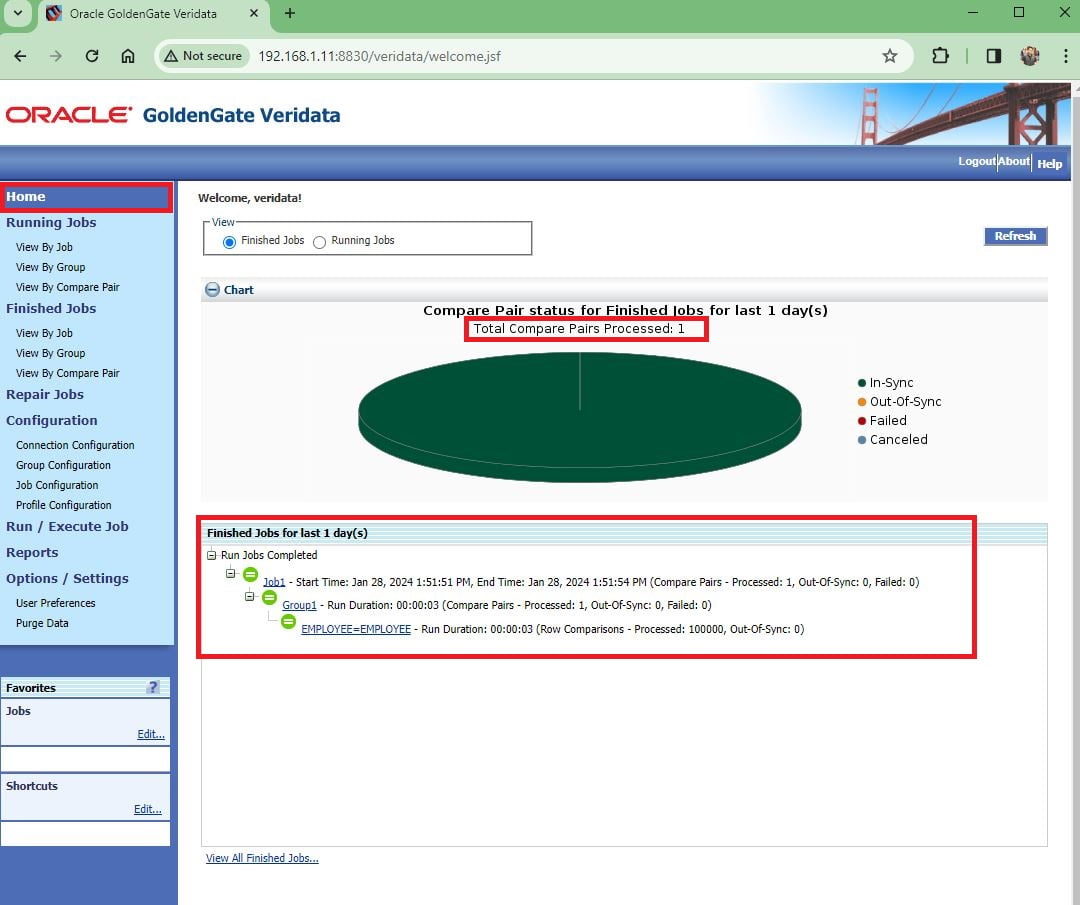
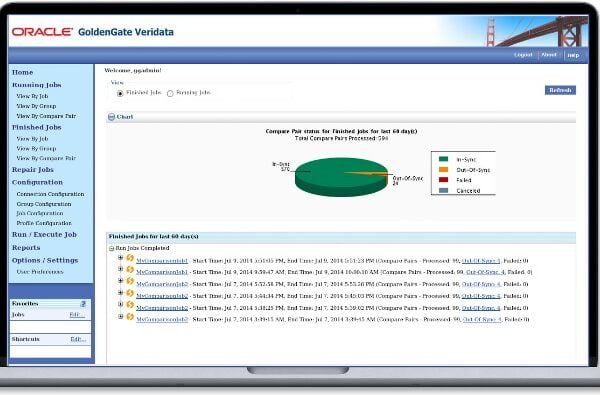
The details can also be seen in the Home page as below.
I hope you had a clear understanding about the comparing data between tables in source and target using Oracle GoldenGate Veridata.
Cheers :-)


 Total Users : 1899466
Where exactly the veridata compare job runs, will it run in DB or outside the DB.
It runs in the Veridata Server.