As you know, Oracle GoldenGate Veridata serves as more than just a rapid data comparison tool across various databases. It seamlessly addresses data inconsistencies between heterogeneous databases without disrupting ongoing business operations, all automatically.
My last article was about Oracle GoldenGate Veridata where I explained in detail on how to compare data between the source and target tables. Please refer the link below.
Oracle GoldenGate Veridata – Comparing data between Tables
In this article, I will explain the Automatic Repair Feature provided by Oracle GoldenGate Veridata. In this scenario, we perform a comparison of data between the EMPLOYEE table in the source and target databases. Any data inconsistencies detected are automatically rectified by Veridata.
Before getting into the scenario, let me explain about the Automatic Repair feature.
Automatic Repair Feature
Oracle GoldenGate Veridata includes an automatic repair feature. Upon completion of a comparison task, if any data integrity issues arise, the repair task is initiated automatically. This process synchronizes the target tables with the source tables without requiring manual selection of rows for repair.
Oracle GoldenGate Veridata offers users three options for data repair.
-
1. Automatic Repair
2. Manual Repair
3. Download Repair SQL
1. Automatic Repair
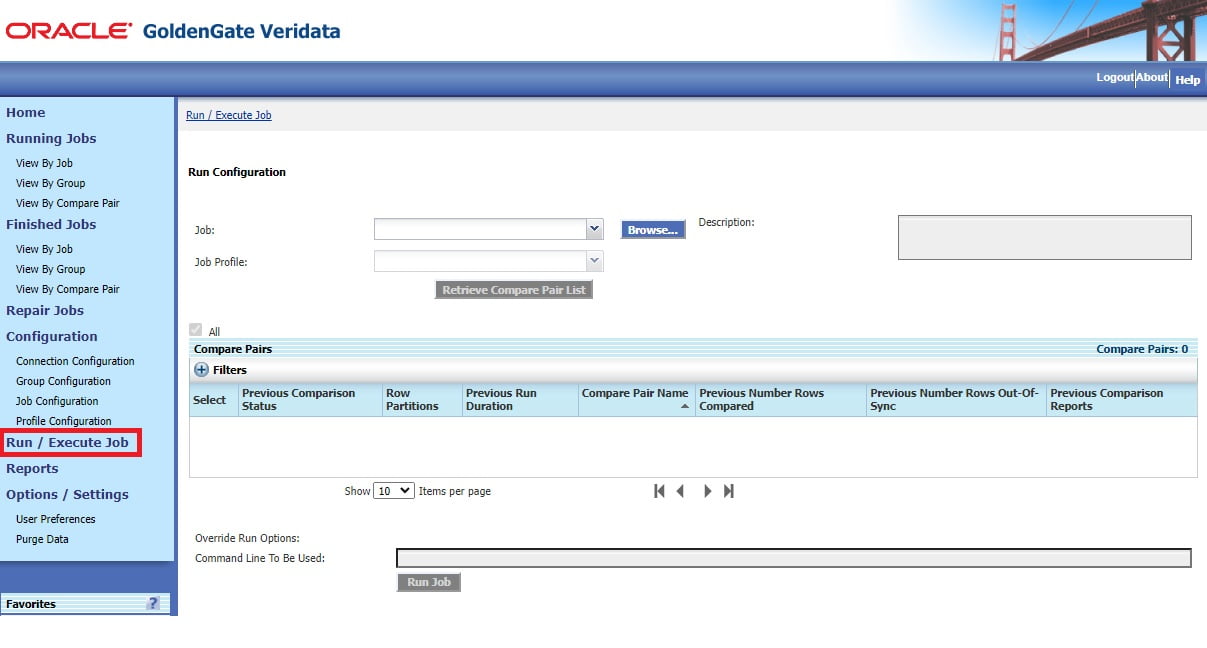
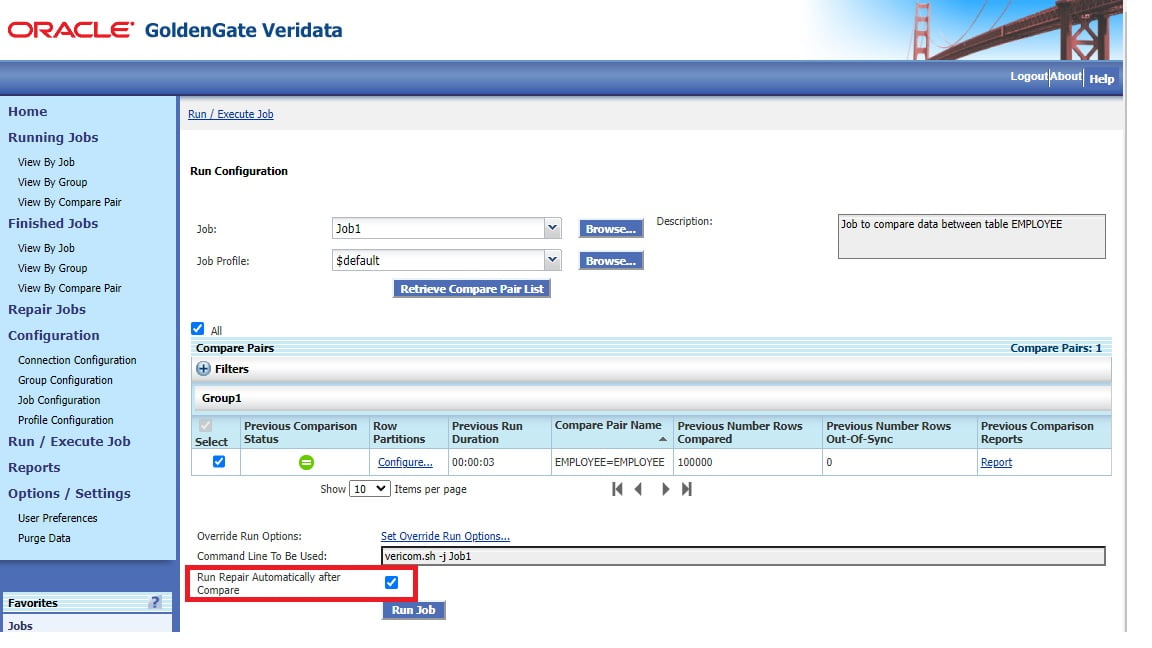
By default the automatic repair feature is disabled. You can select the option “Run Repair Automatically after Compare” before running a job. But mostly, we create and schedule the jobs. It is rare to run a job manually from the UI.
Once you click on the “Run / Execute Jobs” and provide the details, you will see the option of “Run Repair Automatically after Compare” and it is unchecked by default.
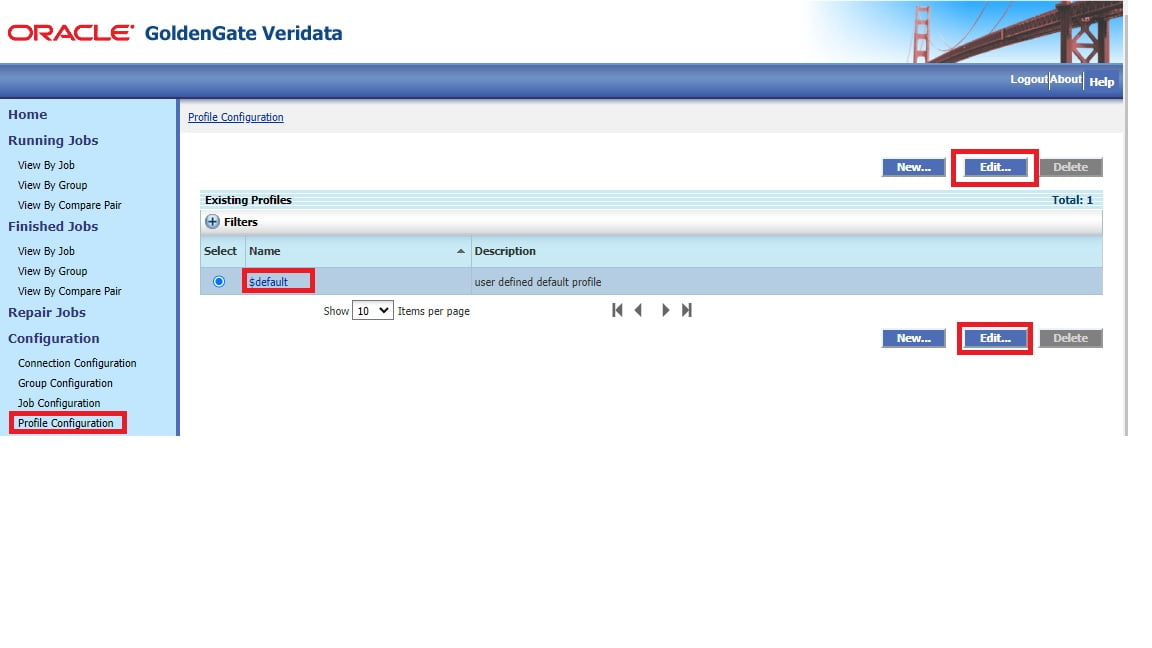
However it can be enabled in the Profile Configuration.
Click on the “Profile Configuration” tab in the left panel and you will see “Profile Settings” with various categories
Under that, select the “Repair” category.
Here, you can see that the setting “Run Repair Automatically after Compare” is unchecked by default.
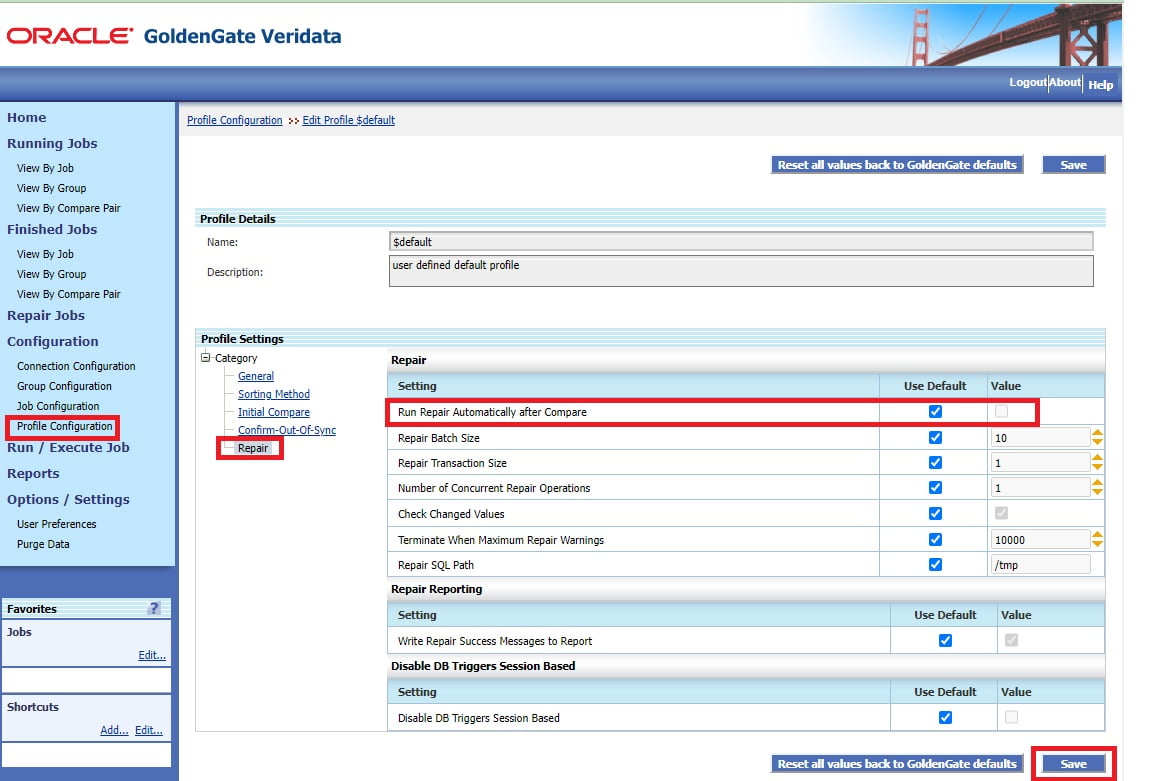
You can override this by unchecking the Use Default option and checking the Value. Click on Save button to save the changes.

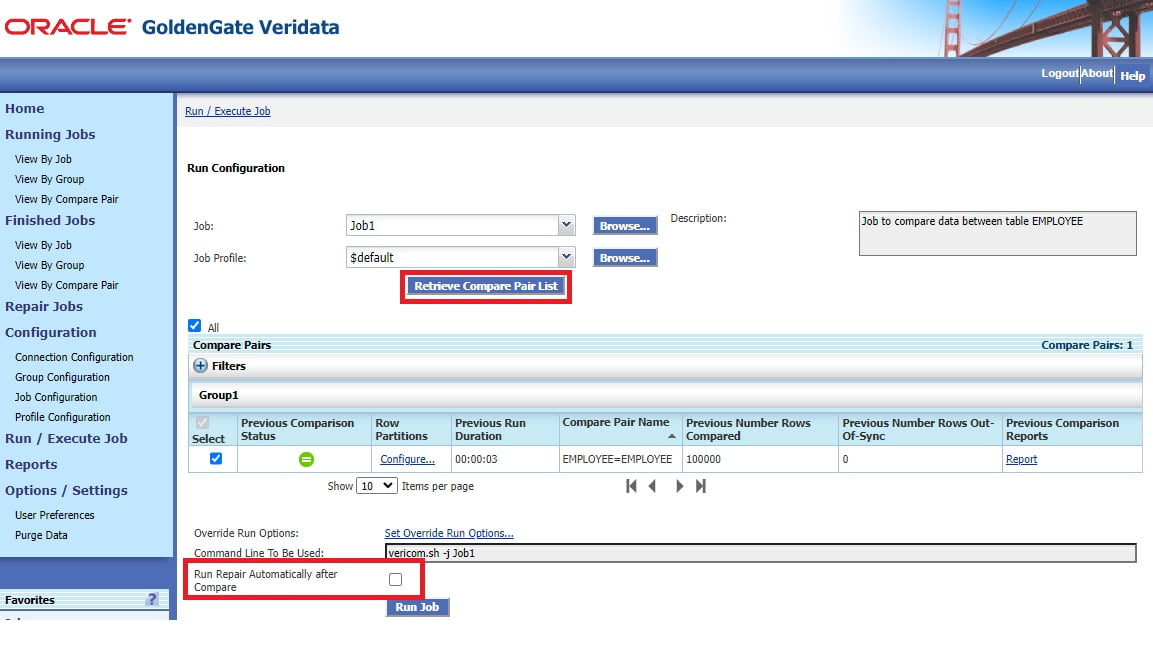
Now, if you go to the “Run / Execute Jobs” page, you will see the Automatic repair option is enabled by default.
Once this is enabled, after the comparison job is completed and if there are any data issues, the repair job kicks in automatically and fixes the issue. There is no need of any manual intervention.
2. Manual Repair
As I mentioned by default the automatic repair feature is disabled and there are users they don’t want to repair the data which is Out-Of-Sync automatically. They review the Out-Of-Sync of sync data and then, run the Repair job manually.
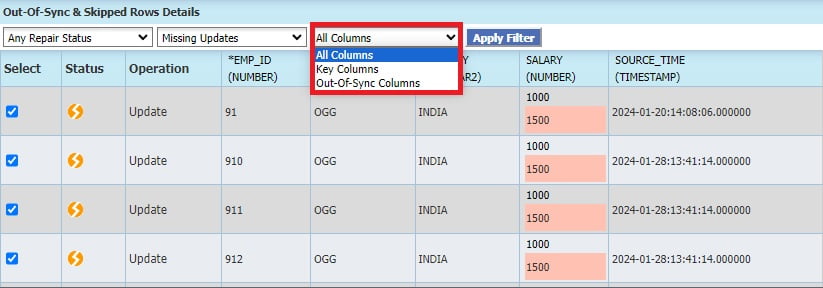
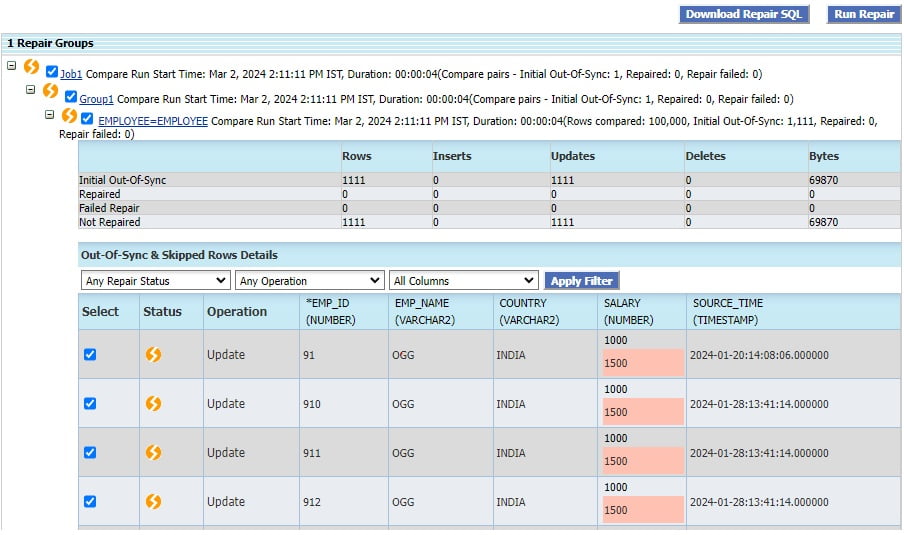
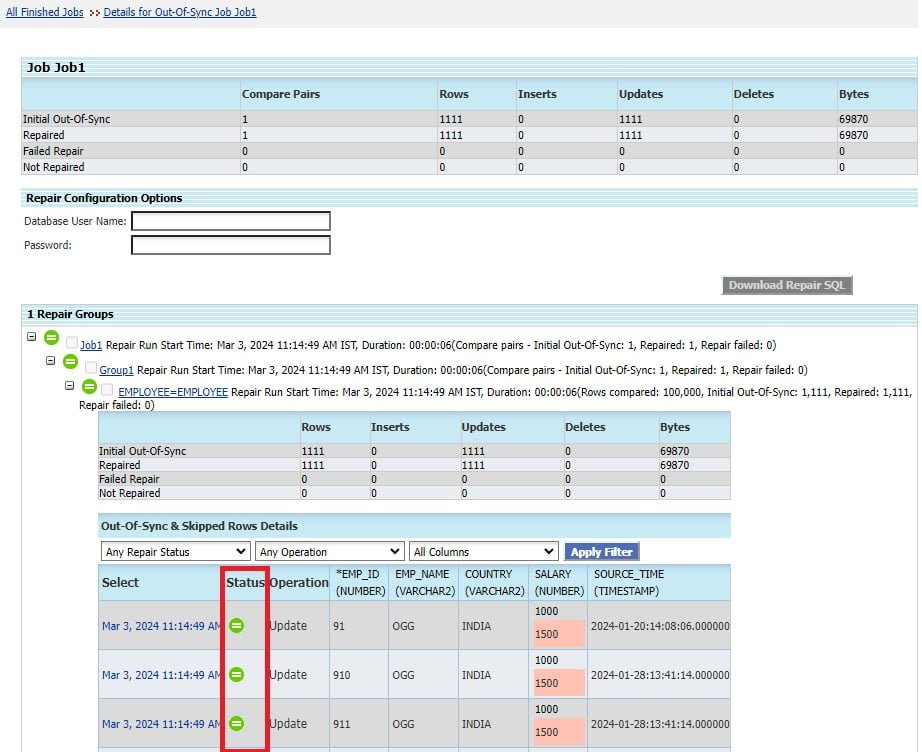
Once the comparison is done, Oracle GoldenGate Veridata will display the Out-Of-Sync data in detail as below,
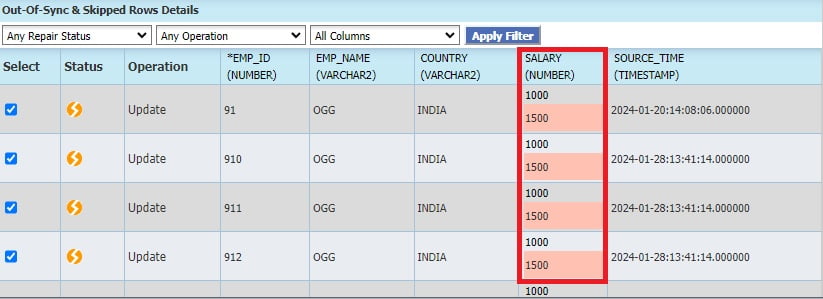
This allows users to easily identify rows that are Out-Of-Sync in various tables, providing insight into the exact column values that do not match. This functionality enables users to review discrepancies and make informed decisions about repairs.
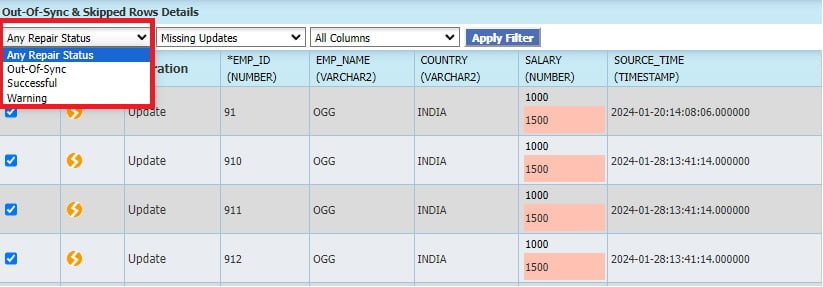
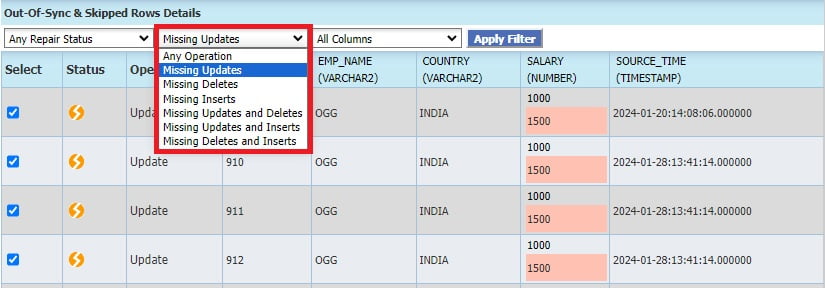
There are also varios filters available
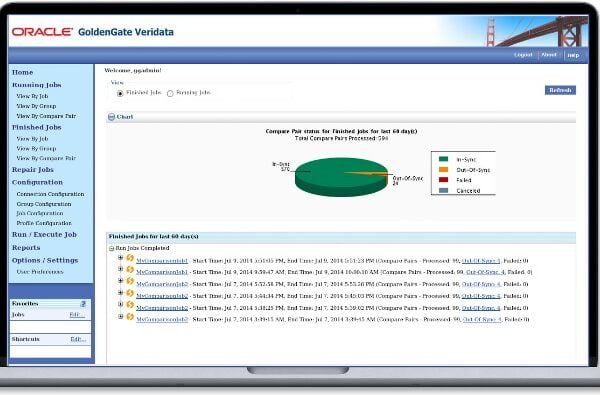
Click on the “Finished Jobs”
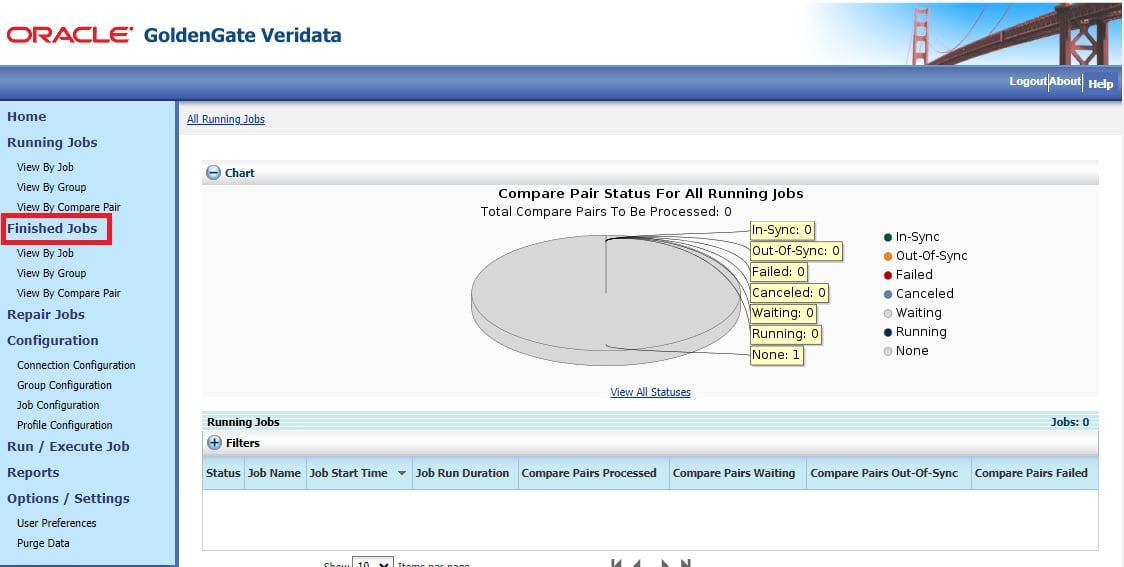
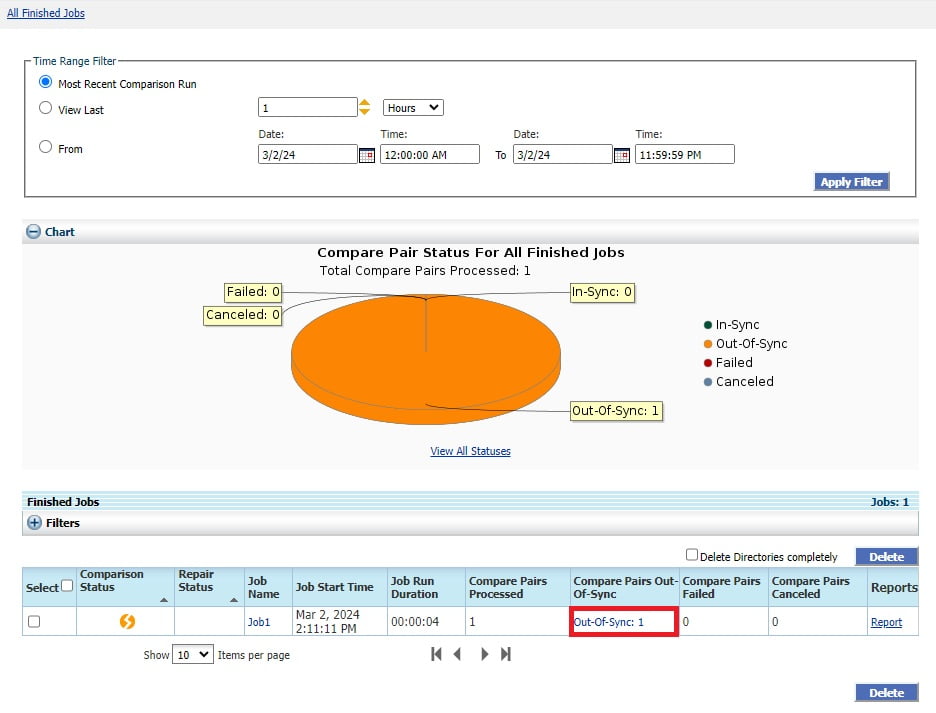
You can now see the finished job status. Click on the “Out-Of-Sync” hyperlink under “Compare Pairs Out-Of-Sync”.
Expand the compare pair “Employee=Employee” by clicking the + sign.
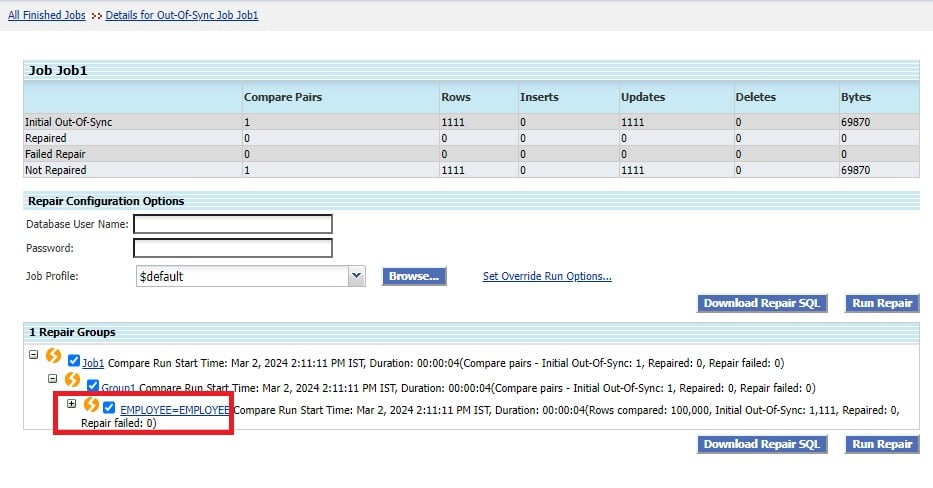
A detailed report of Out-Of-Sync data is displayed in the UI.
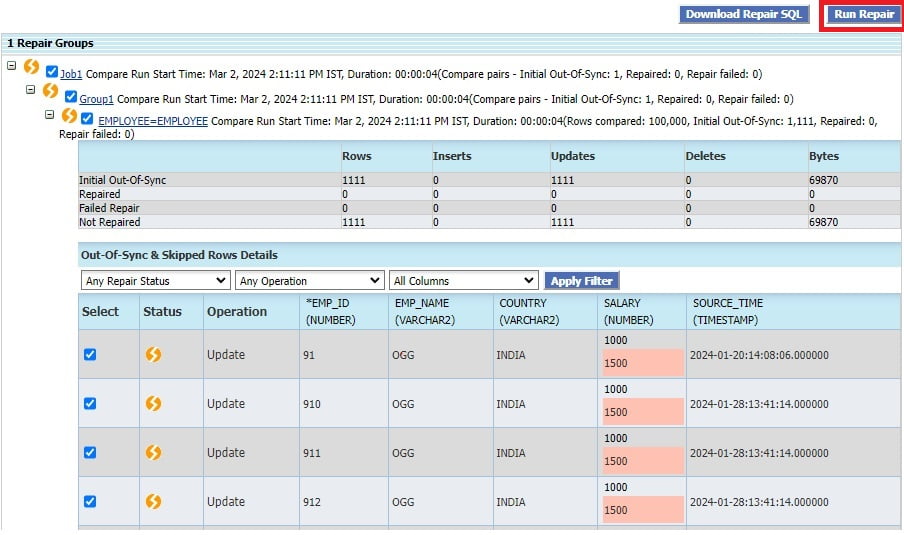
On the top right side, you will also see a “Run Repair” button.
Once after reviewing the Out-Of-Sync data, you can click on the “Run Repair” button and start the repair job to fix the data discrepancies.
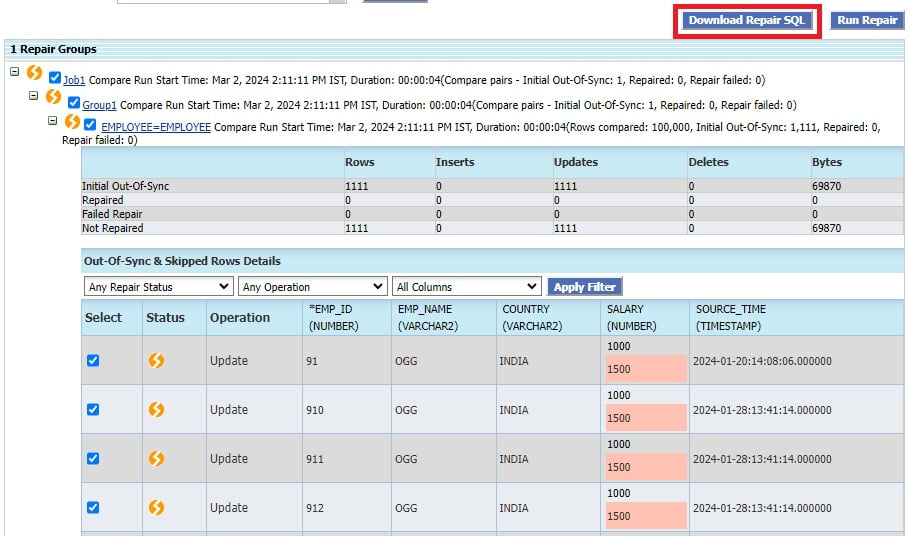
3. Download Repair SQL
In the same screen, you will see another button “Download Repair SQL”. As a DBA, we only manage the data and not own the data. The application team is the real owners of the data. Download Repair SQL provides the users with the option to download the Repair SQL script and review it by themselves or can share it to the Application team for review. Once after the confirmation, the script can be run in the Target database to fix the Out-Of-Sync issue.
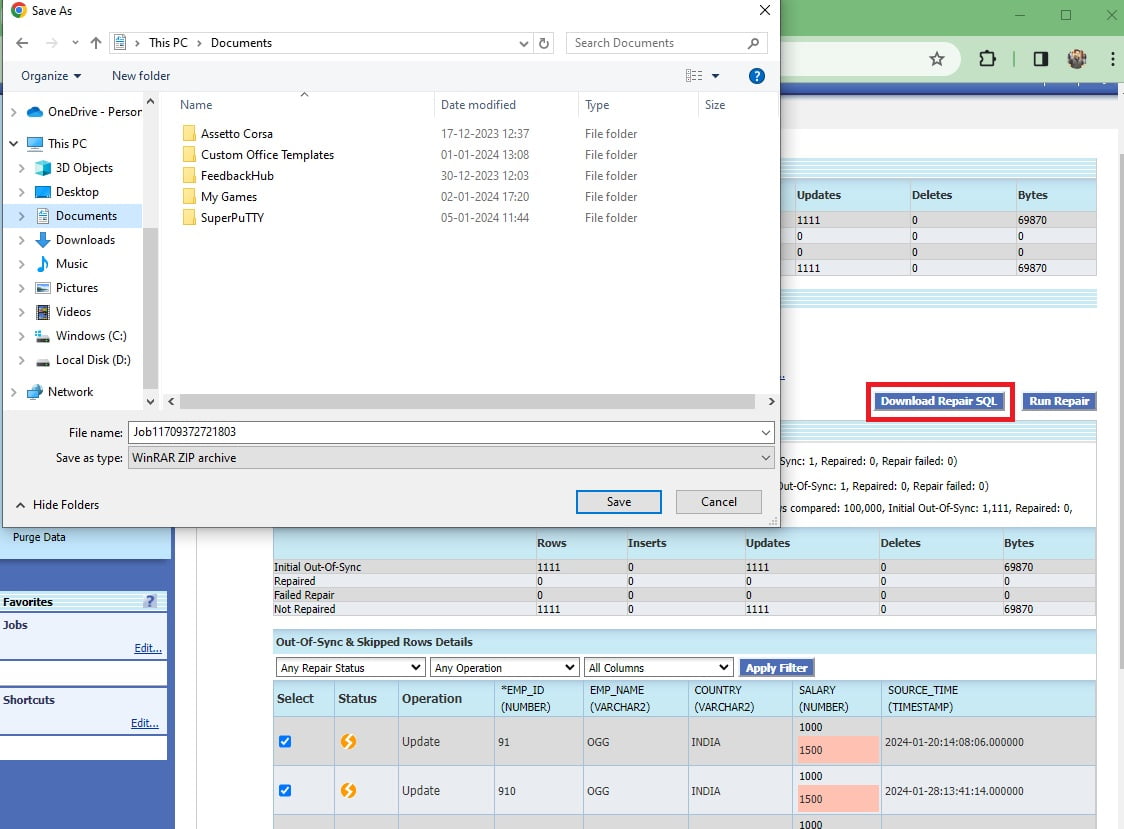
Once you click the “Download Repair SQL” button, a window opens requesting for the location to save the SQL file.
You can open the file and this is how it looks like.
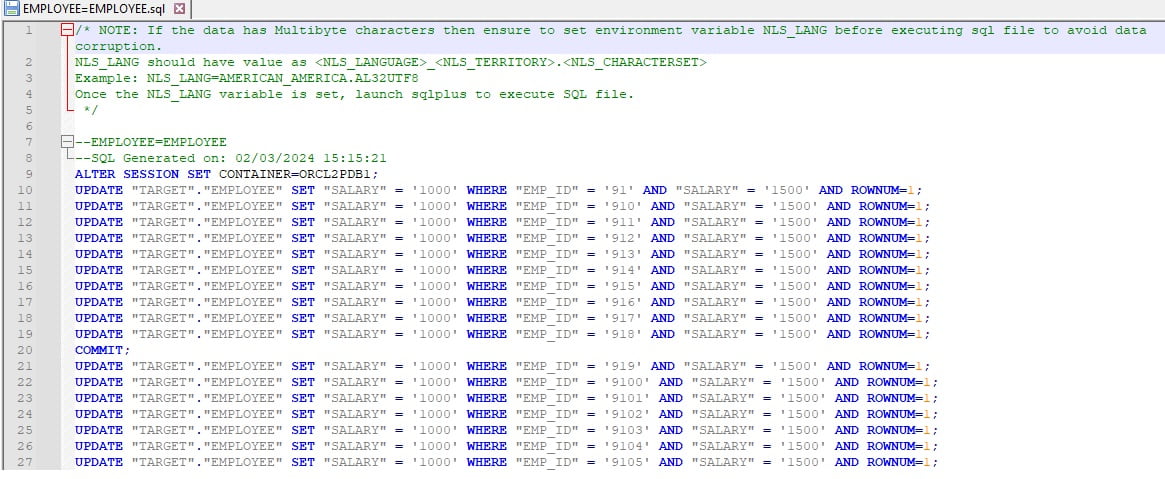
So, these are the 3 options available in Oracle GoldenGate Veridata to repair the Out-Of-Sync data.
Repair Out-Of-Sync data – Manual Method
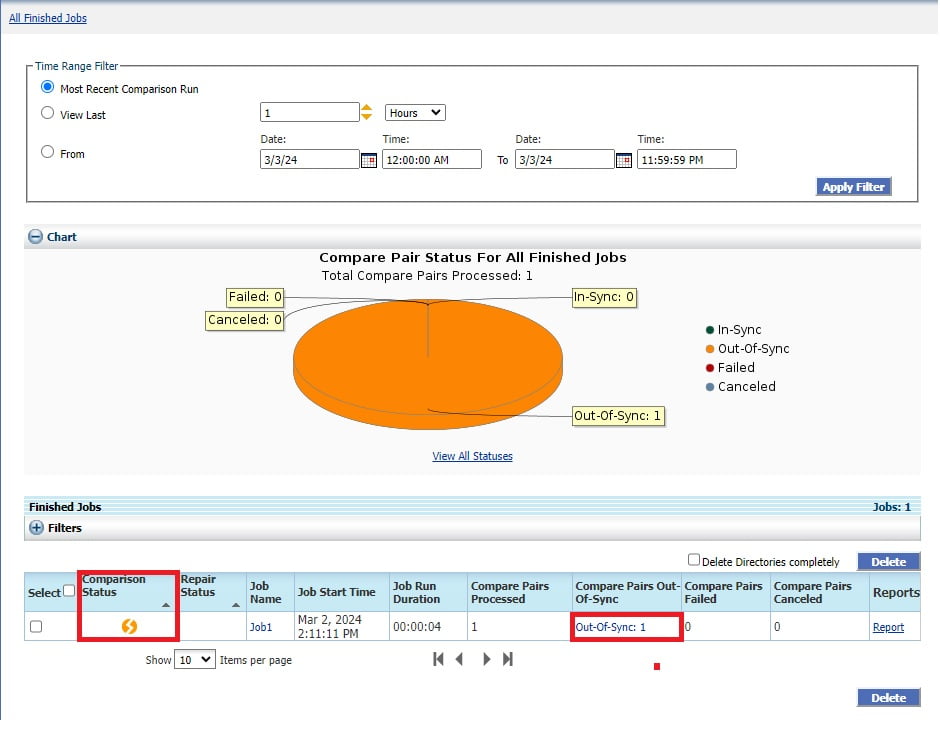
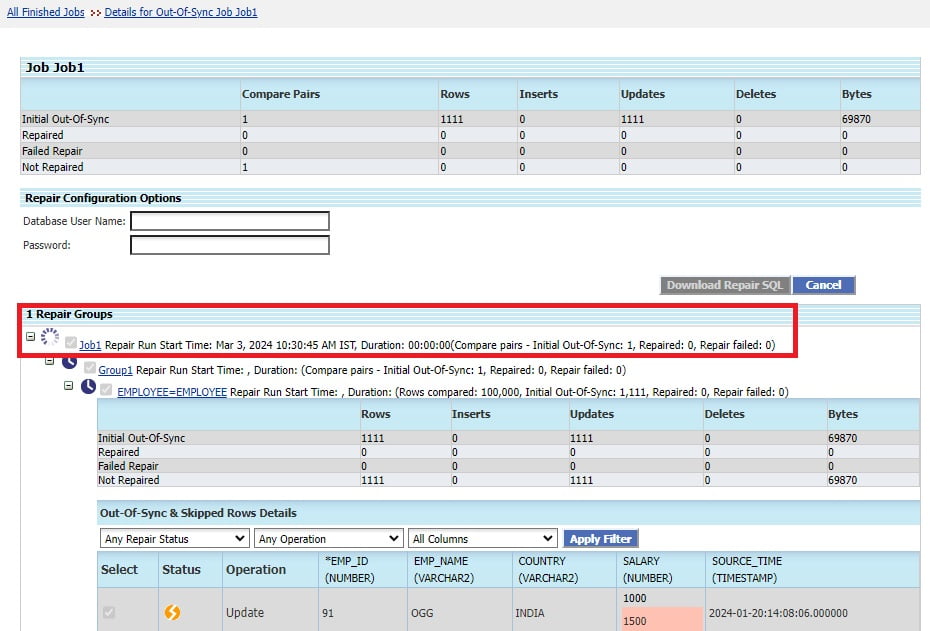
Let’s jump into the scenario now. Considering, we have already run a job and Oracle GoldenGate Veridata reported 1111 rows Out-Of-Sync. The “Comparison Status” column will show a broken icon which tells the data is Out-Of-Sync. Click on the “Out-Of-Sync” hyperlink.
We could see from the below “Details for Finished Compare Pair EMPLOYEE=EMPLOYEE” page and we have not opted for “Run Repair Automatically after Compare”. So, we need to manually repair the data.
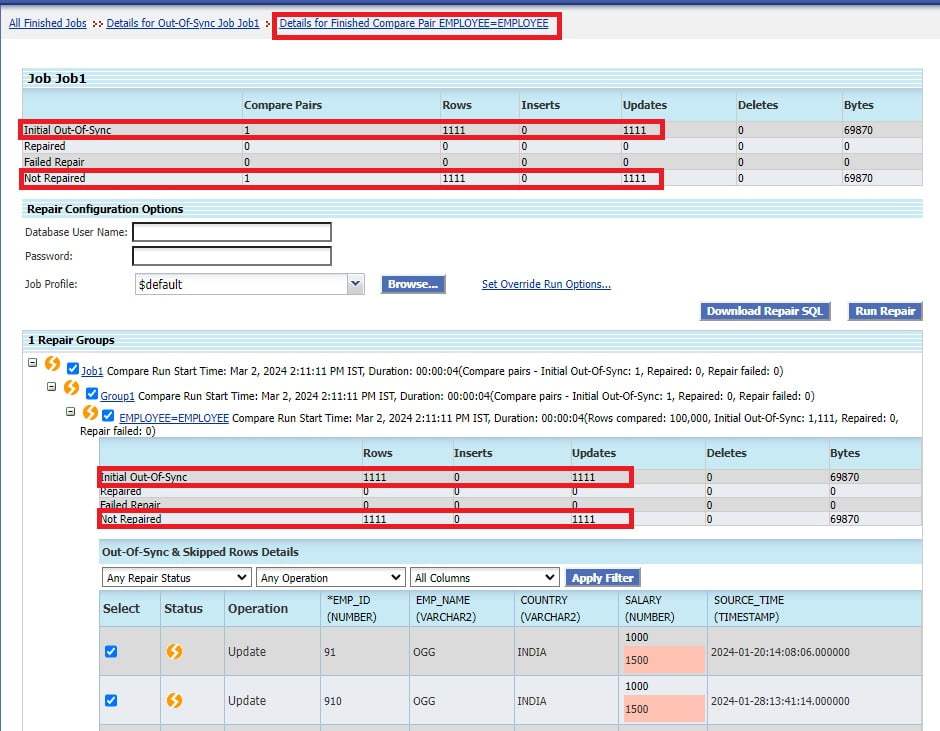
Click on the “Run Repair” button to execute the Run Job.
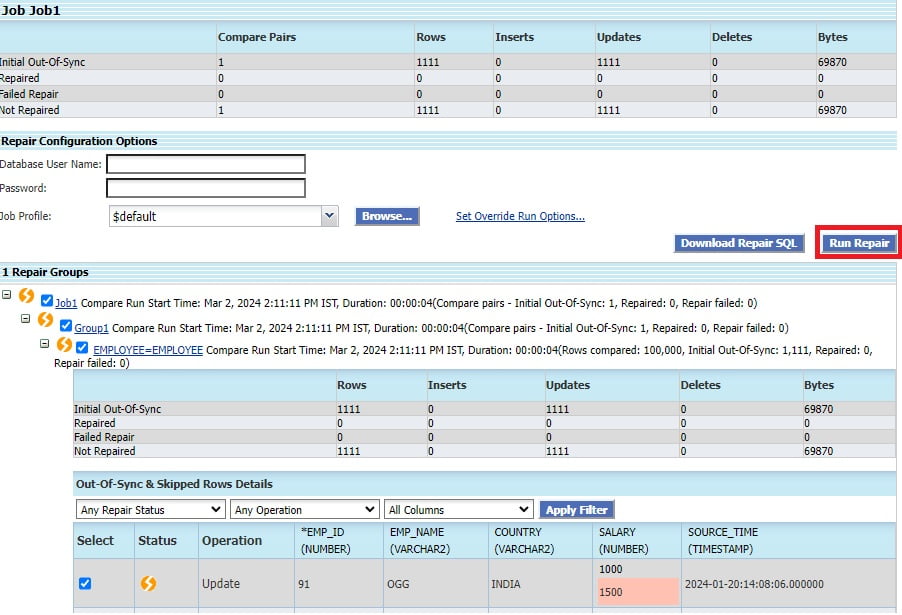
The Repair Job has started now.
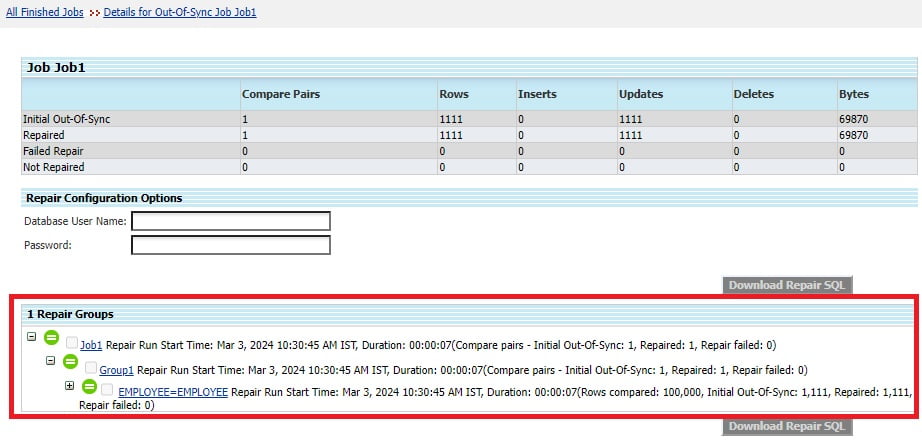
Once the repair is done. The icon will be changed to Equal sign (=) which says, the data is In-Sync.
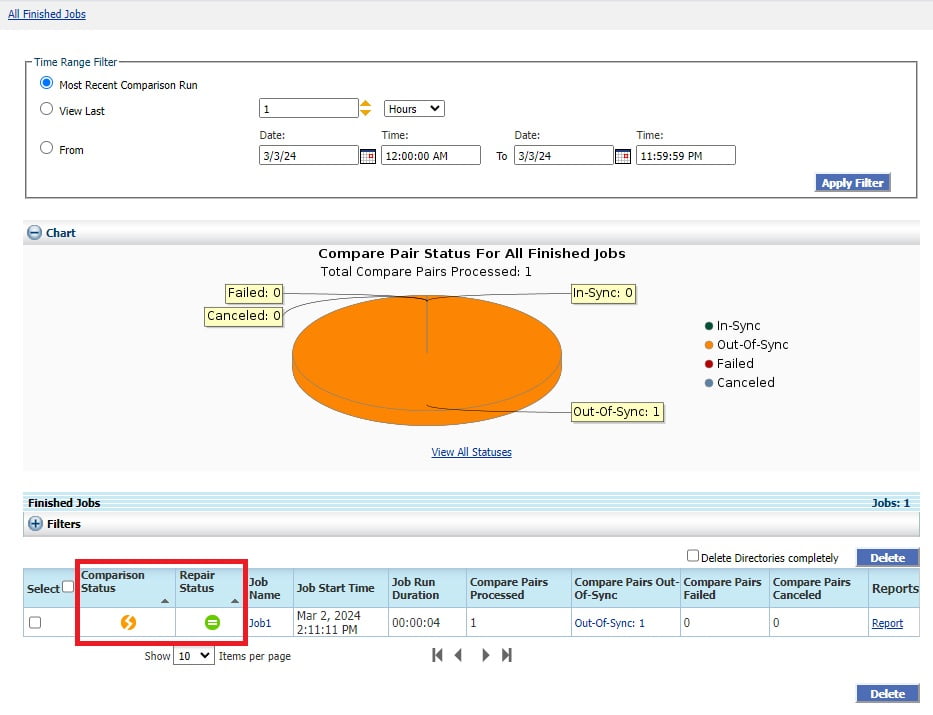
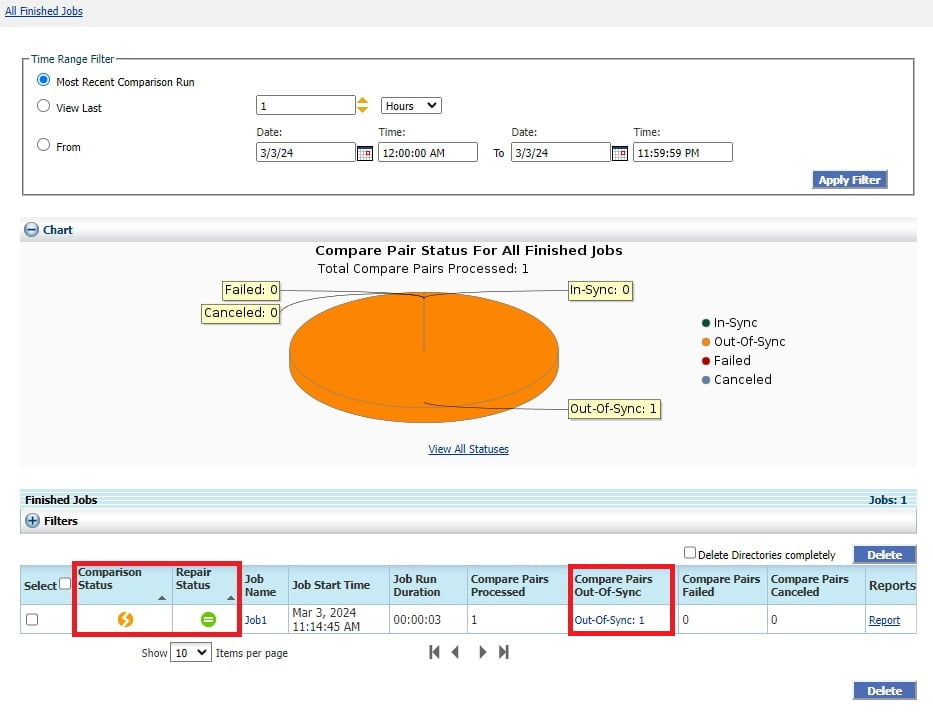
Click on the “Finished Jobs” in the left panel and you can see the “Comparison Status” with broken icon and “Repair Status” as Equal sign icon. It means, initially the comparison job has completed with Out-Of-Sync data and we ran the Repair which fixed the data.
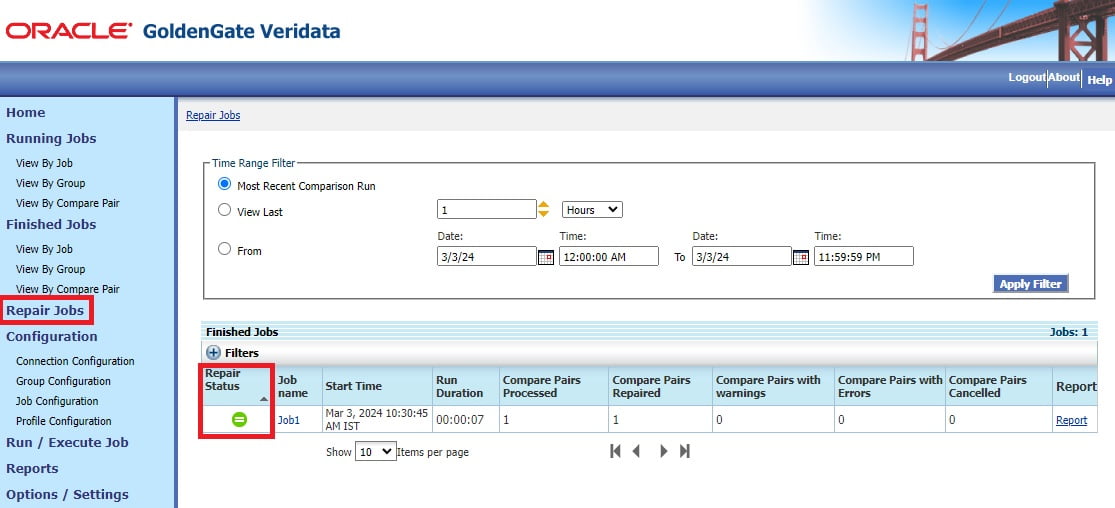
Also, you can see the status of the Repair Job in the “Repair Jobs”.
Repair Out-Of-Sync data – Automatic Method
What if we enabled “Run Repair Automatically after Compare” when we run the job? Let’s see how it works.
Click on the “Run / Execute Job”. Enable the “Run Repair Automatically after Compare” and click on the “Run Job” to start the comparison job.

The job started running. You can see the progress.
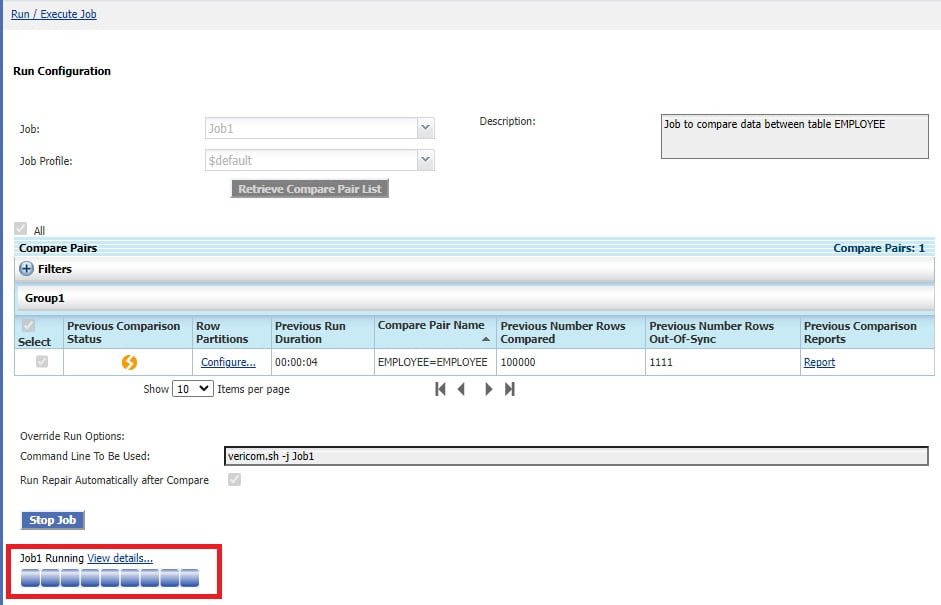
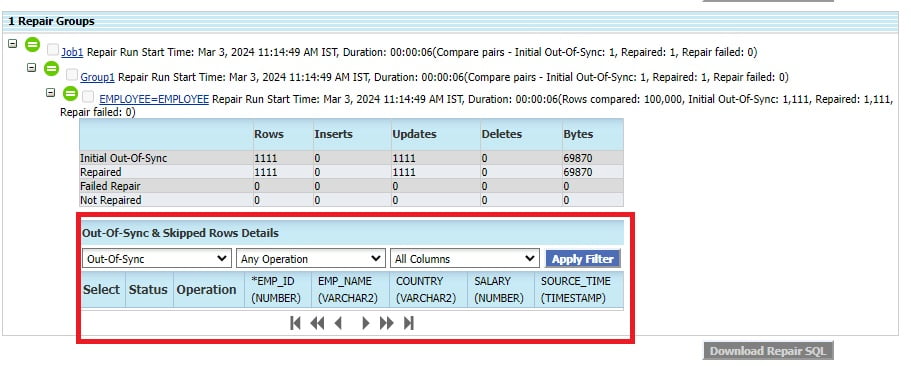
Wait for the job to complete. The comparison job has completed and identified 1111 rows are Out-Of-Sync. It didn’t wait for any inputs from the user and immediately after the completion of comparison job, the repair job started and repaired the data.
Click on the “Out-Of-Sync” hyperlink.
Repair status in “Equal Sign(=)”.
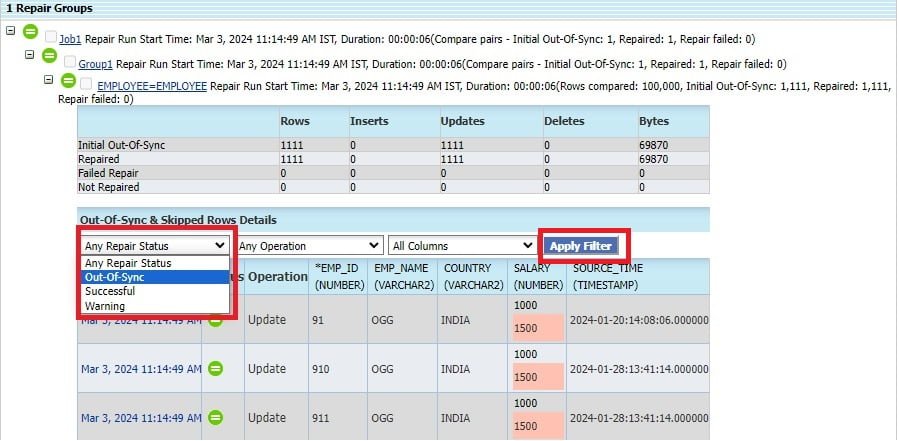
You can also use the filter to see if there are any more Out-Of-Sync records or if any records are not repaired (failed to repair). Select the “Out-Of-Sync” filter and click on “Apply Filter” button.
Hope this article provided you with lot of information about Oracle GoldenGate Veridata and it’s Automatic Repair Feature.
I will cover additional features of Oracle GoldenGate Veridata in forthcoming articles.
Cheers :-)


 Total Users : 1899106