In this article, I will be explaining on the steps to install Oracle GoldenGate 19c on Oracle RDBMS 19c.
Download the binaries in either of the below sites,
or
Below are the steps to download the OGG binaries from edelivery.oracle.com,
Once you get in to edelivery.oracle.com, type in the search bar “Oracle GoldenGate”,
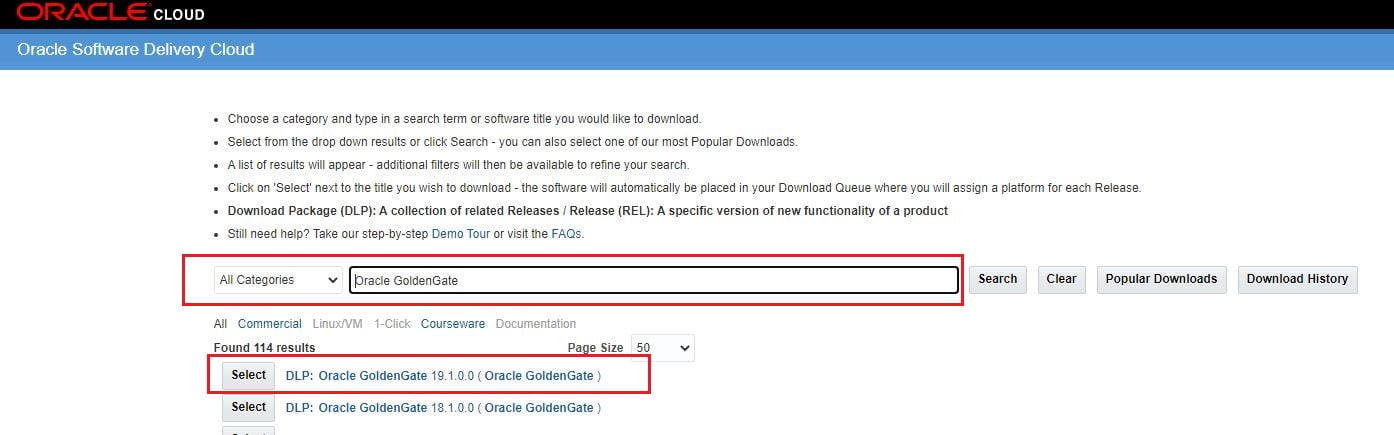
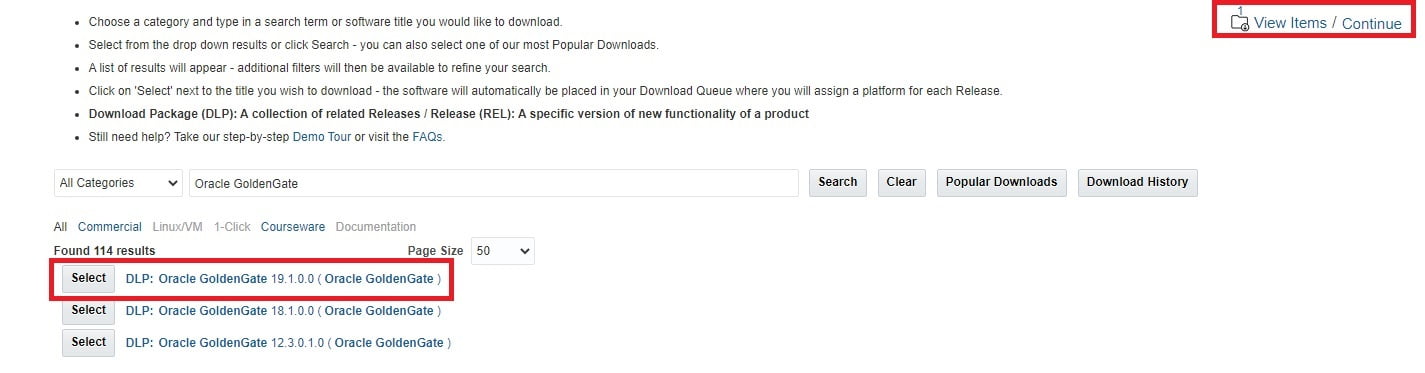
You will see list of binaries as below,
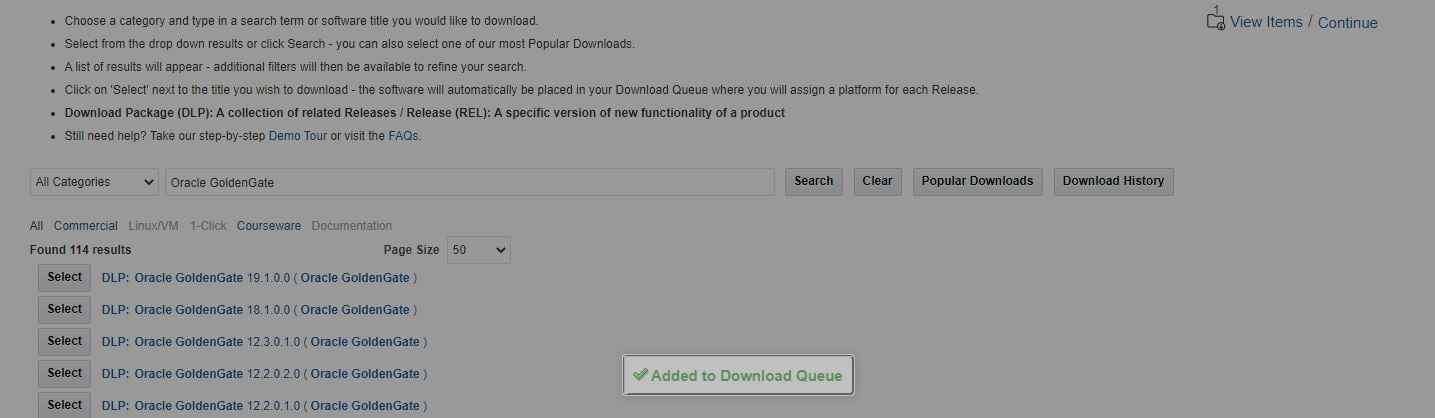
Once you click on the binaries you need, you will see on the top right corner “View Items” as 1.
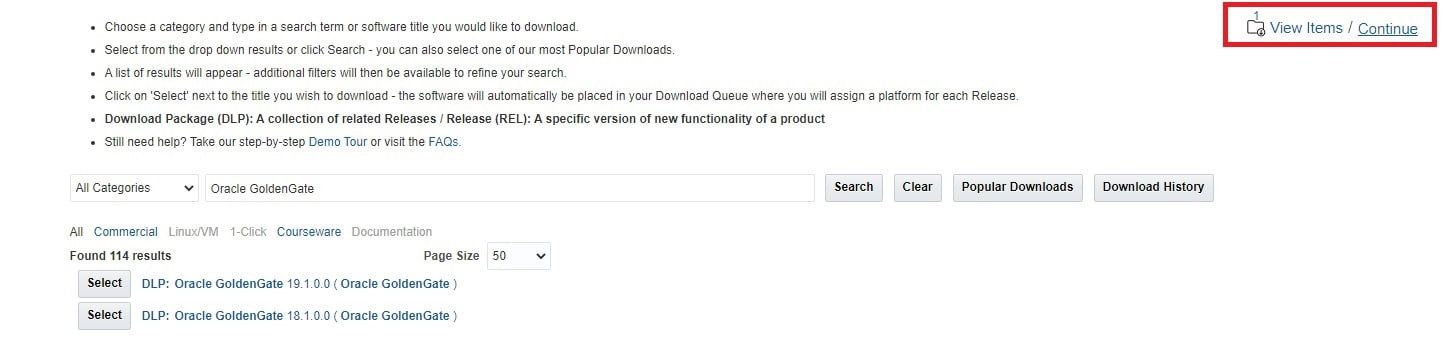
Click on the continue button,
Select the platform for which you need the OGG binary to be downloaded,

Click on the continue,

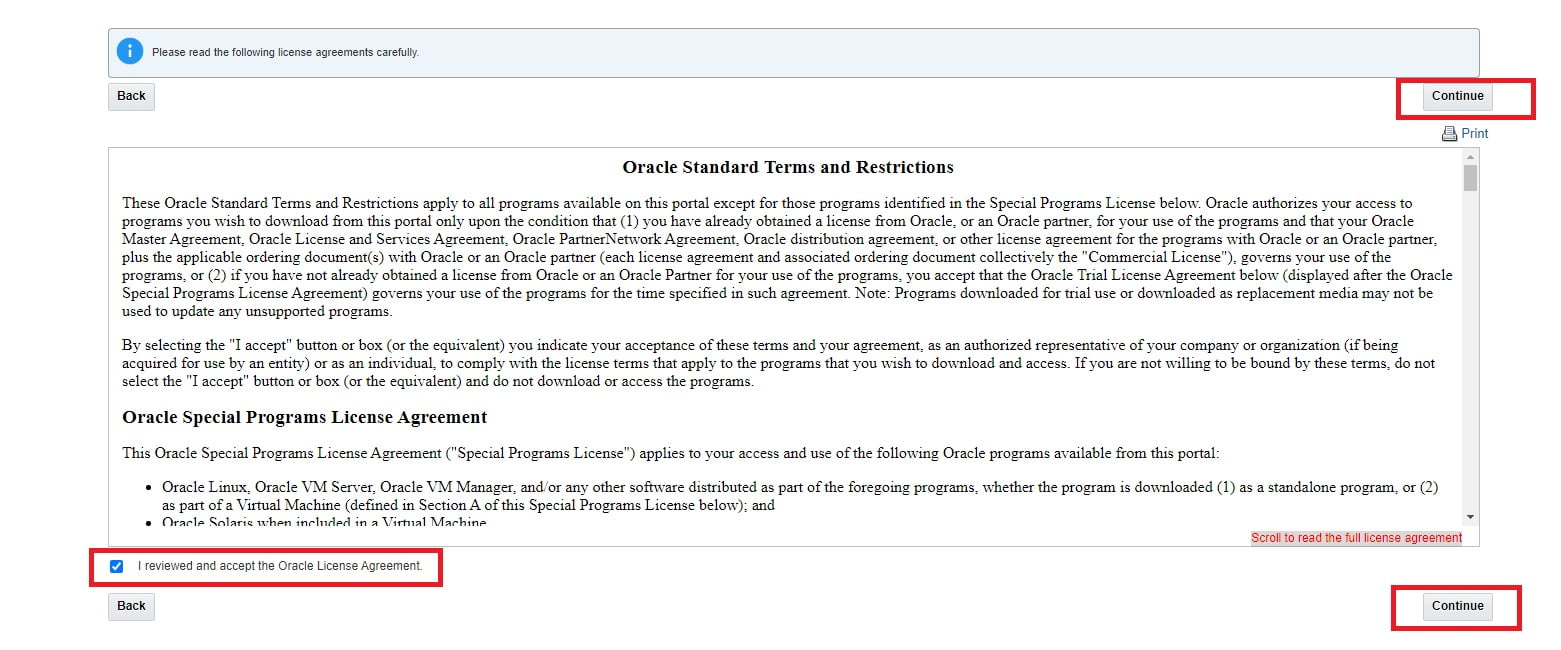
Accept the License Agreement,
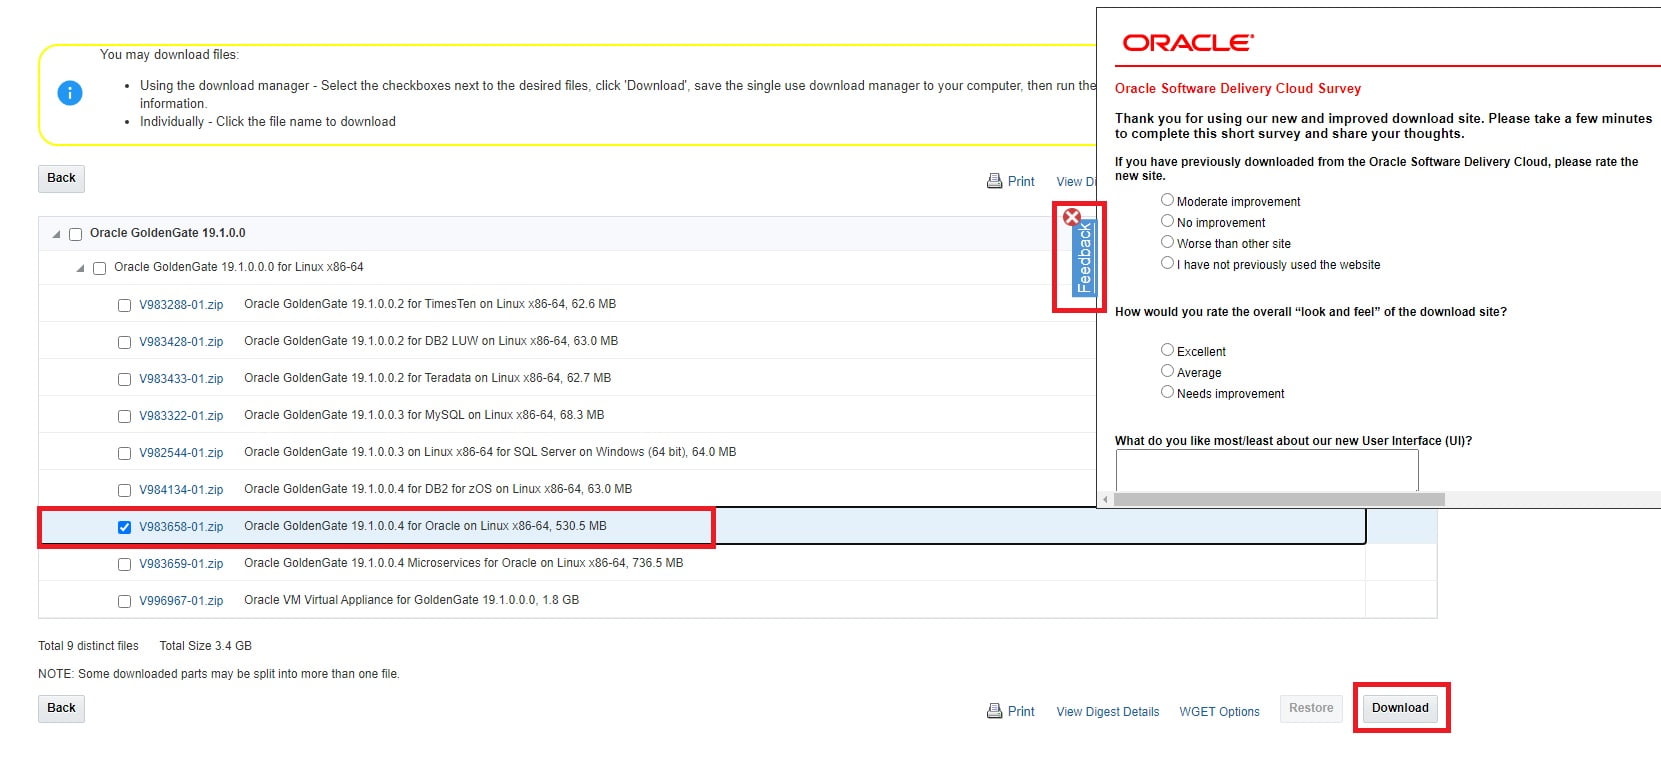
Close the feedback and select appropriate software for the appropriate database. Either it is for Oracle or MySql or DB2 etc., Here we are going to install it for Oracle and so, select Oracle Database and click on the Download.
The Software will be downloaded. Please move it to the server where you are going to install the Oracle GoldenGate. I have moved the binary as below,

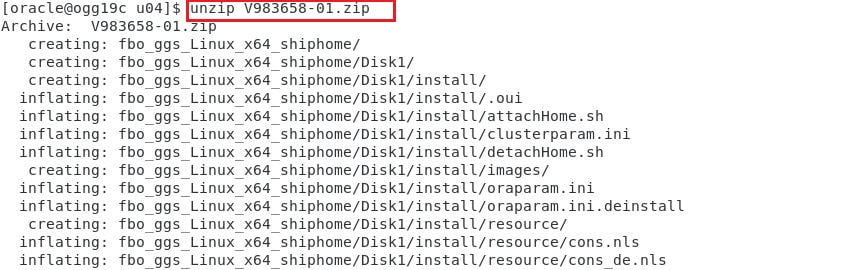
Unzip the binary as below,
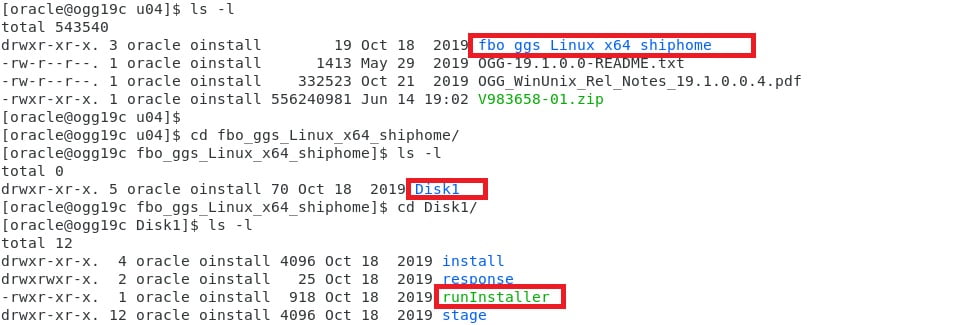
You will be seeing a folder called fbo_ggs_Linux_x64_shiphome as below,

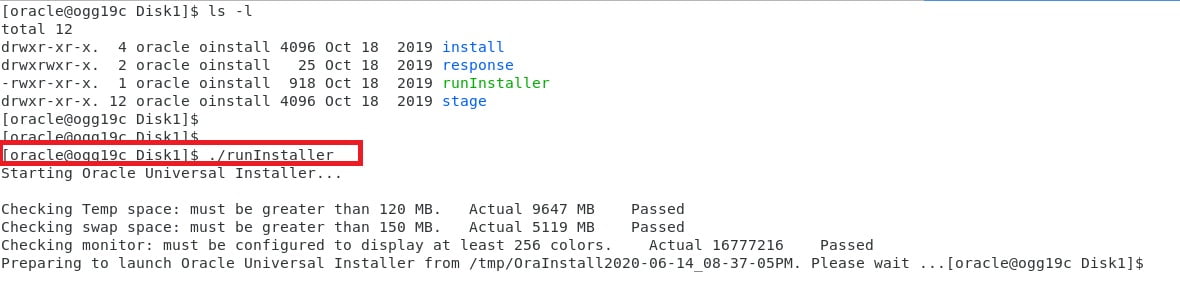
Navigate through that directory and finally you will the runInstaller,
Run the runIntaller to start the Oracle GoldenGate binary installation.
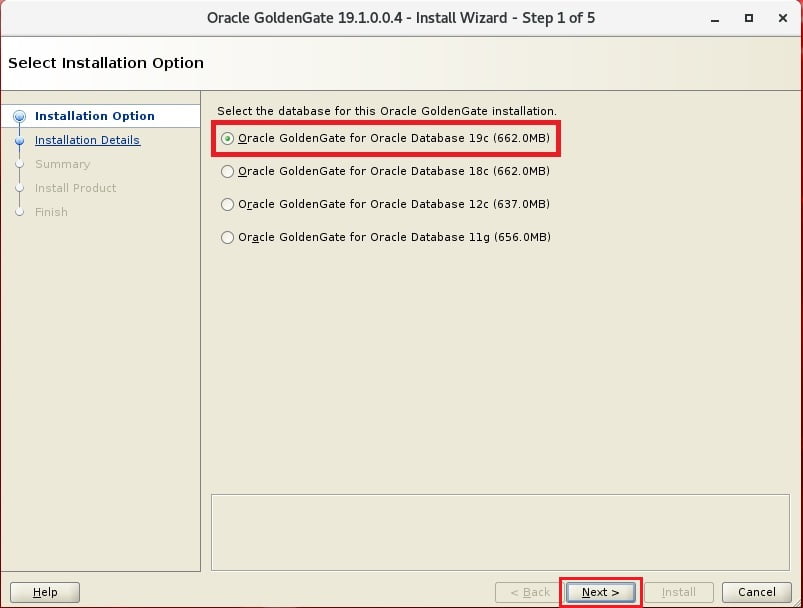
Select appropriate version of the Database for which you are going to install the OGG. This is a bundled one for all the database versions and we need to select the appropriate database version in here.
We are going to install Oracle GoldenGate for Oracle Database 19c and hence selected the “Oracle GoldenGate for Oracle Database 19c” option.
Click on the Next once done,
Provide the location or OGG_HOME where you need to install the OGG binaries.
There is an additional option “Start Manager”. If you check that box, the manager process will be started automatically post installation. Also, it is not required to create the directories post installation.
If you uncheck the “Start Manager” checkbox then, you need to start the manager manually post installation from the GGSCI prompt. Also, the directories should be created manually using the command
CREATE SUBDIRS
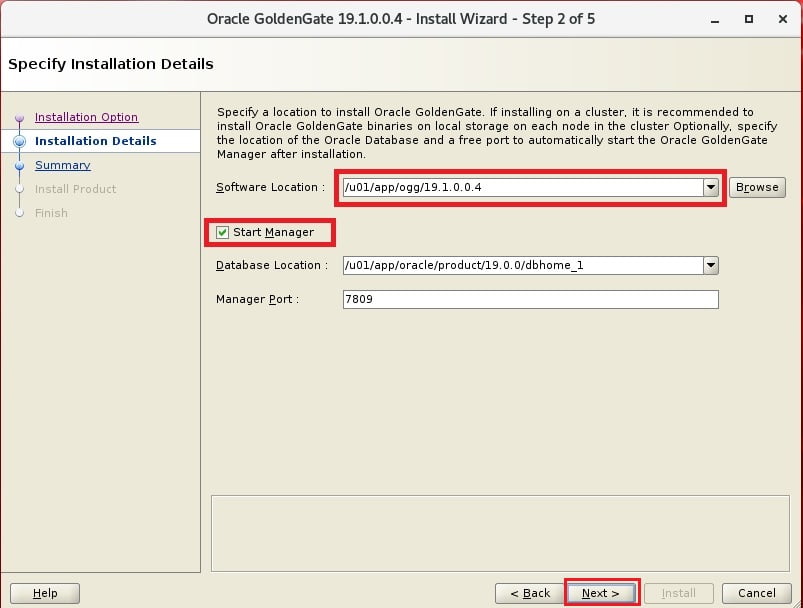
Click on the Next
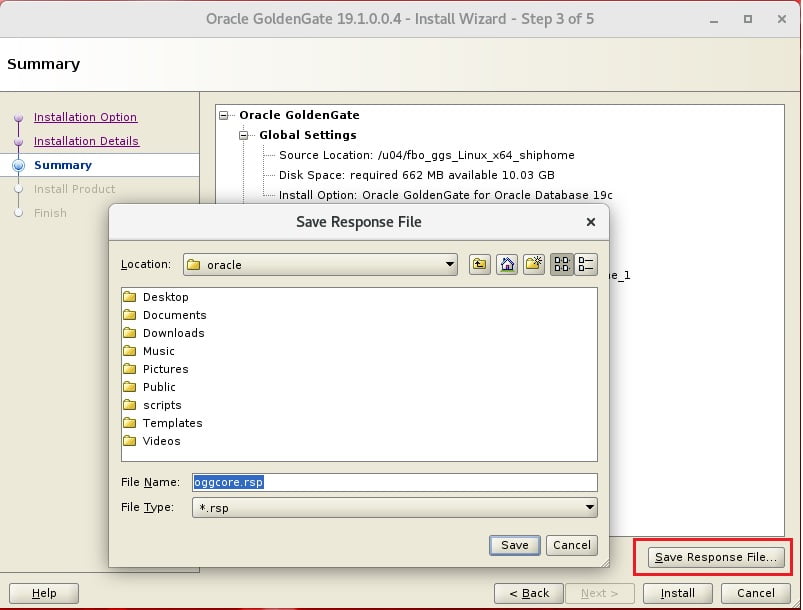
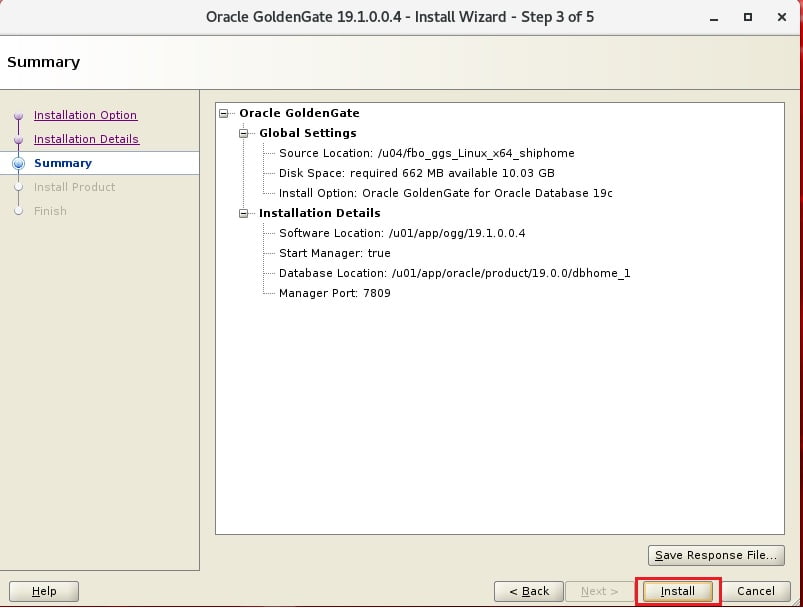
Review the Summary Page. If you want to save the response file for future use, click on the “Save Response Flie…”. Save the file and then click on Install.
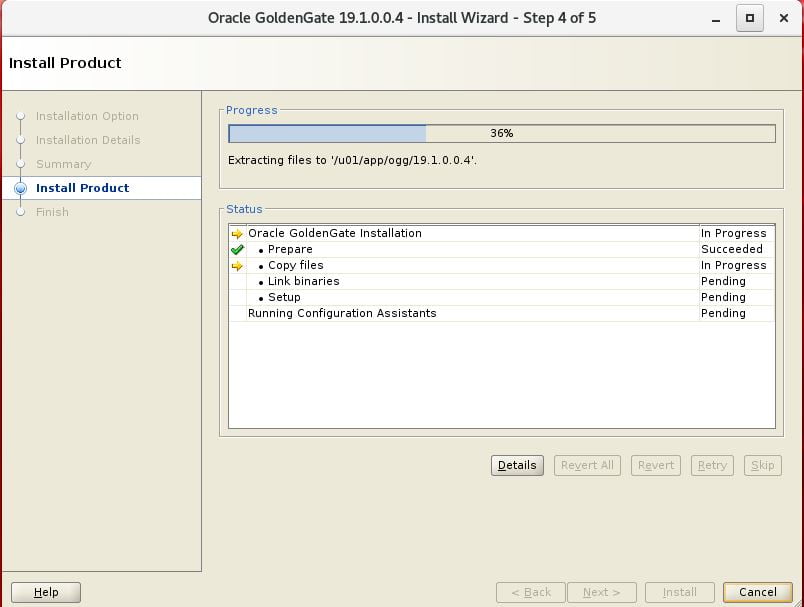
You could see the progress in the Installation.
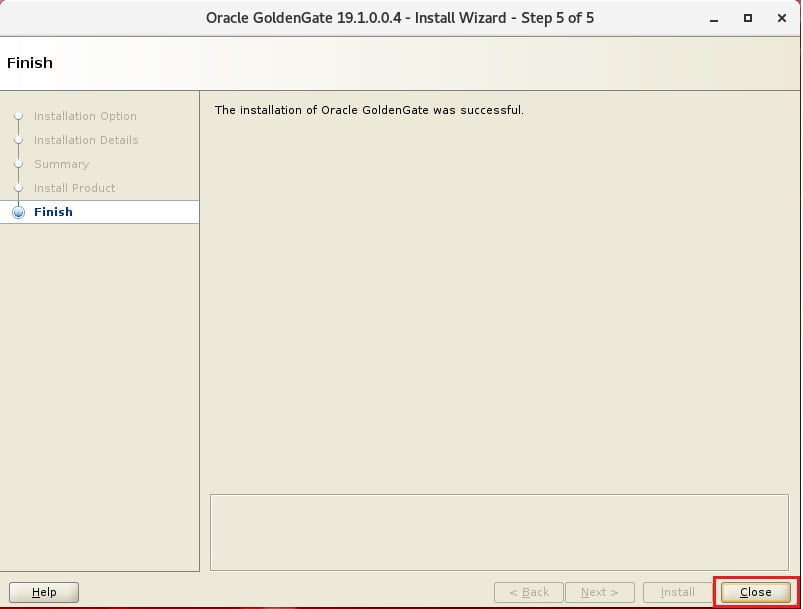
Once the installation is successfully completed, click on the “Close” button.
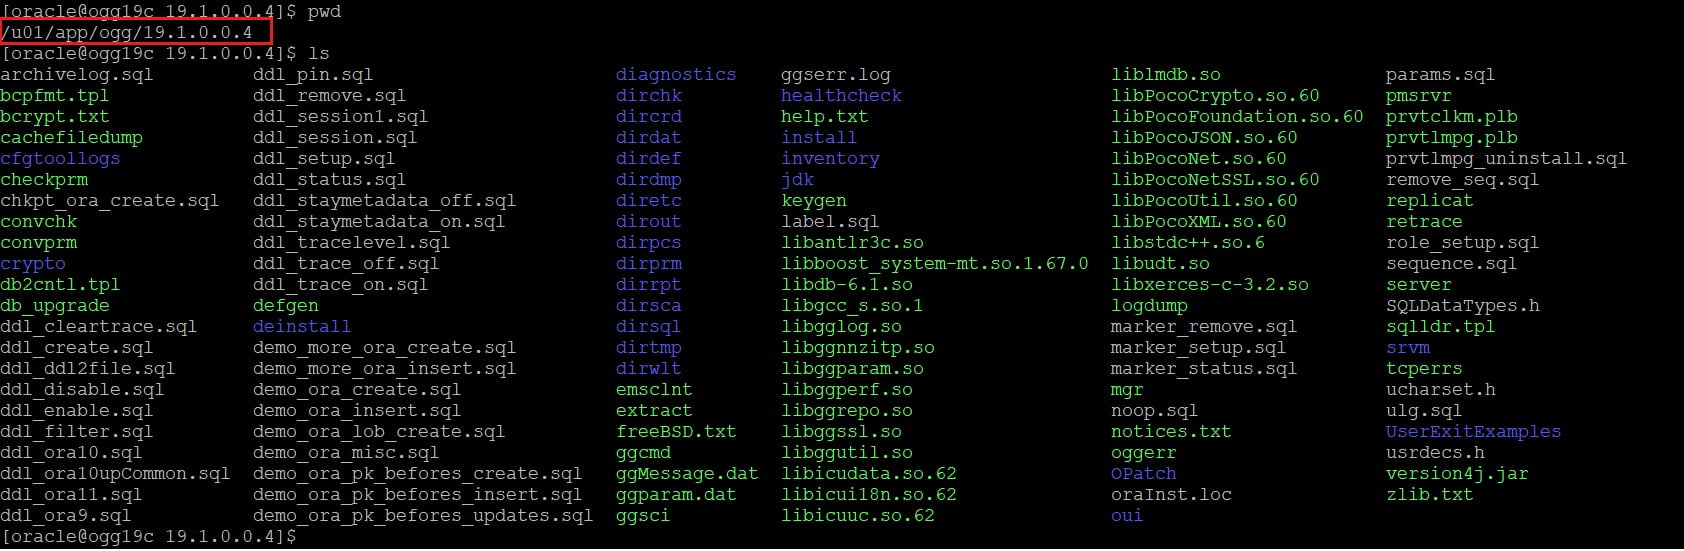
Here my OGG_HOME is /u01/app/ogg/19.1.0.0.4 Navigate to that directory and check if the installation files are present.
From the OGG_HOME, do GGSCI, and you can see the MANAGER process is in running.
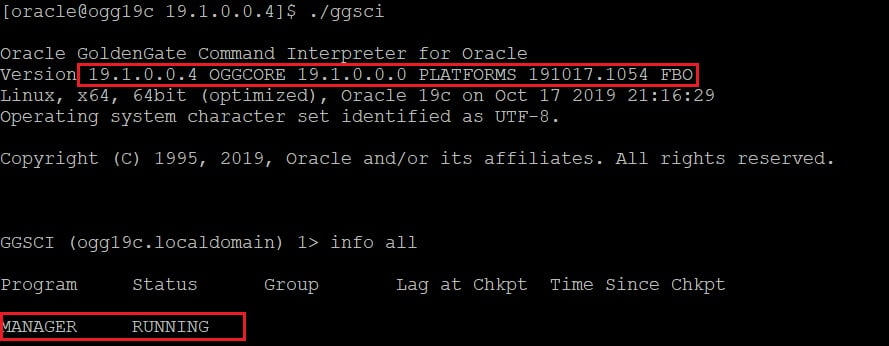
INFO MGR is the command which show the information about the Manager process. The Manager is running on the port 7809

As you remember, earlier I mentioned as below,
There is an additional option “Start Manager”. If you check that box, the manager process will be started automatically post installation. Also, it is not required to create the directories post installation.
If you uncheck the “Start Manager” checkbox then, you need to start the manager manually post installation from the GGSCI prompt. Also, the directories should be created manually using the command
CREATE SUBDIRS
Trying to check this by executing the command CREATE SUBDIRS, but all the directories are created since we enabled or checked the check box “Start Manager”.
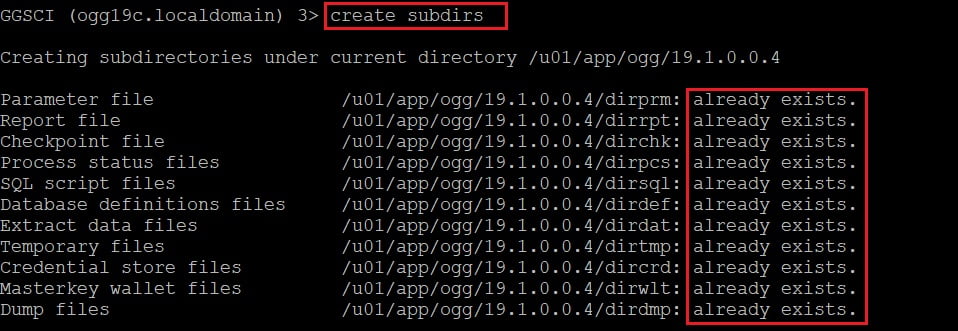
You can see it says “already exists”.
Oracle GoldenGate 19c for Oracle RDBMS 19c has been successfully installed in the server.
Cheers :-)


 Total Users : 1902663
Good one Veera, Thanks
very nice and detailed explanation of installation. thank you