
We have released the latest patch for Oracle GoldenGate Veridata 23c which is 23.4.0.0.0 with major features included in it.
To know more about the patch, please check the below link,
Oracle GoldenGate Veridata 23.4.0.0.0
In this article we are going to see about one of the features called “Fast Compare by Row Count”.
A new “Fast Compare feature by Row Count” has been introduced, enabling users to perform data comparisons based on row counts. A new comparison type option is now added to Profile>General offering two modes: Full and Row Count.
(i) To perform comparison based on row count, select the “Row Count” option.
(ii) To perform a complete data comparison, select the “Full” option.
To utilize the Fast Compare by row count in Veridata 23c:
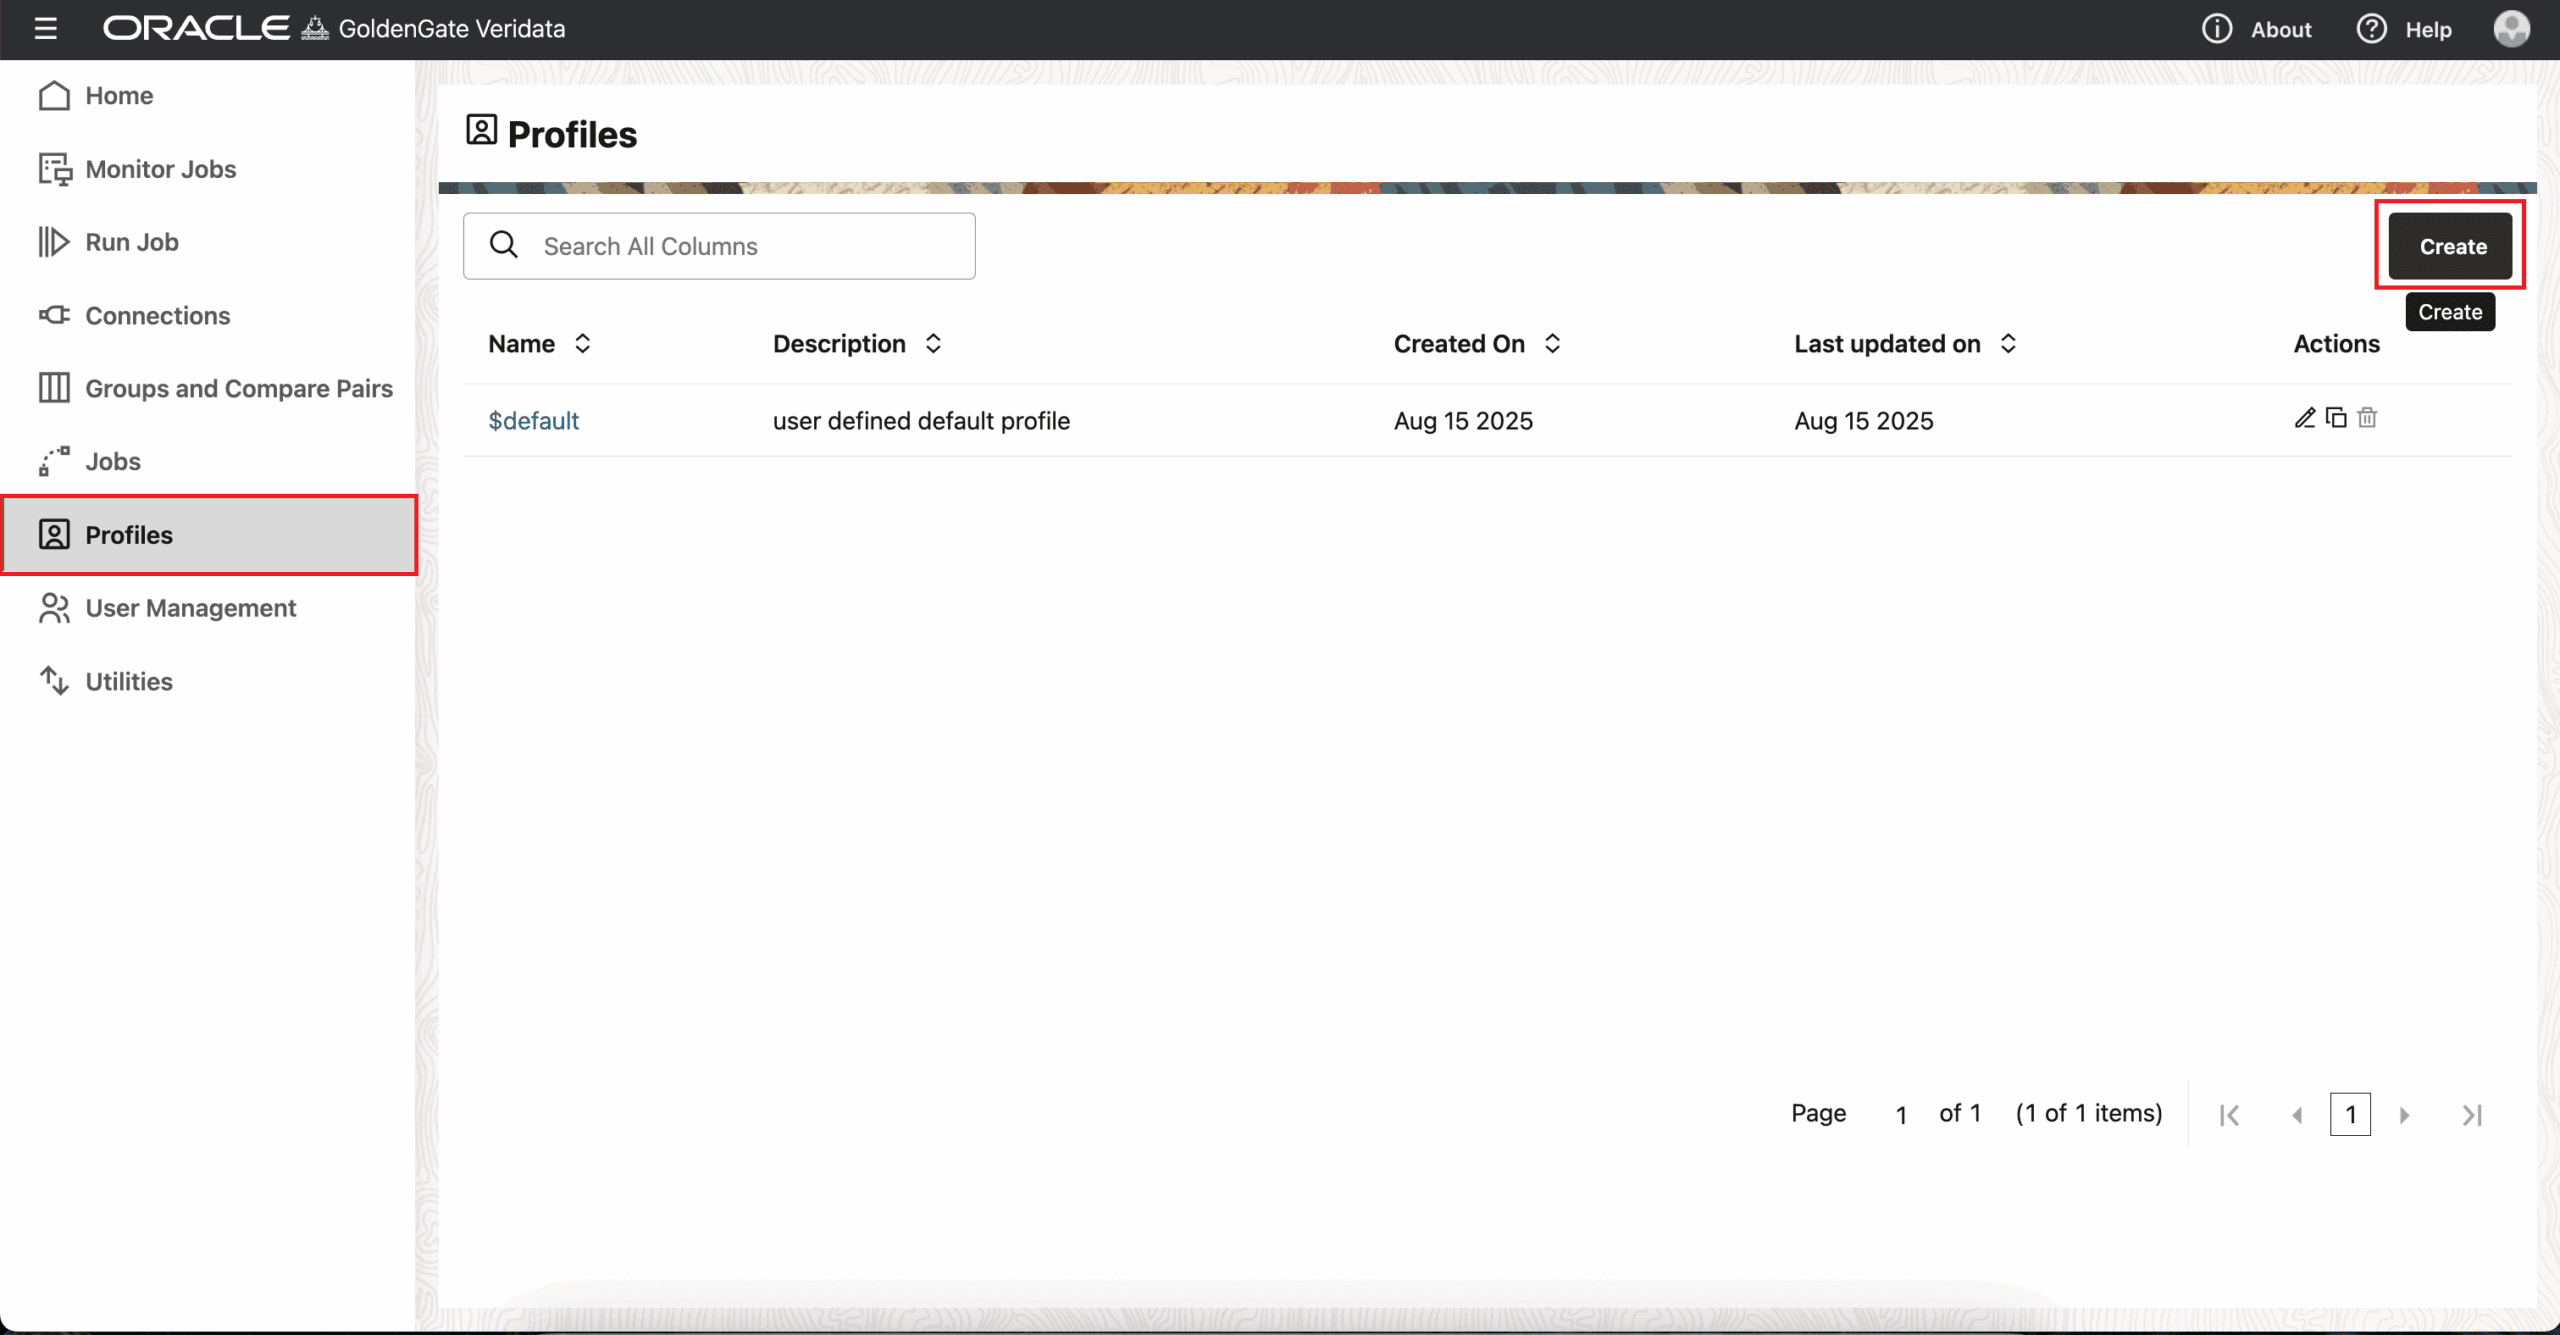
1. Navigate to Profiles: Access the “Profiles” section within the Veridata interface.
2. Select or Create a Profile: Choose an existing comparison profile or create a new one.
3. Access Profile General Settings: Within the selected profile, locate the “General” settings.
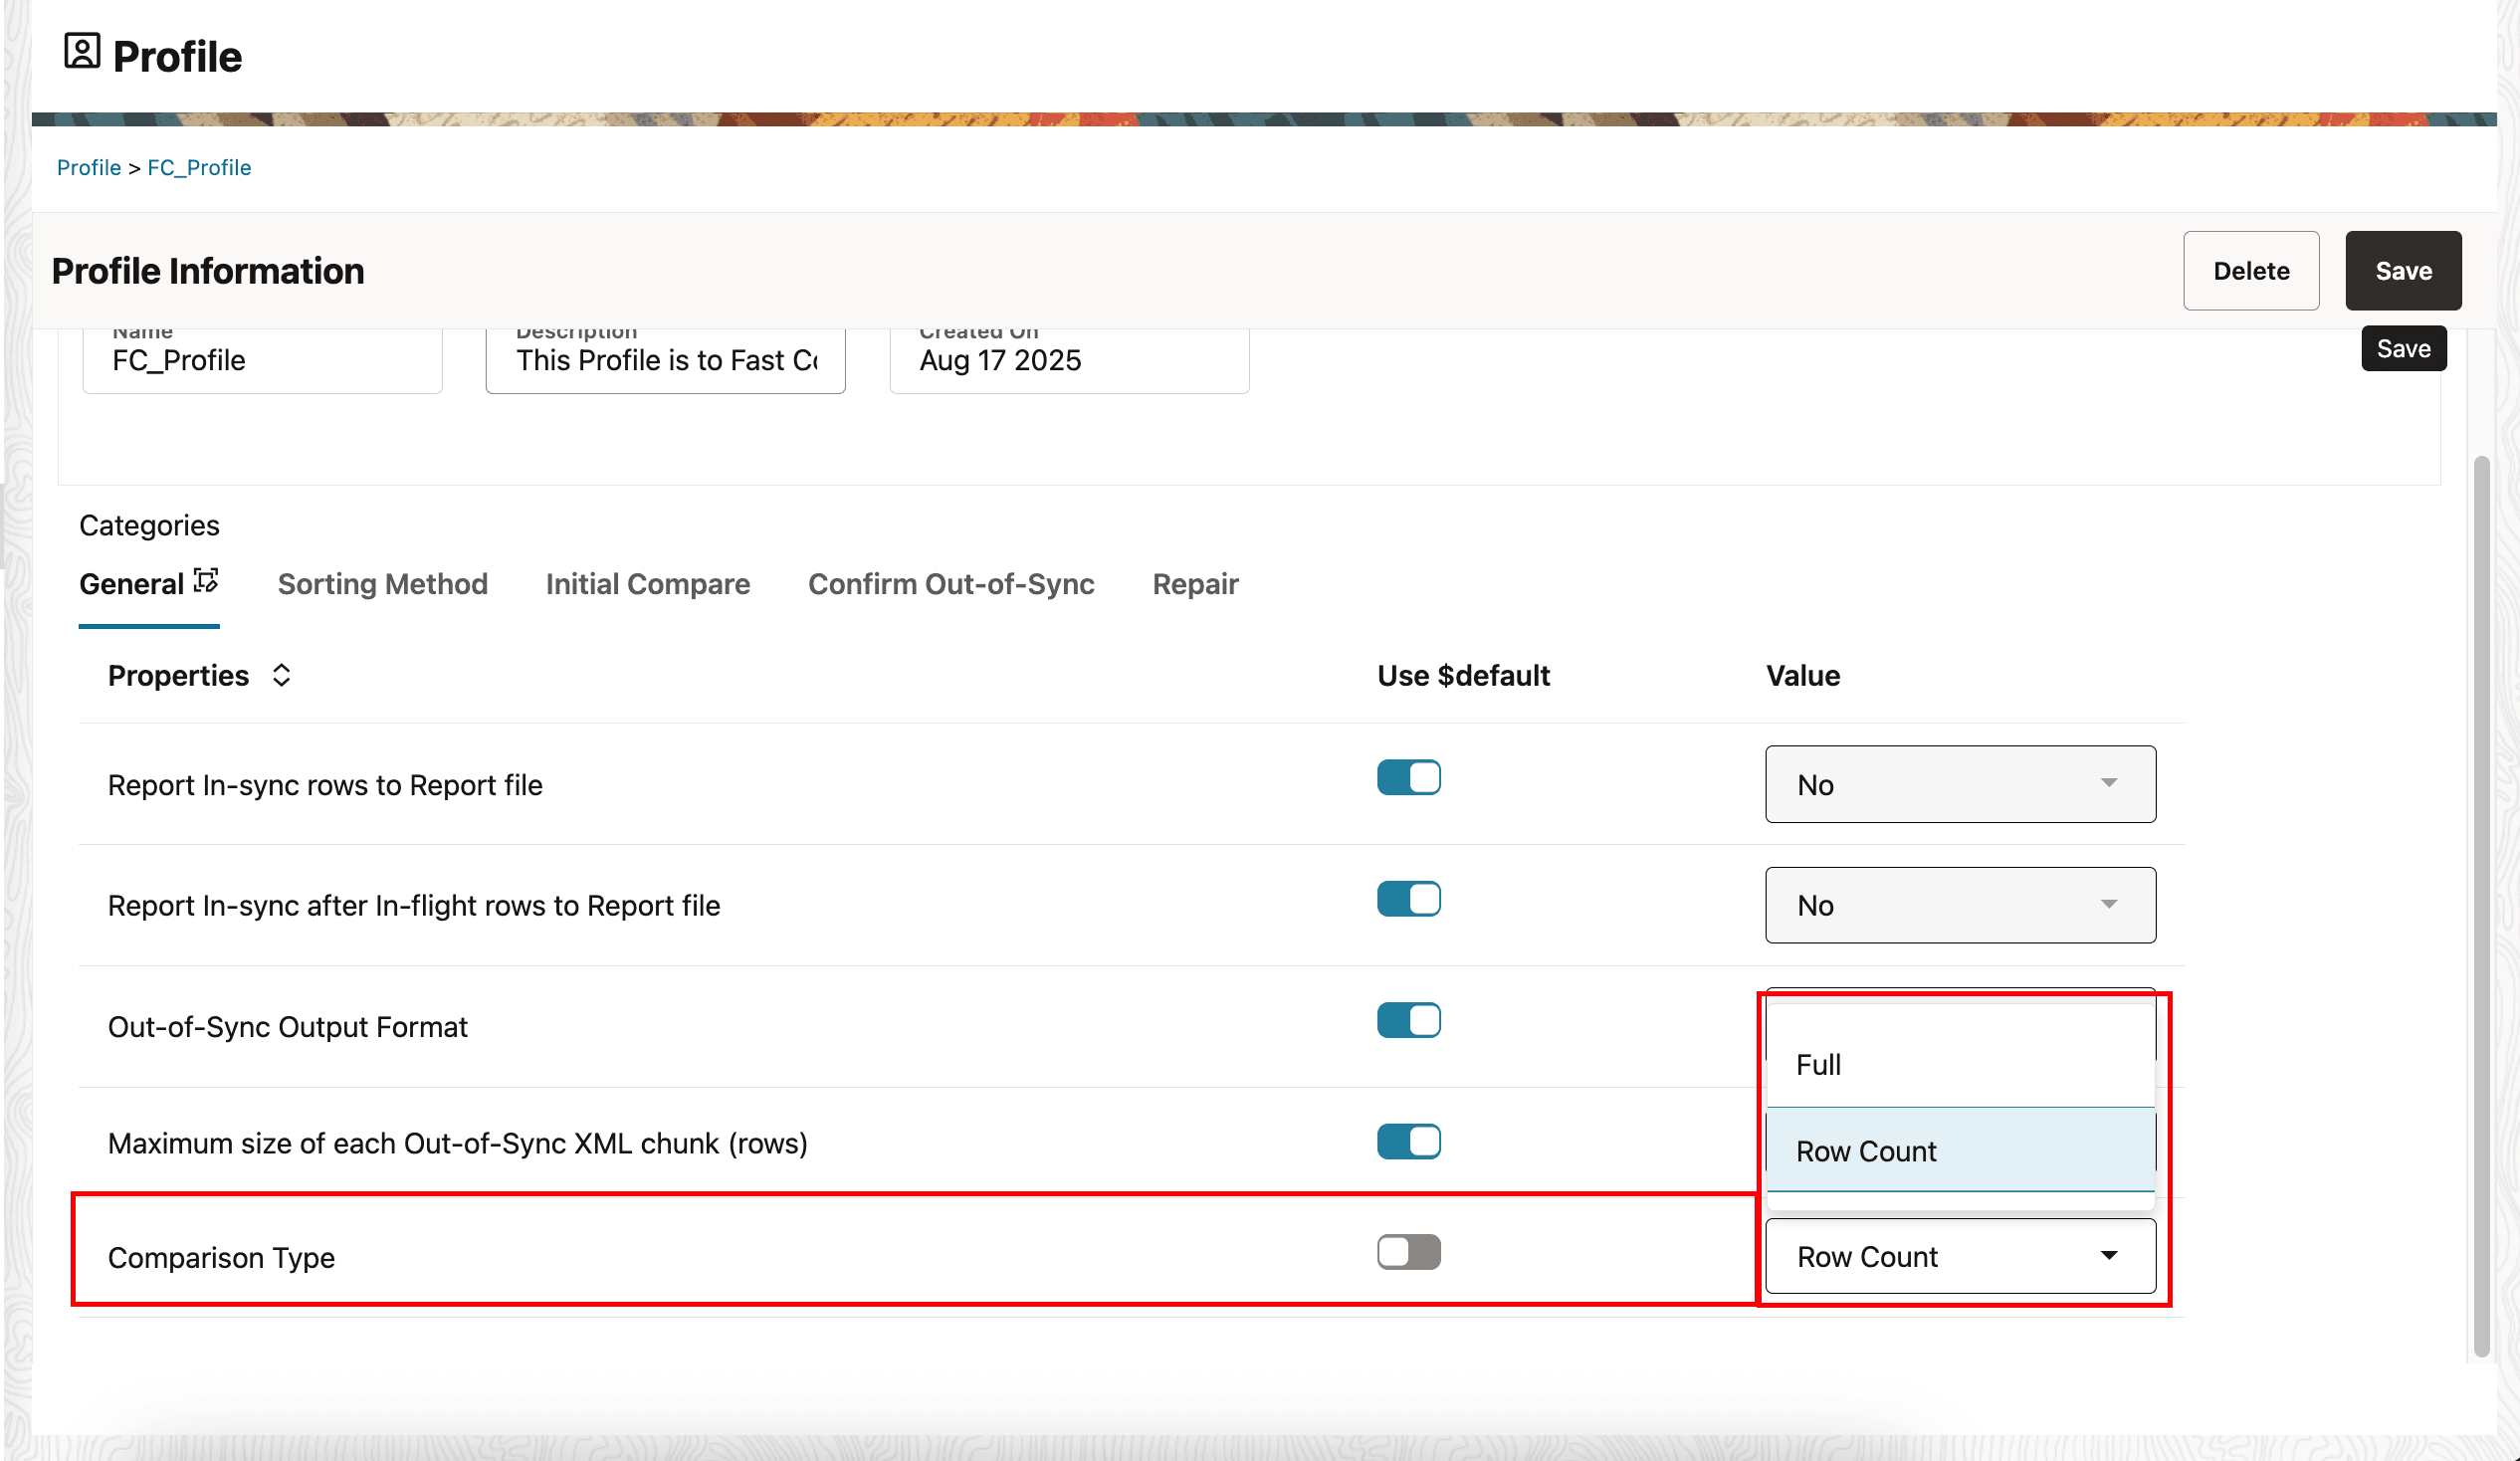
4. Choose Comparison Type: A new “Comparison Type” option is available, offering two modes: “Full” and “Row Count.”
5. Select “Row Count”: To perform a fast comparison based on row counts, select the “Row Count” option.
6. Execute the Comparison: Run the comparison job associated with this profile. Veridata will then perform a comparison based on the total row counts of the specified tables or files on the source and target, providing a quick check for discrepancies in the number of records.
Now let us see in detail with example.
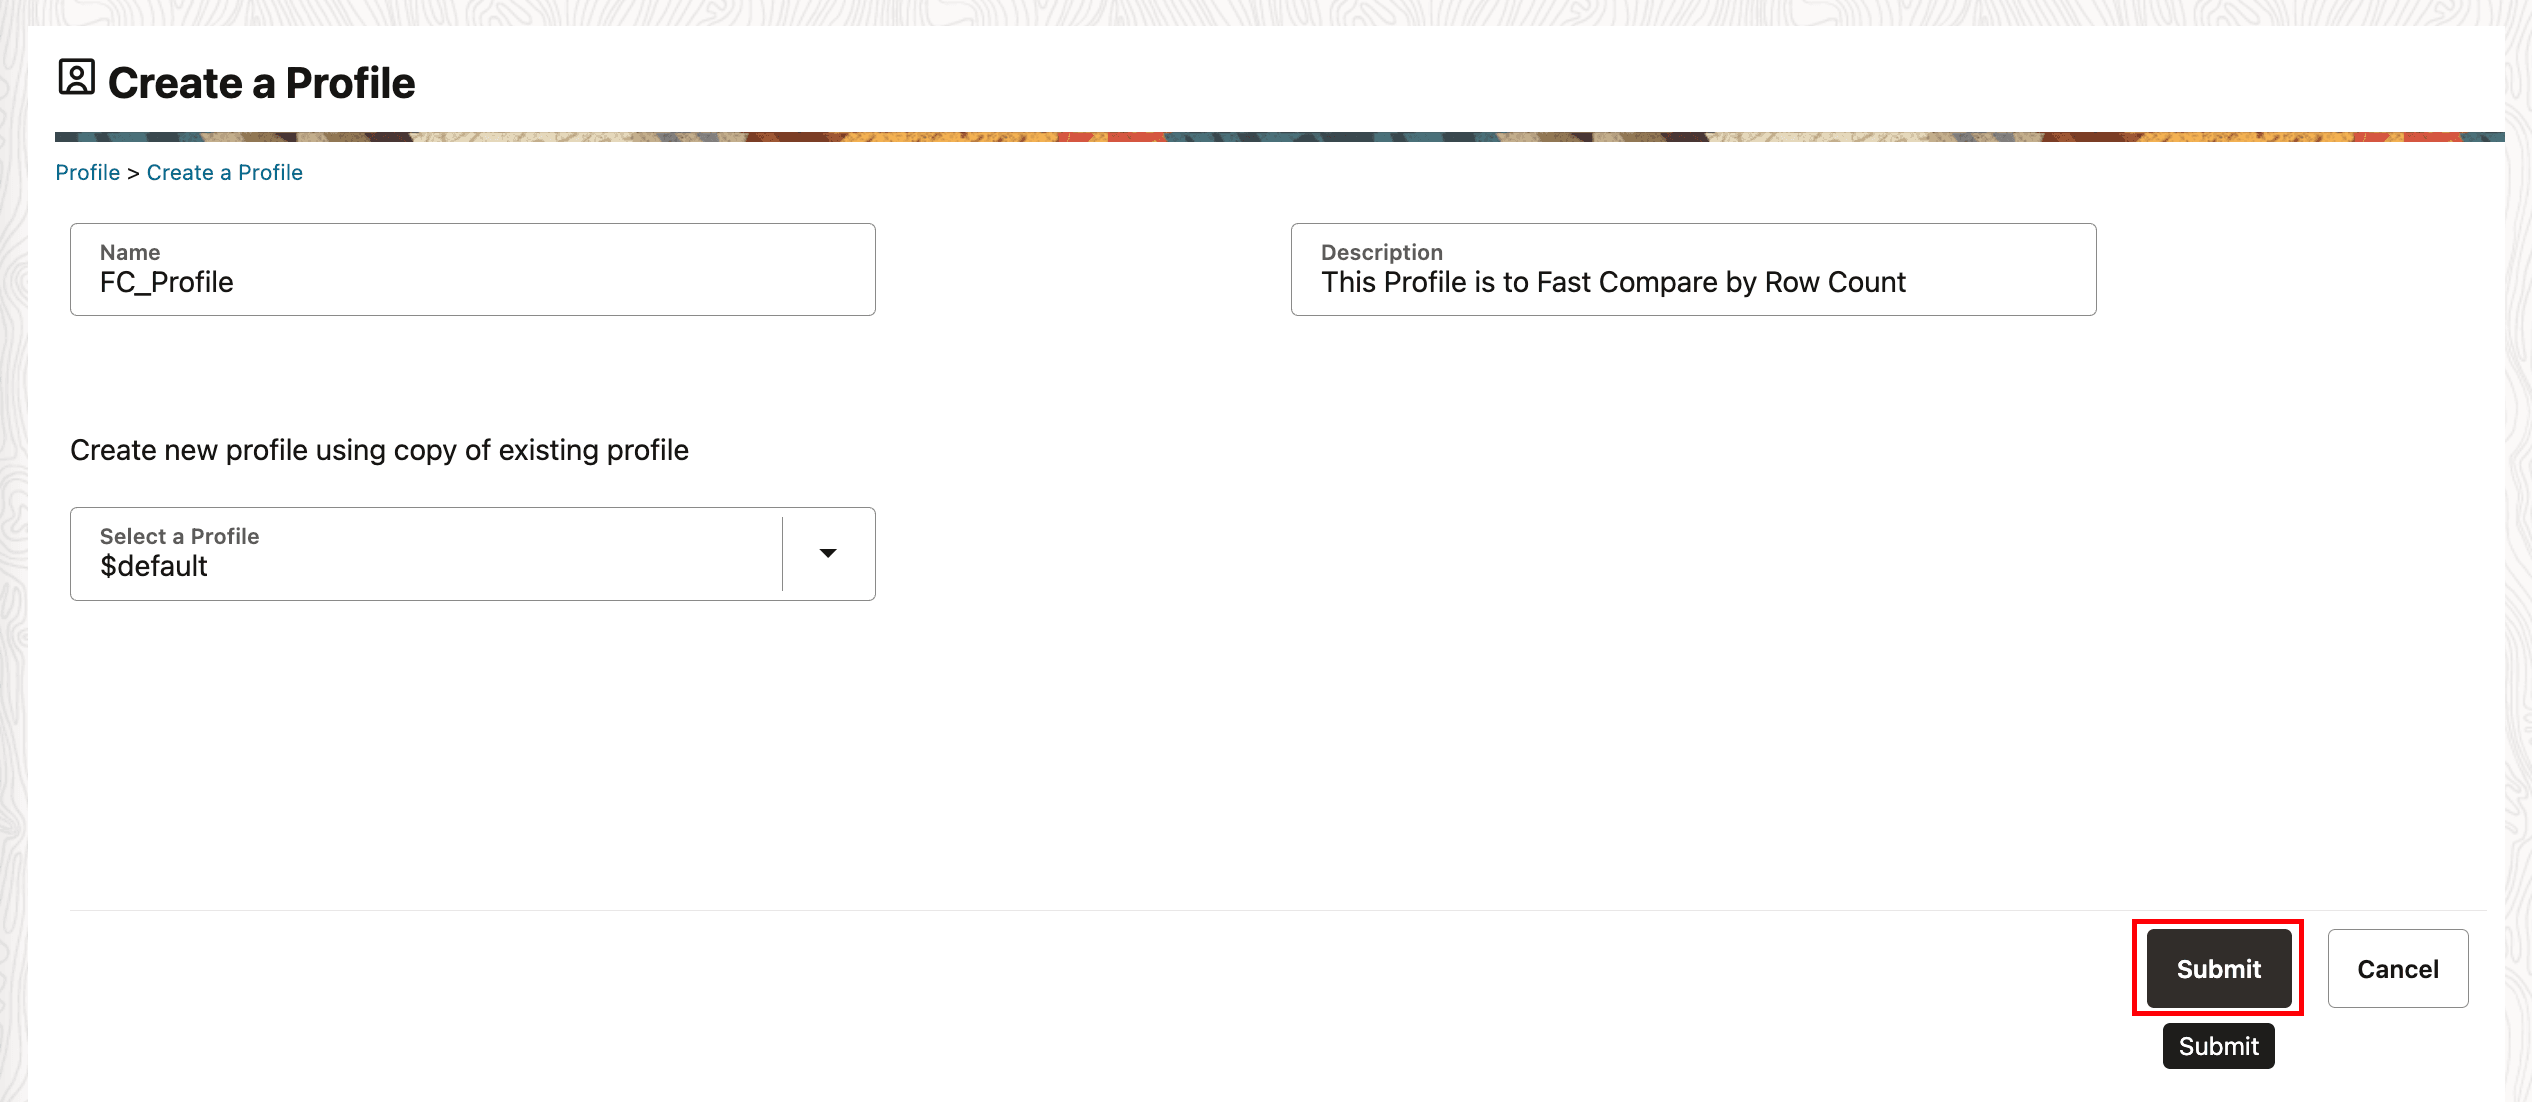
Firstly, we need to create a profile with “Row Count” option enabled.
Provide the details and click on the “Submit” button.
Now you can see a new profile created with name “FC_Profile”.
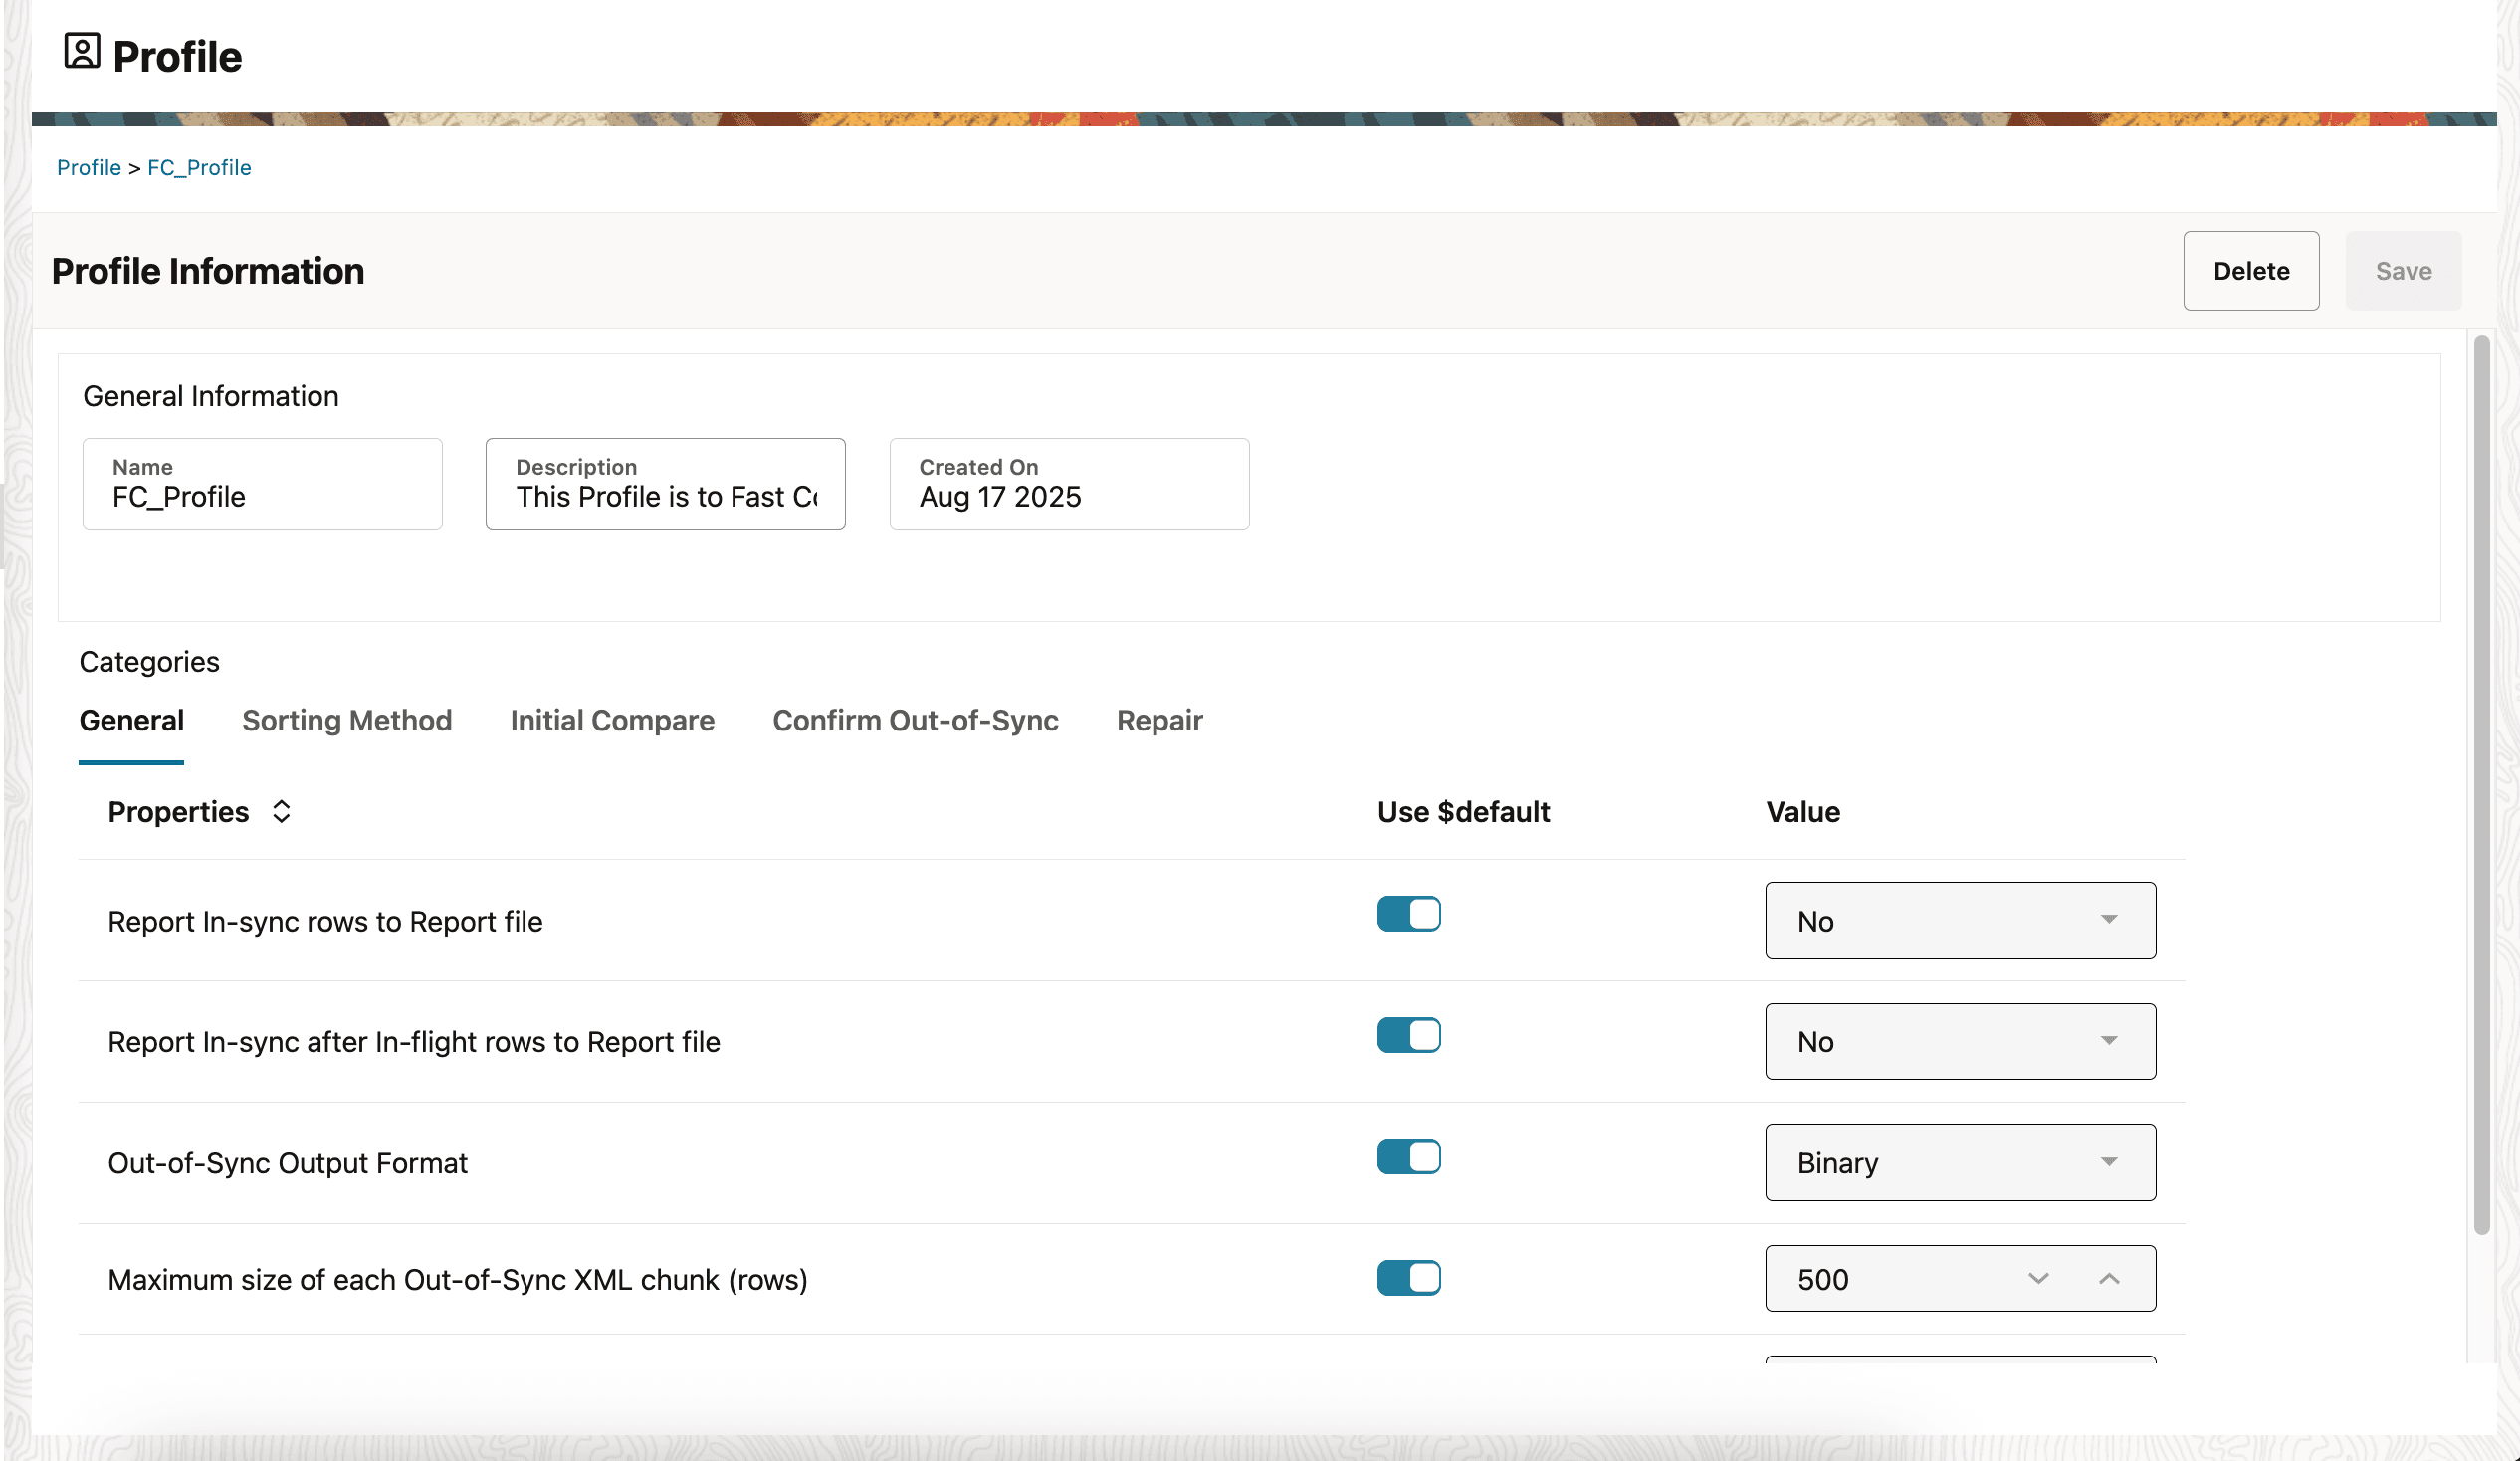
Under the “General” category there are various parameters or settings. A new parameter is added called “Comparison Type”.
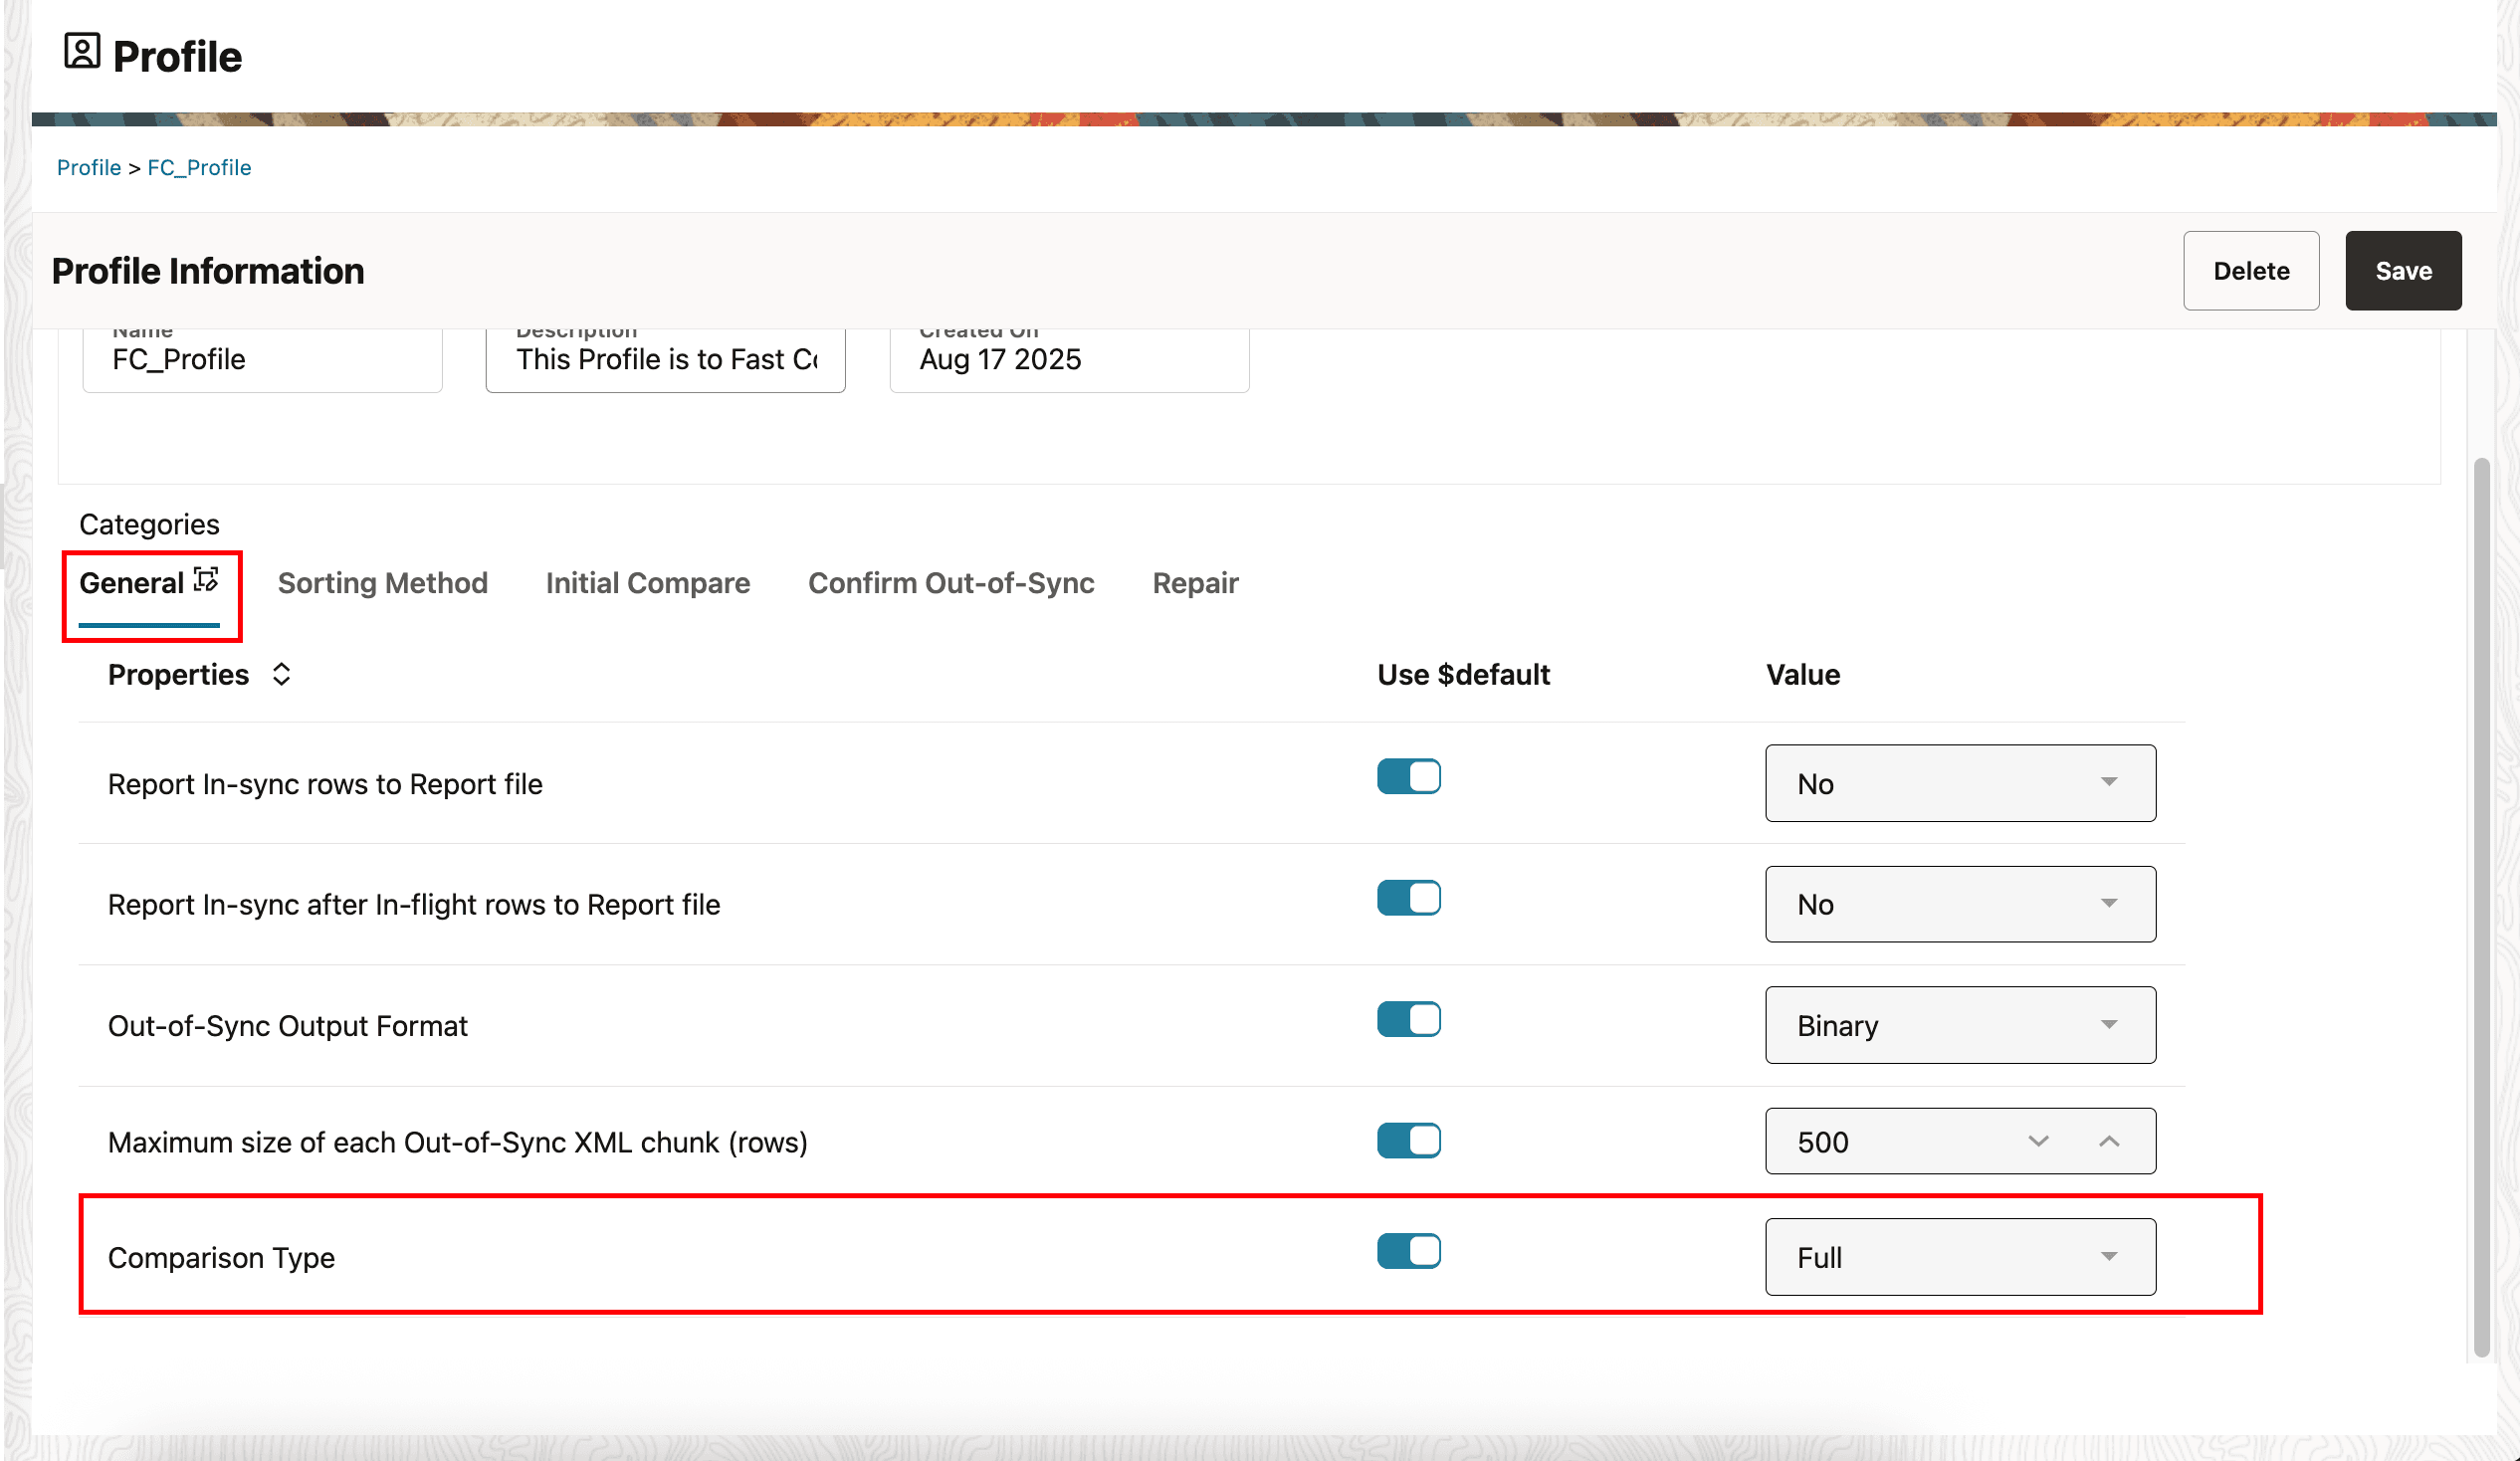
Toggle off the parameter and select the option “Row Count”.
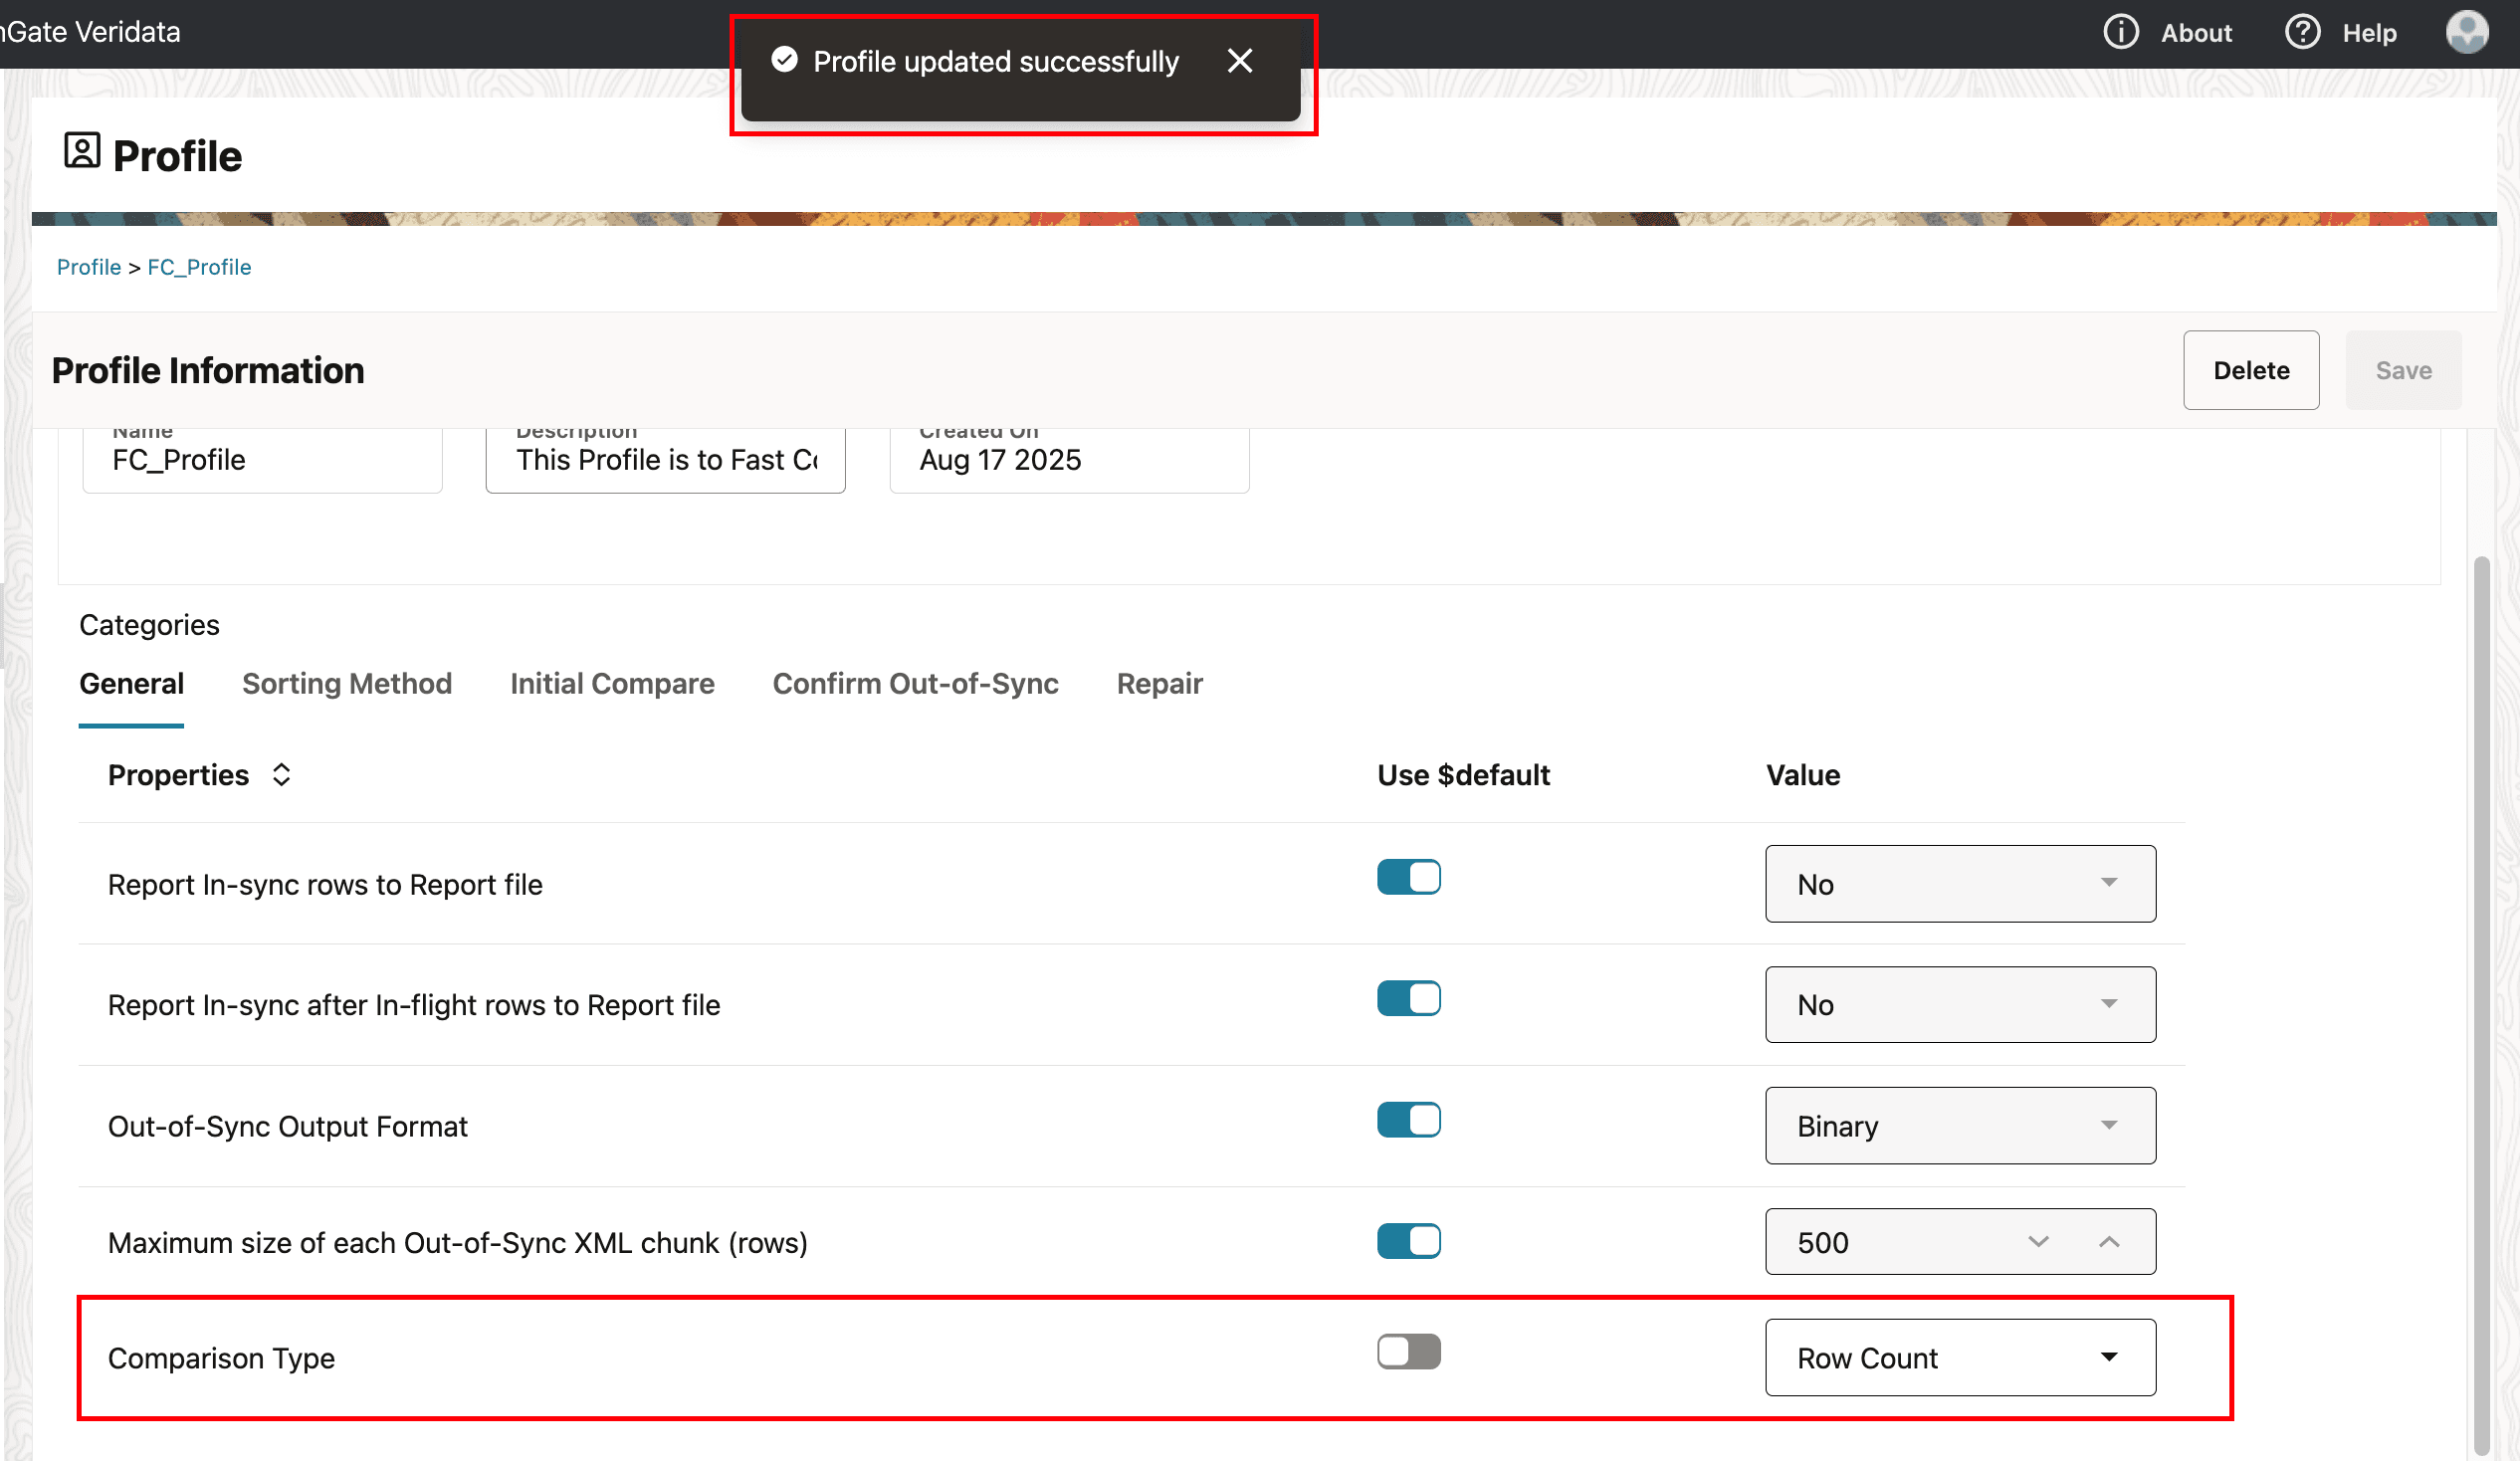
Click on “Save” button and you will see a toast message at the top of the screen as “Profile updated successfully”.
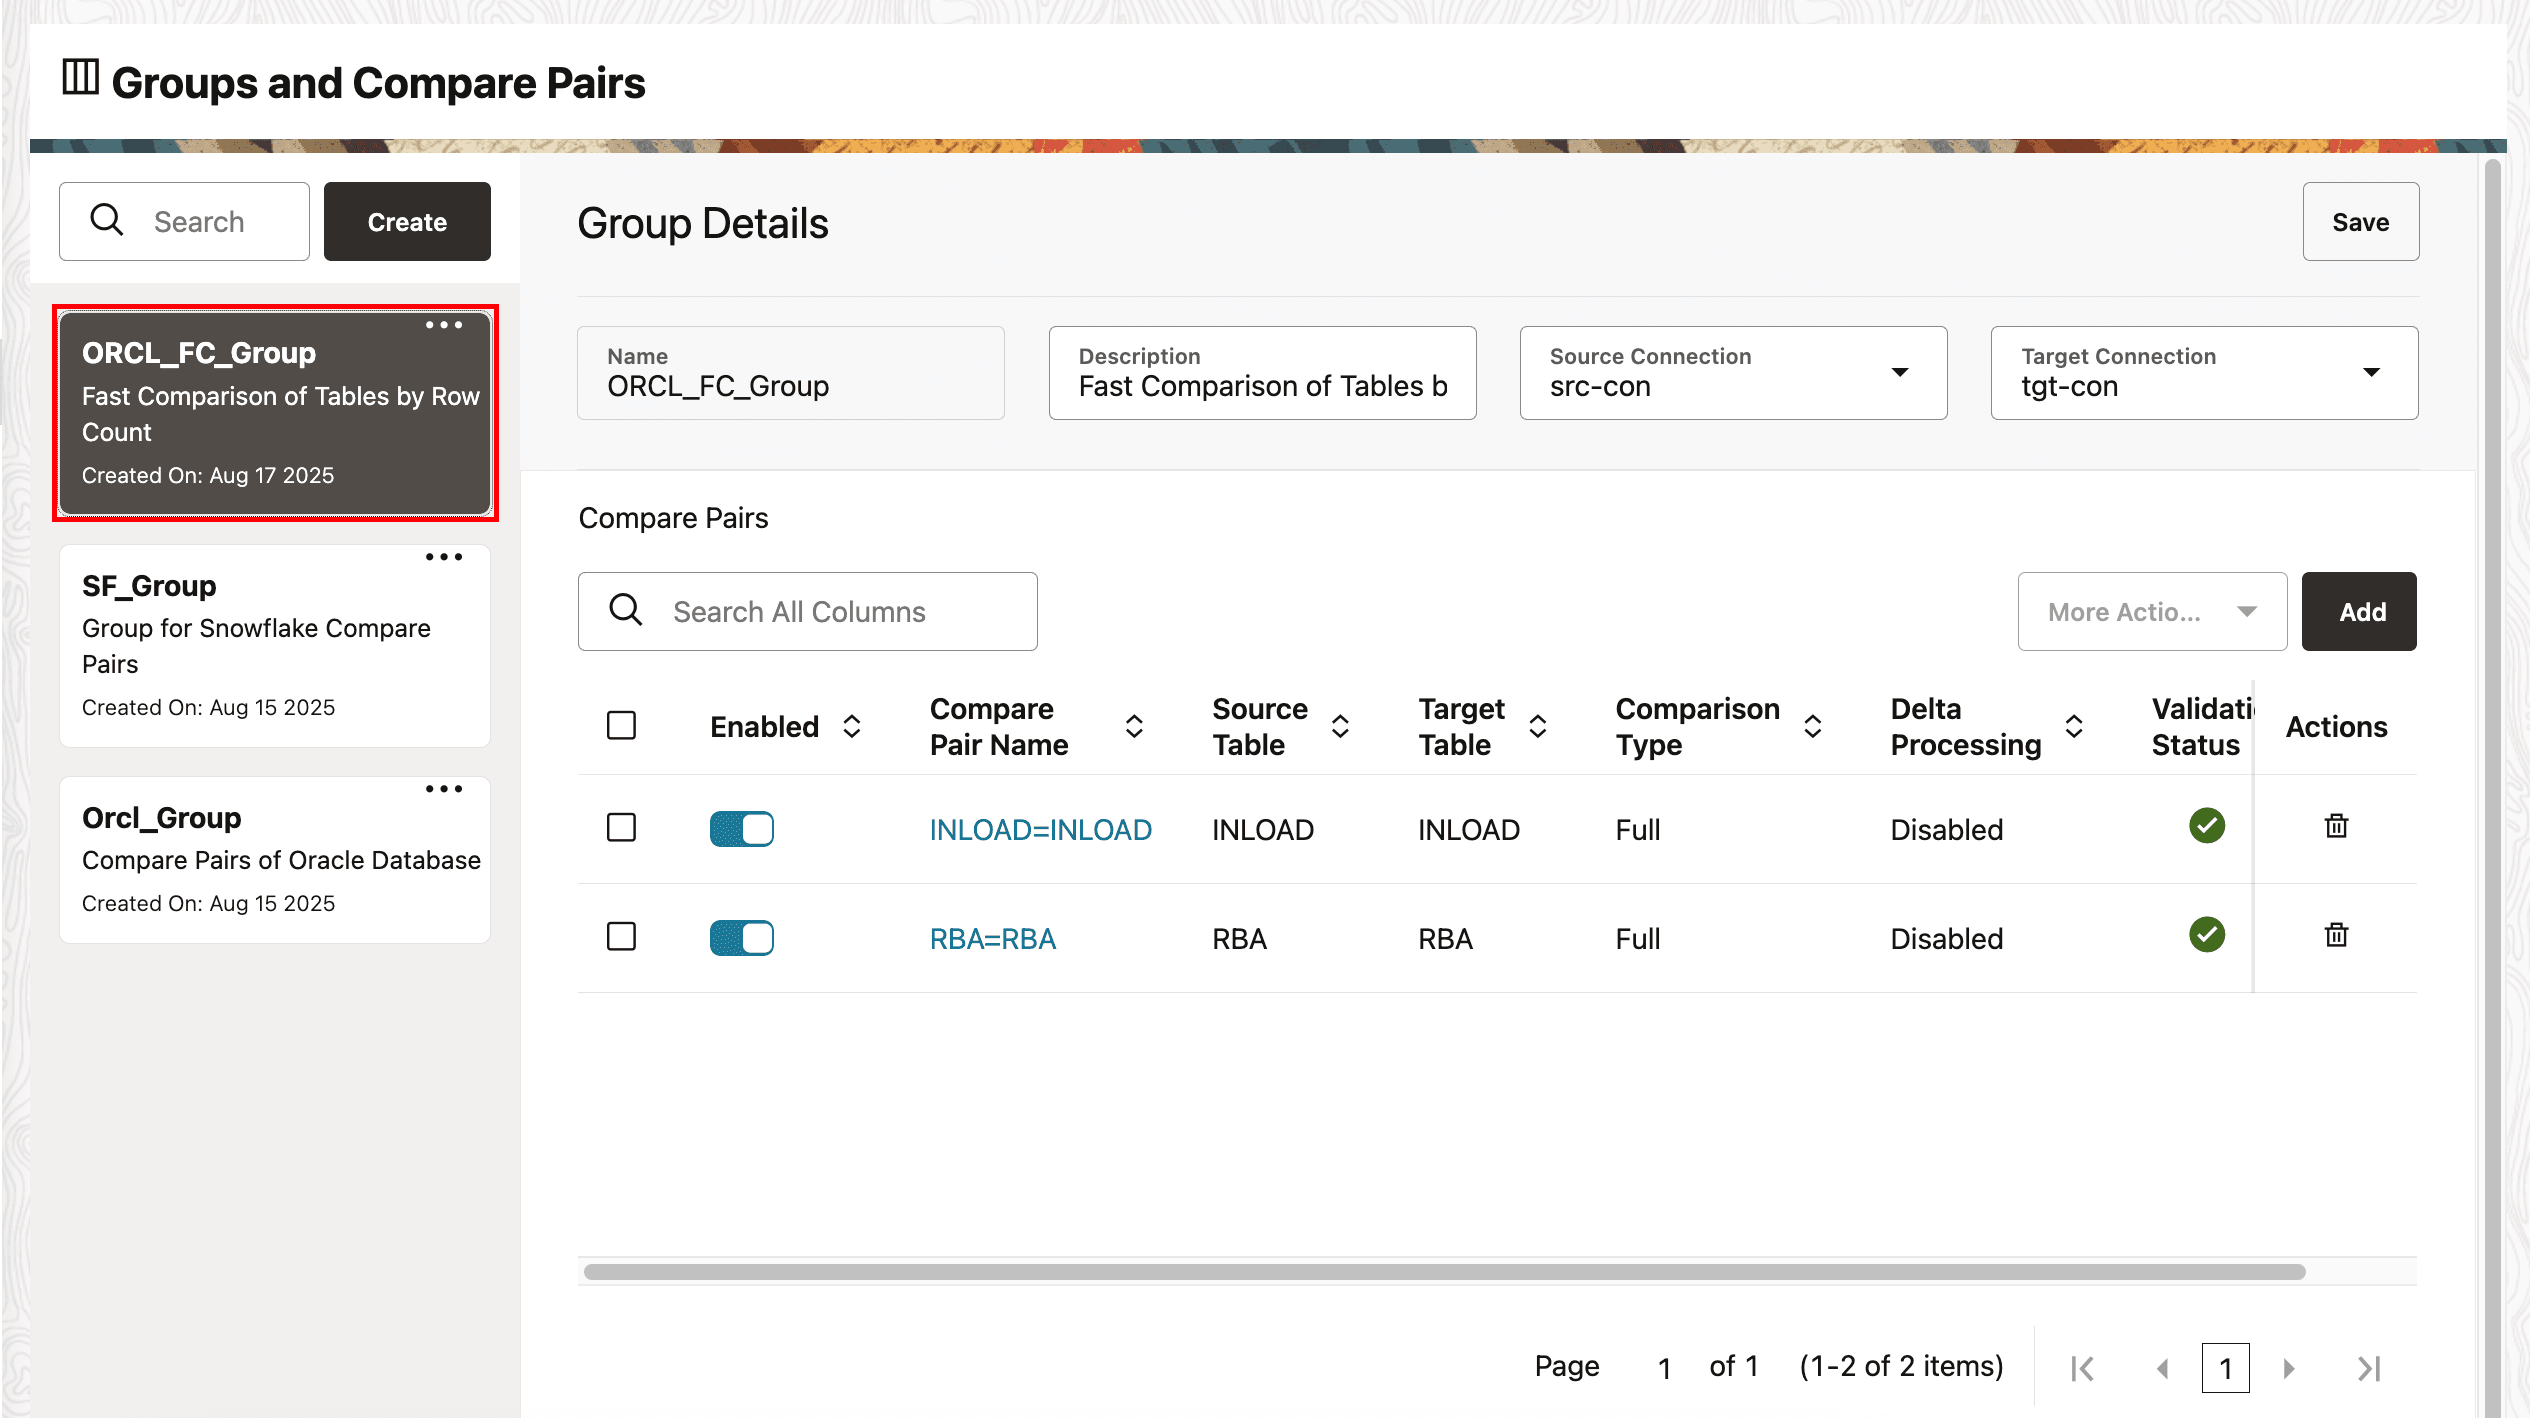
I have already created and configured Groups and Compare Pairs called “ORCL_FC_Group” which has two tables for which I am going to perform “Fast Compare by Row Count”.
Let’s create a separate Job for this. Click on the “Jobs” from the left side panel which will take you to the “Jobs” page.
Click on the “Create” button to create a new job.
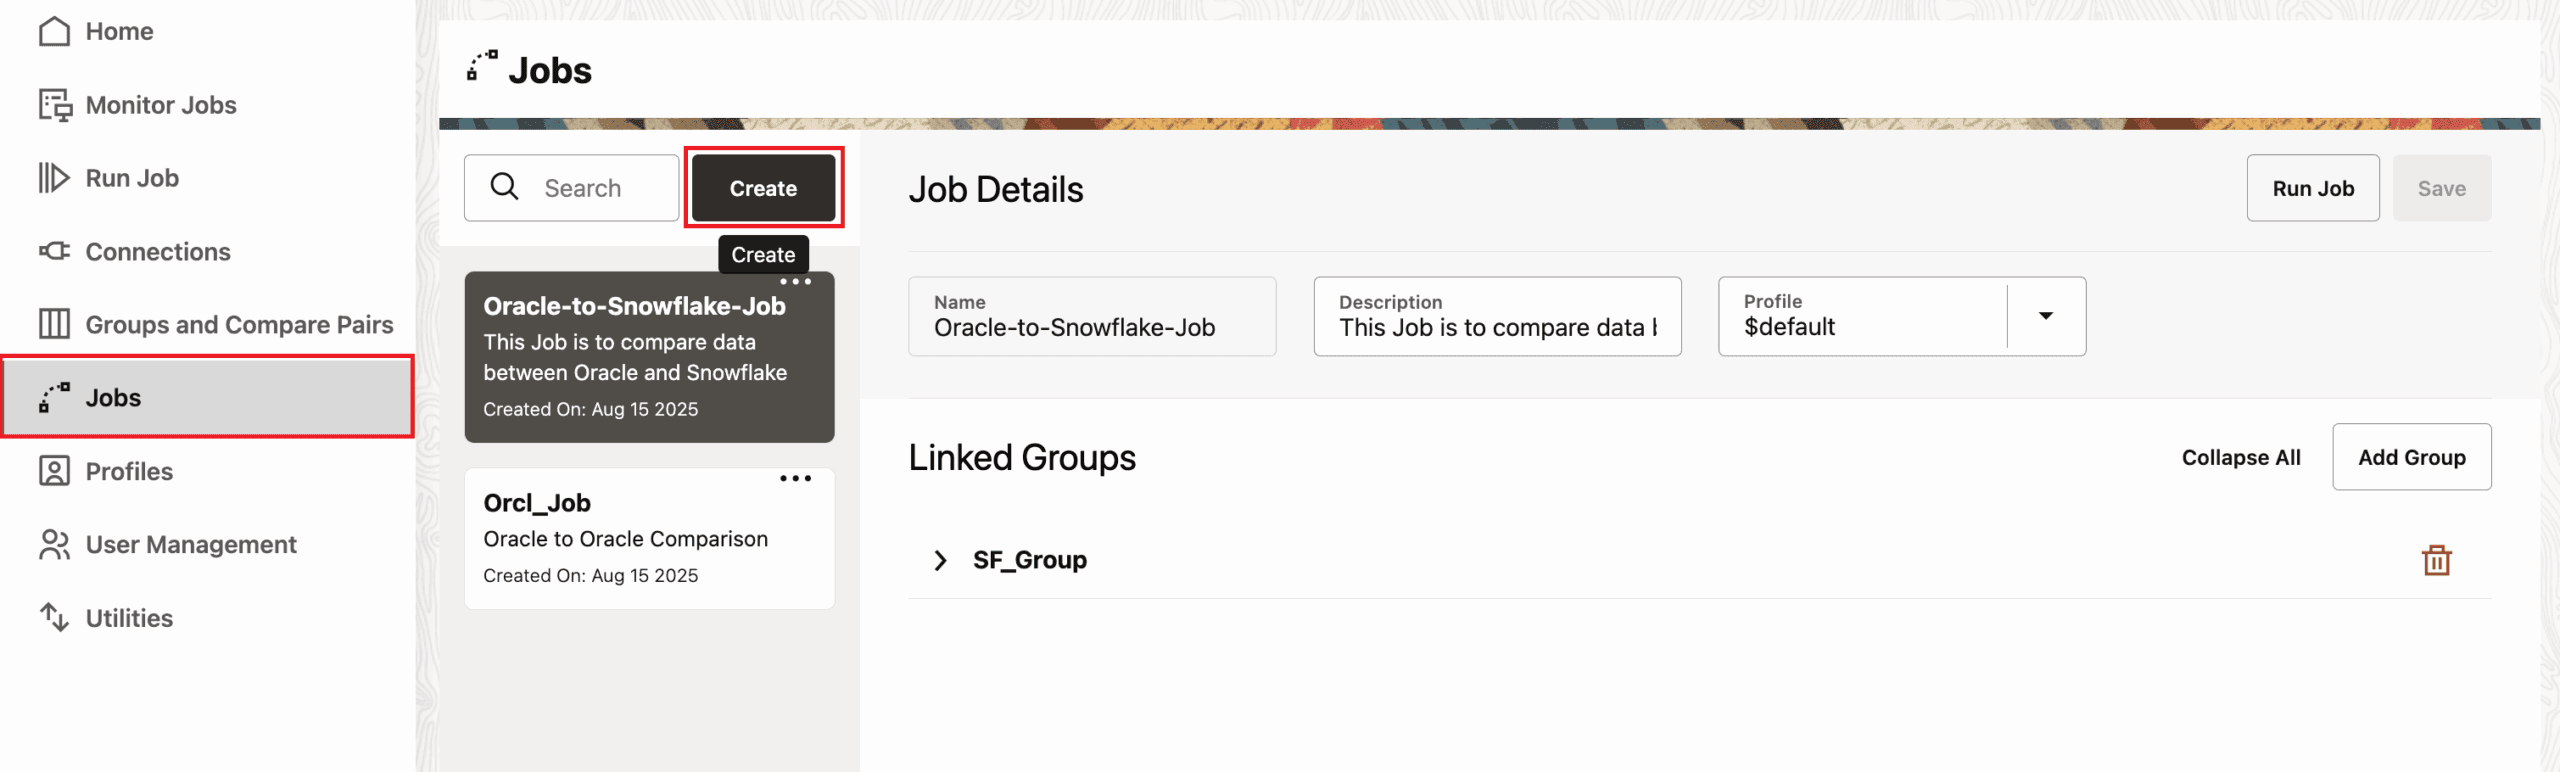
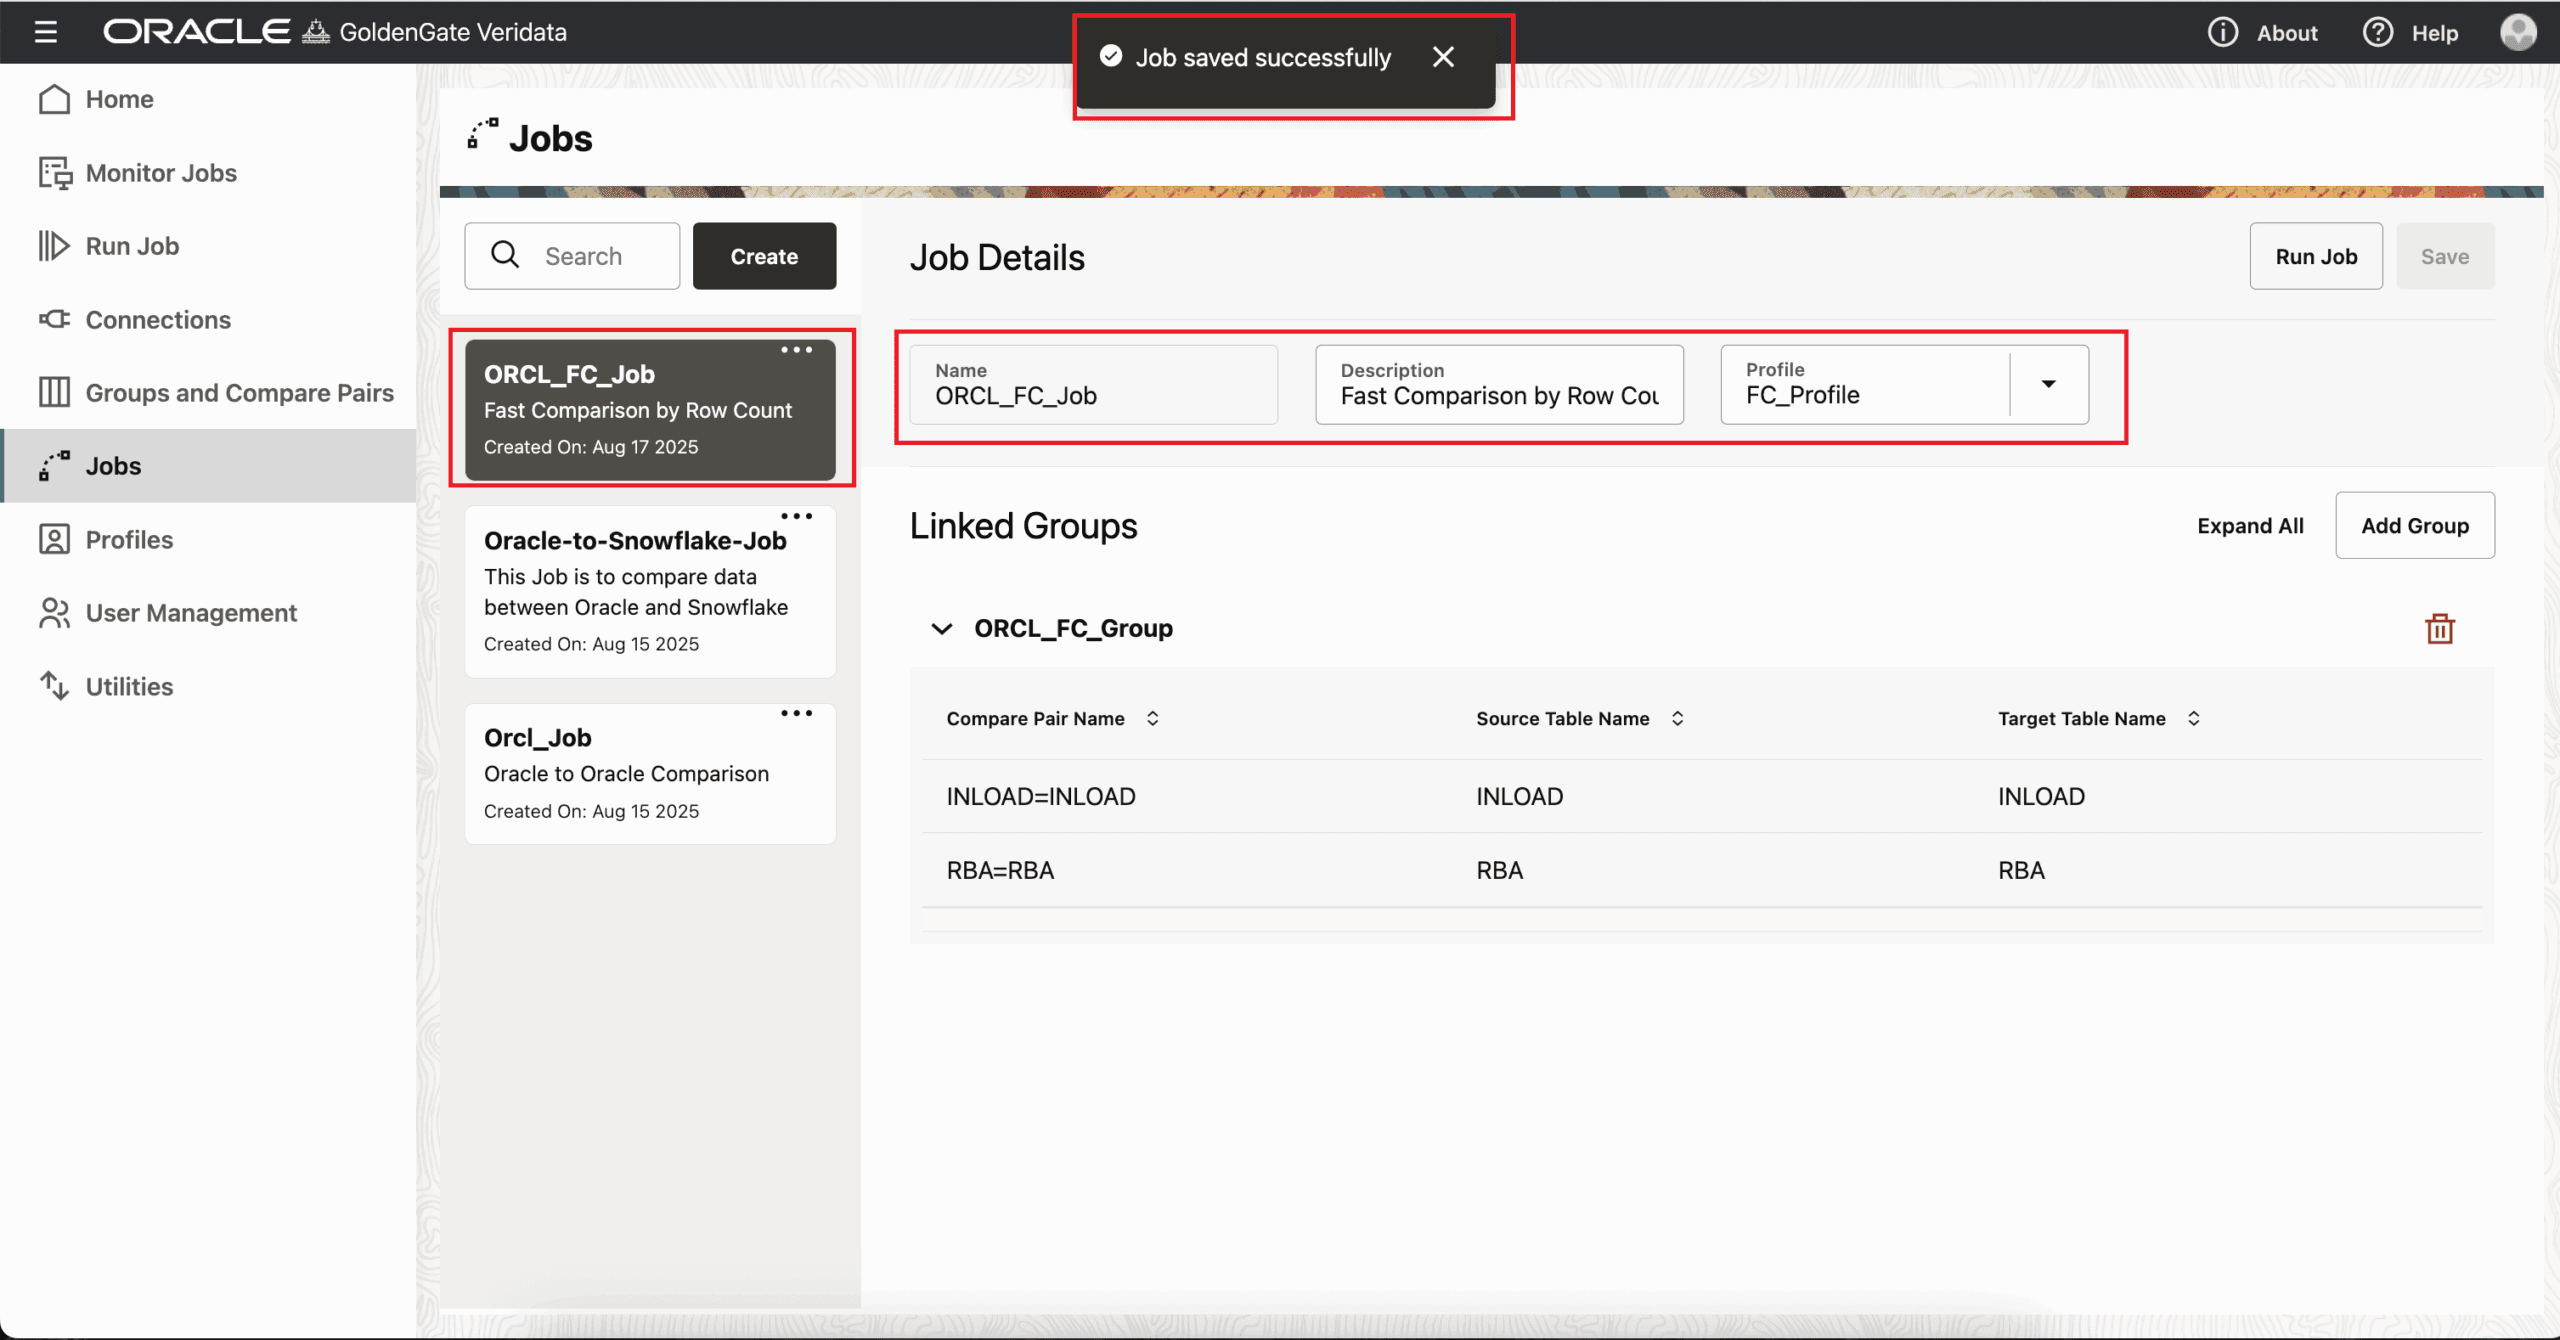
Fill in the details and click on the “Profile” dropdown box where you can select the profile which needs to be applied for this job. As we have already created a separate profile “FC_Profile” for “Fast Compare by Row Count”, select it and click on “Save” button.
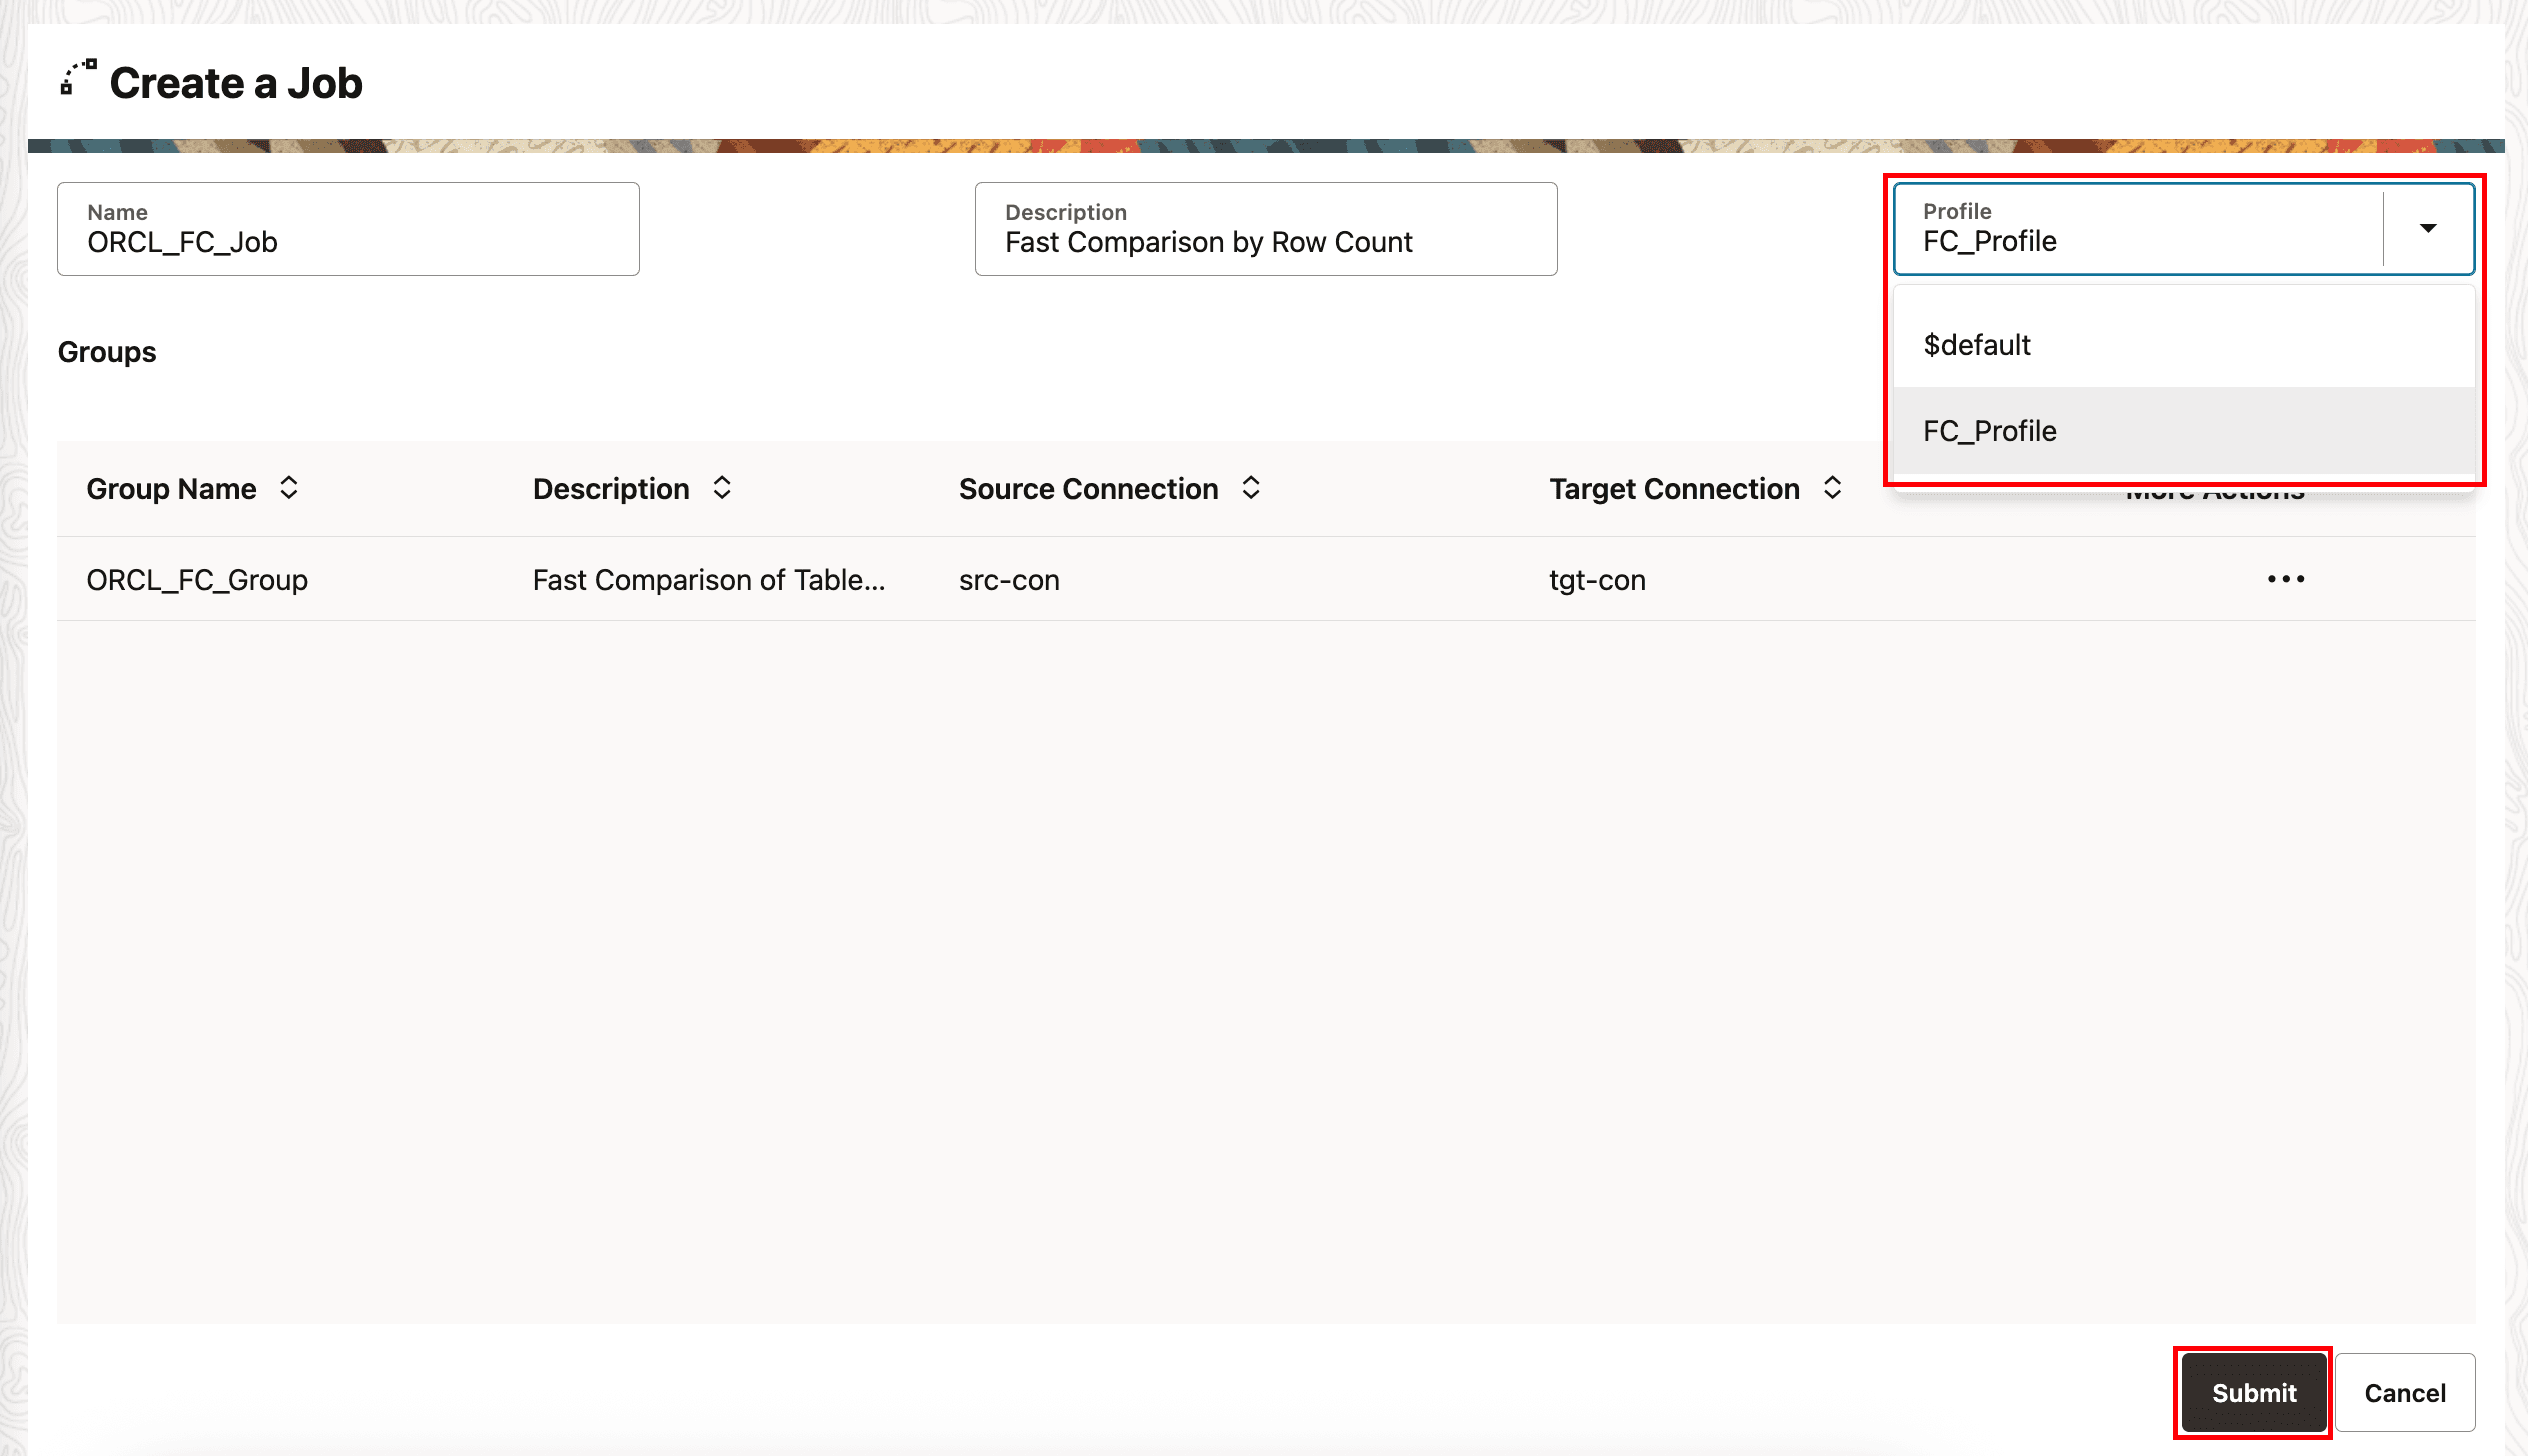
Now the Job has been created successfully.
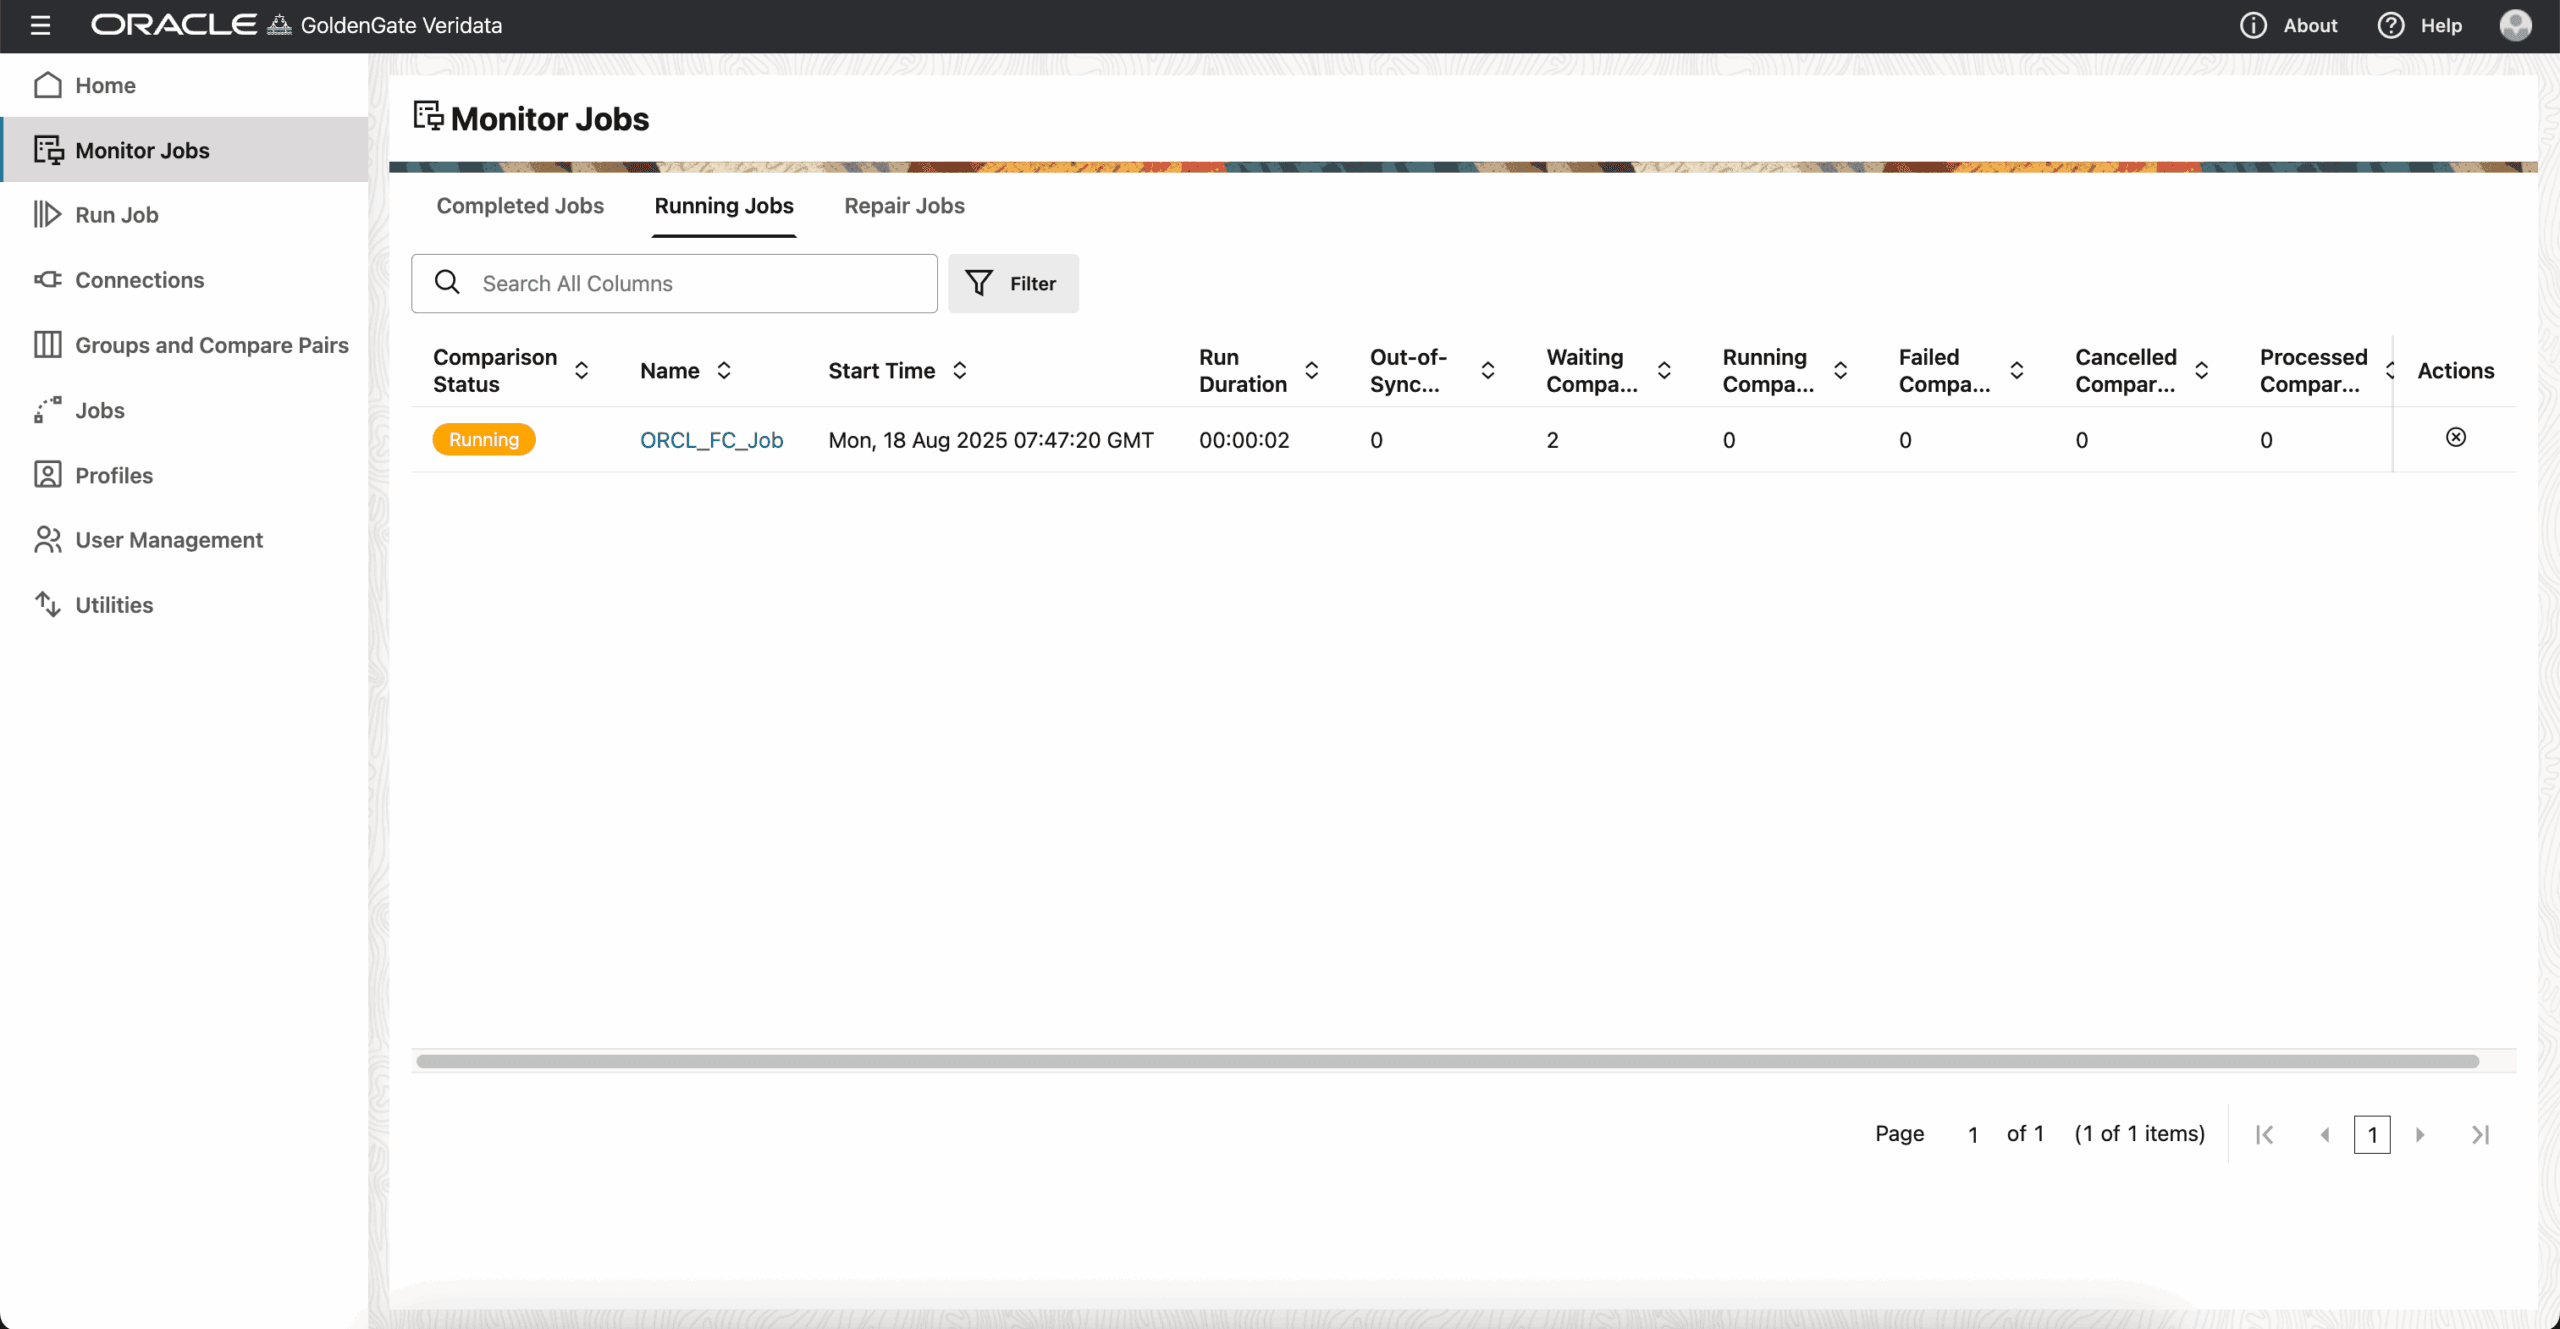
Now, let’s run the job.
Navigate to the “Run Job” page by selecting it from the left side panel. Select the job and click on “Run Job” button.

Navigate to the “Monitor Jobs” page to monitor the job in real time.
Once the comparison job is completed, you will be automatically taken to “Completed Jobs” page within the “Monitor Jobs”. Click on the Job Name to know more details about it.
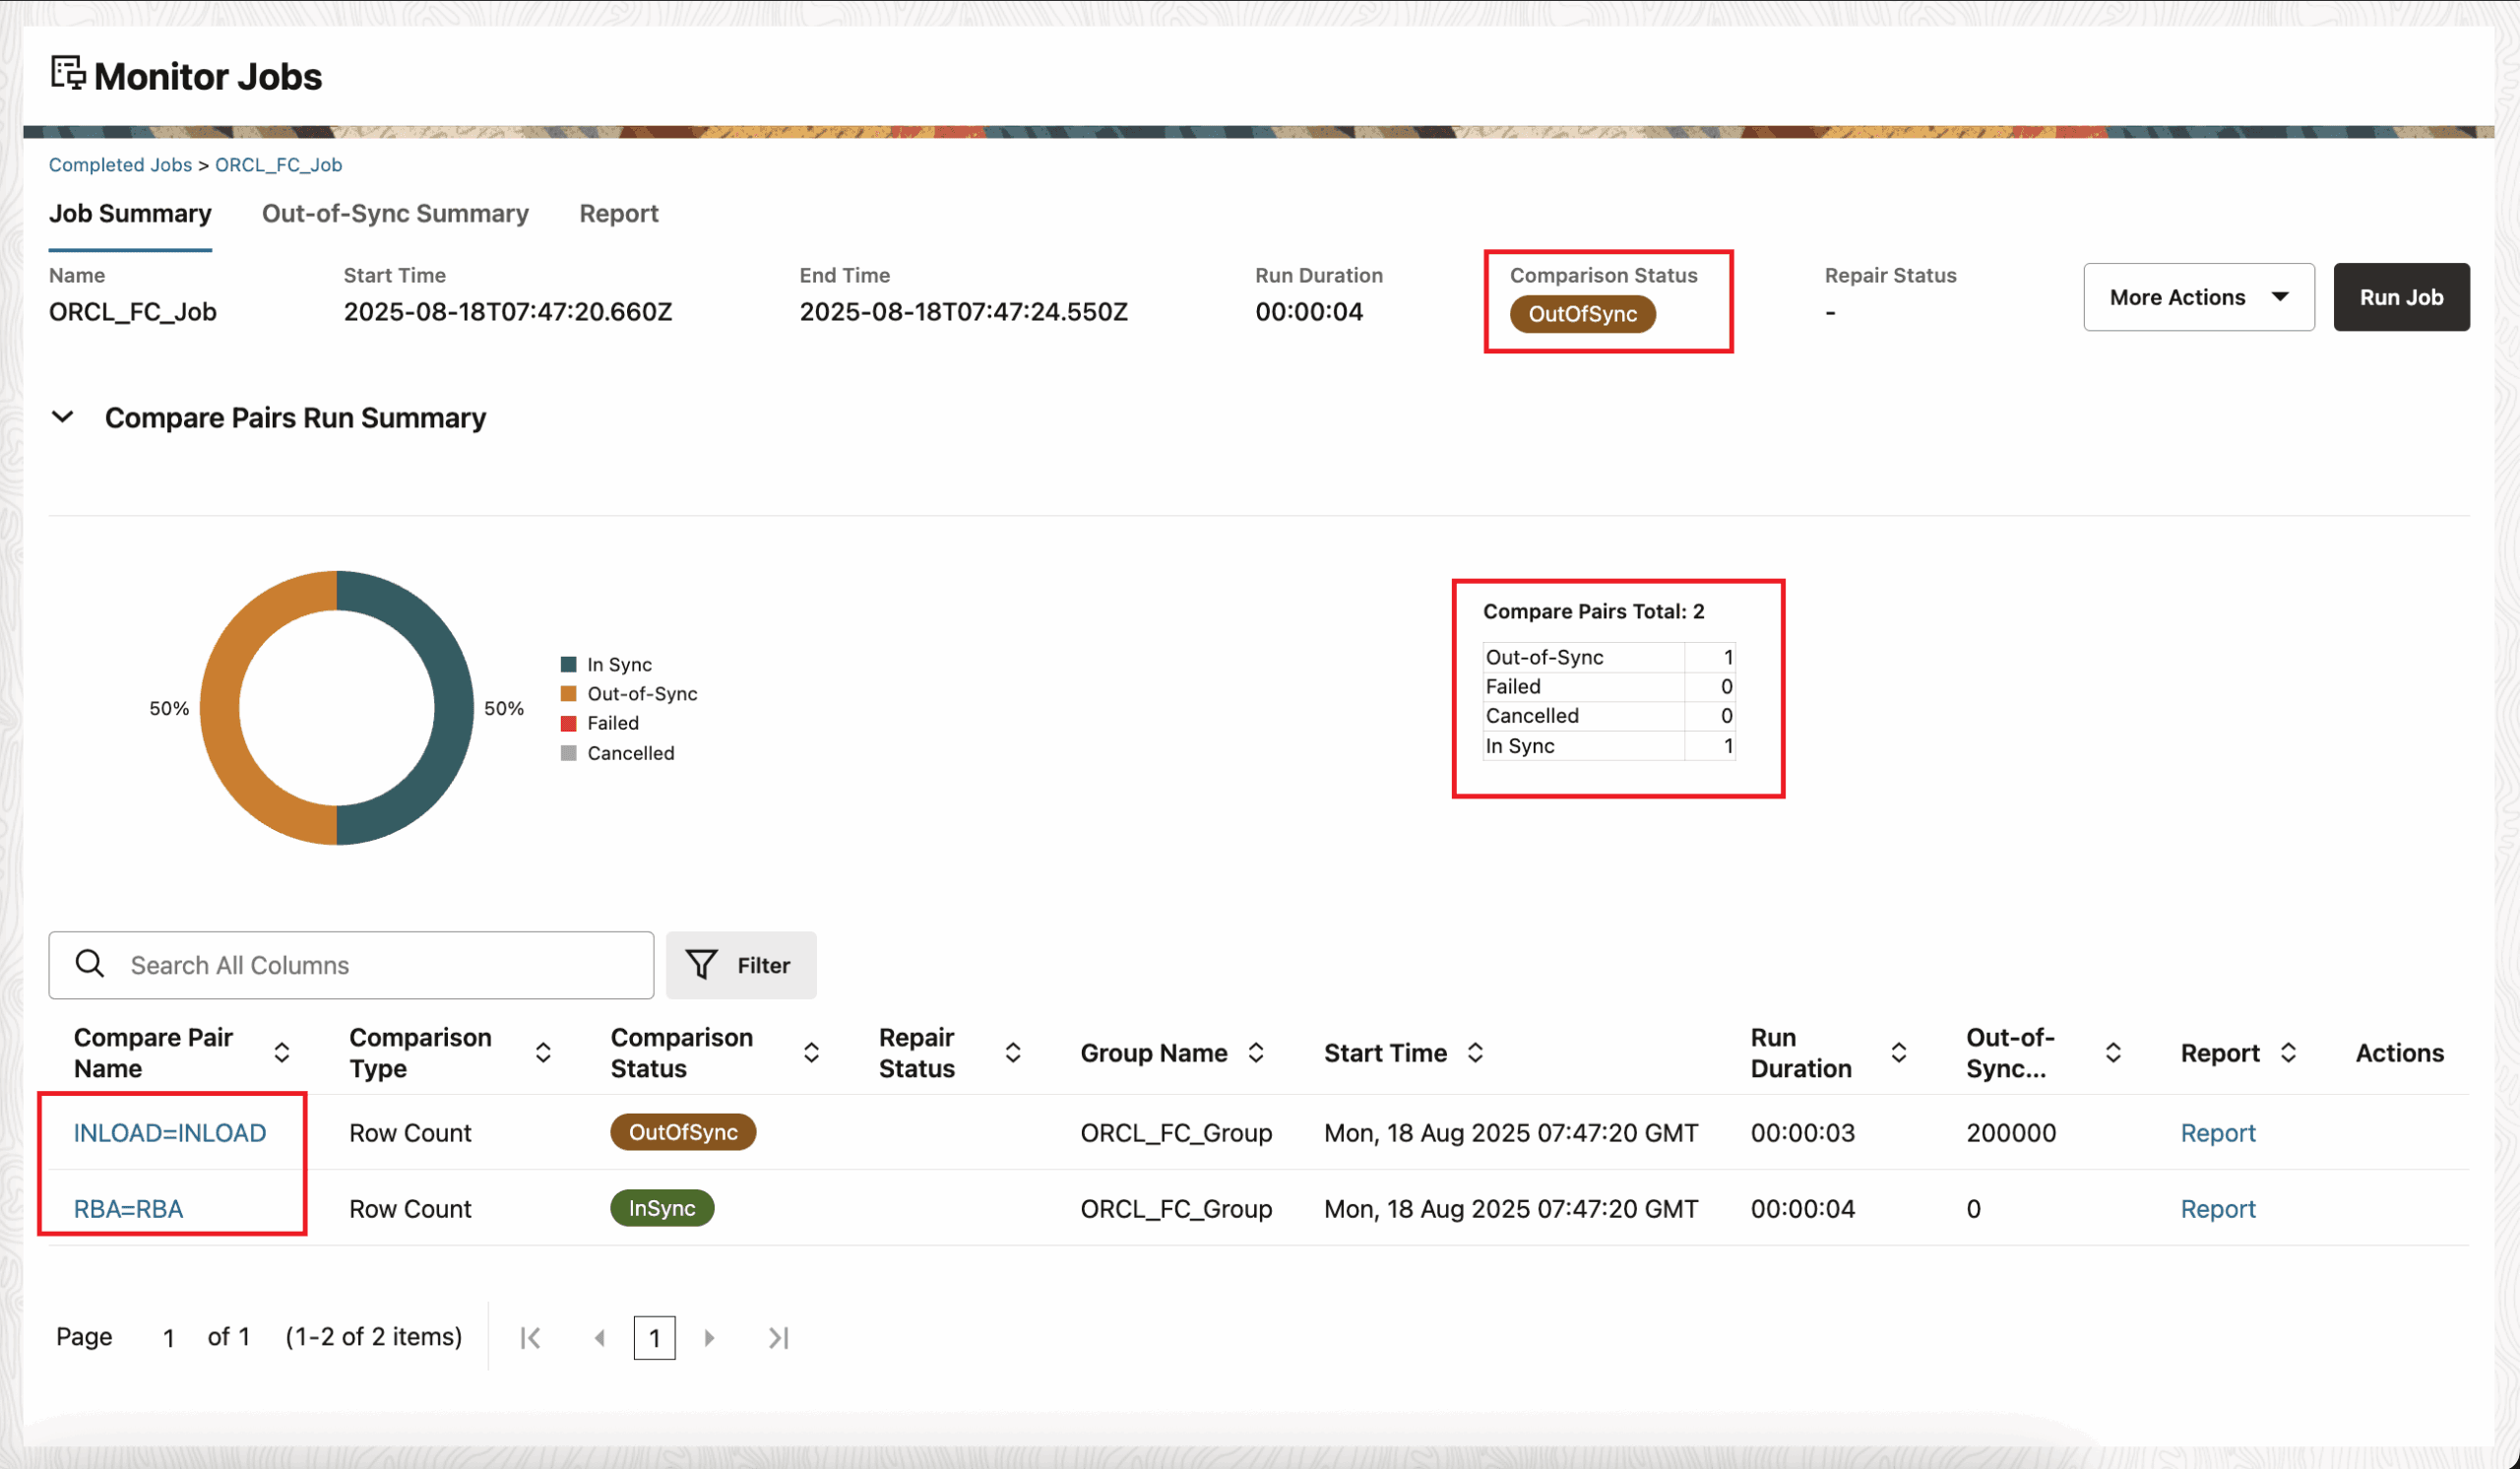
The details pertaining to the respective Compare Pair will be shown here.
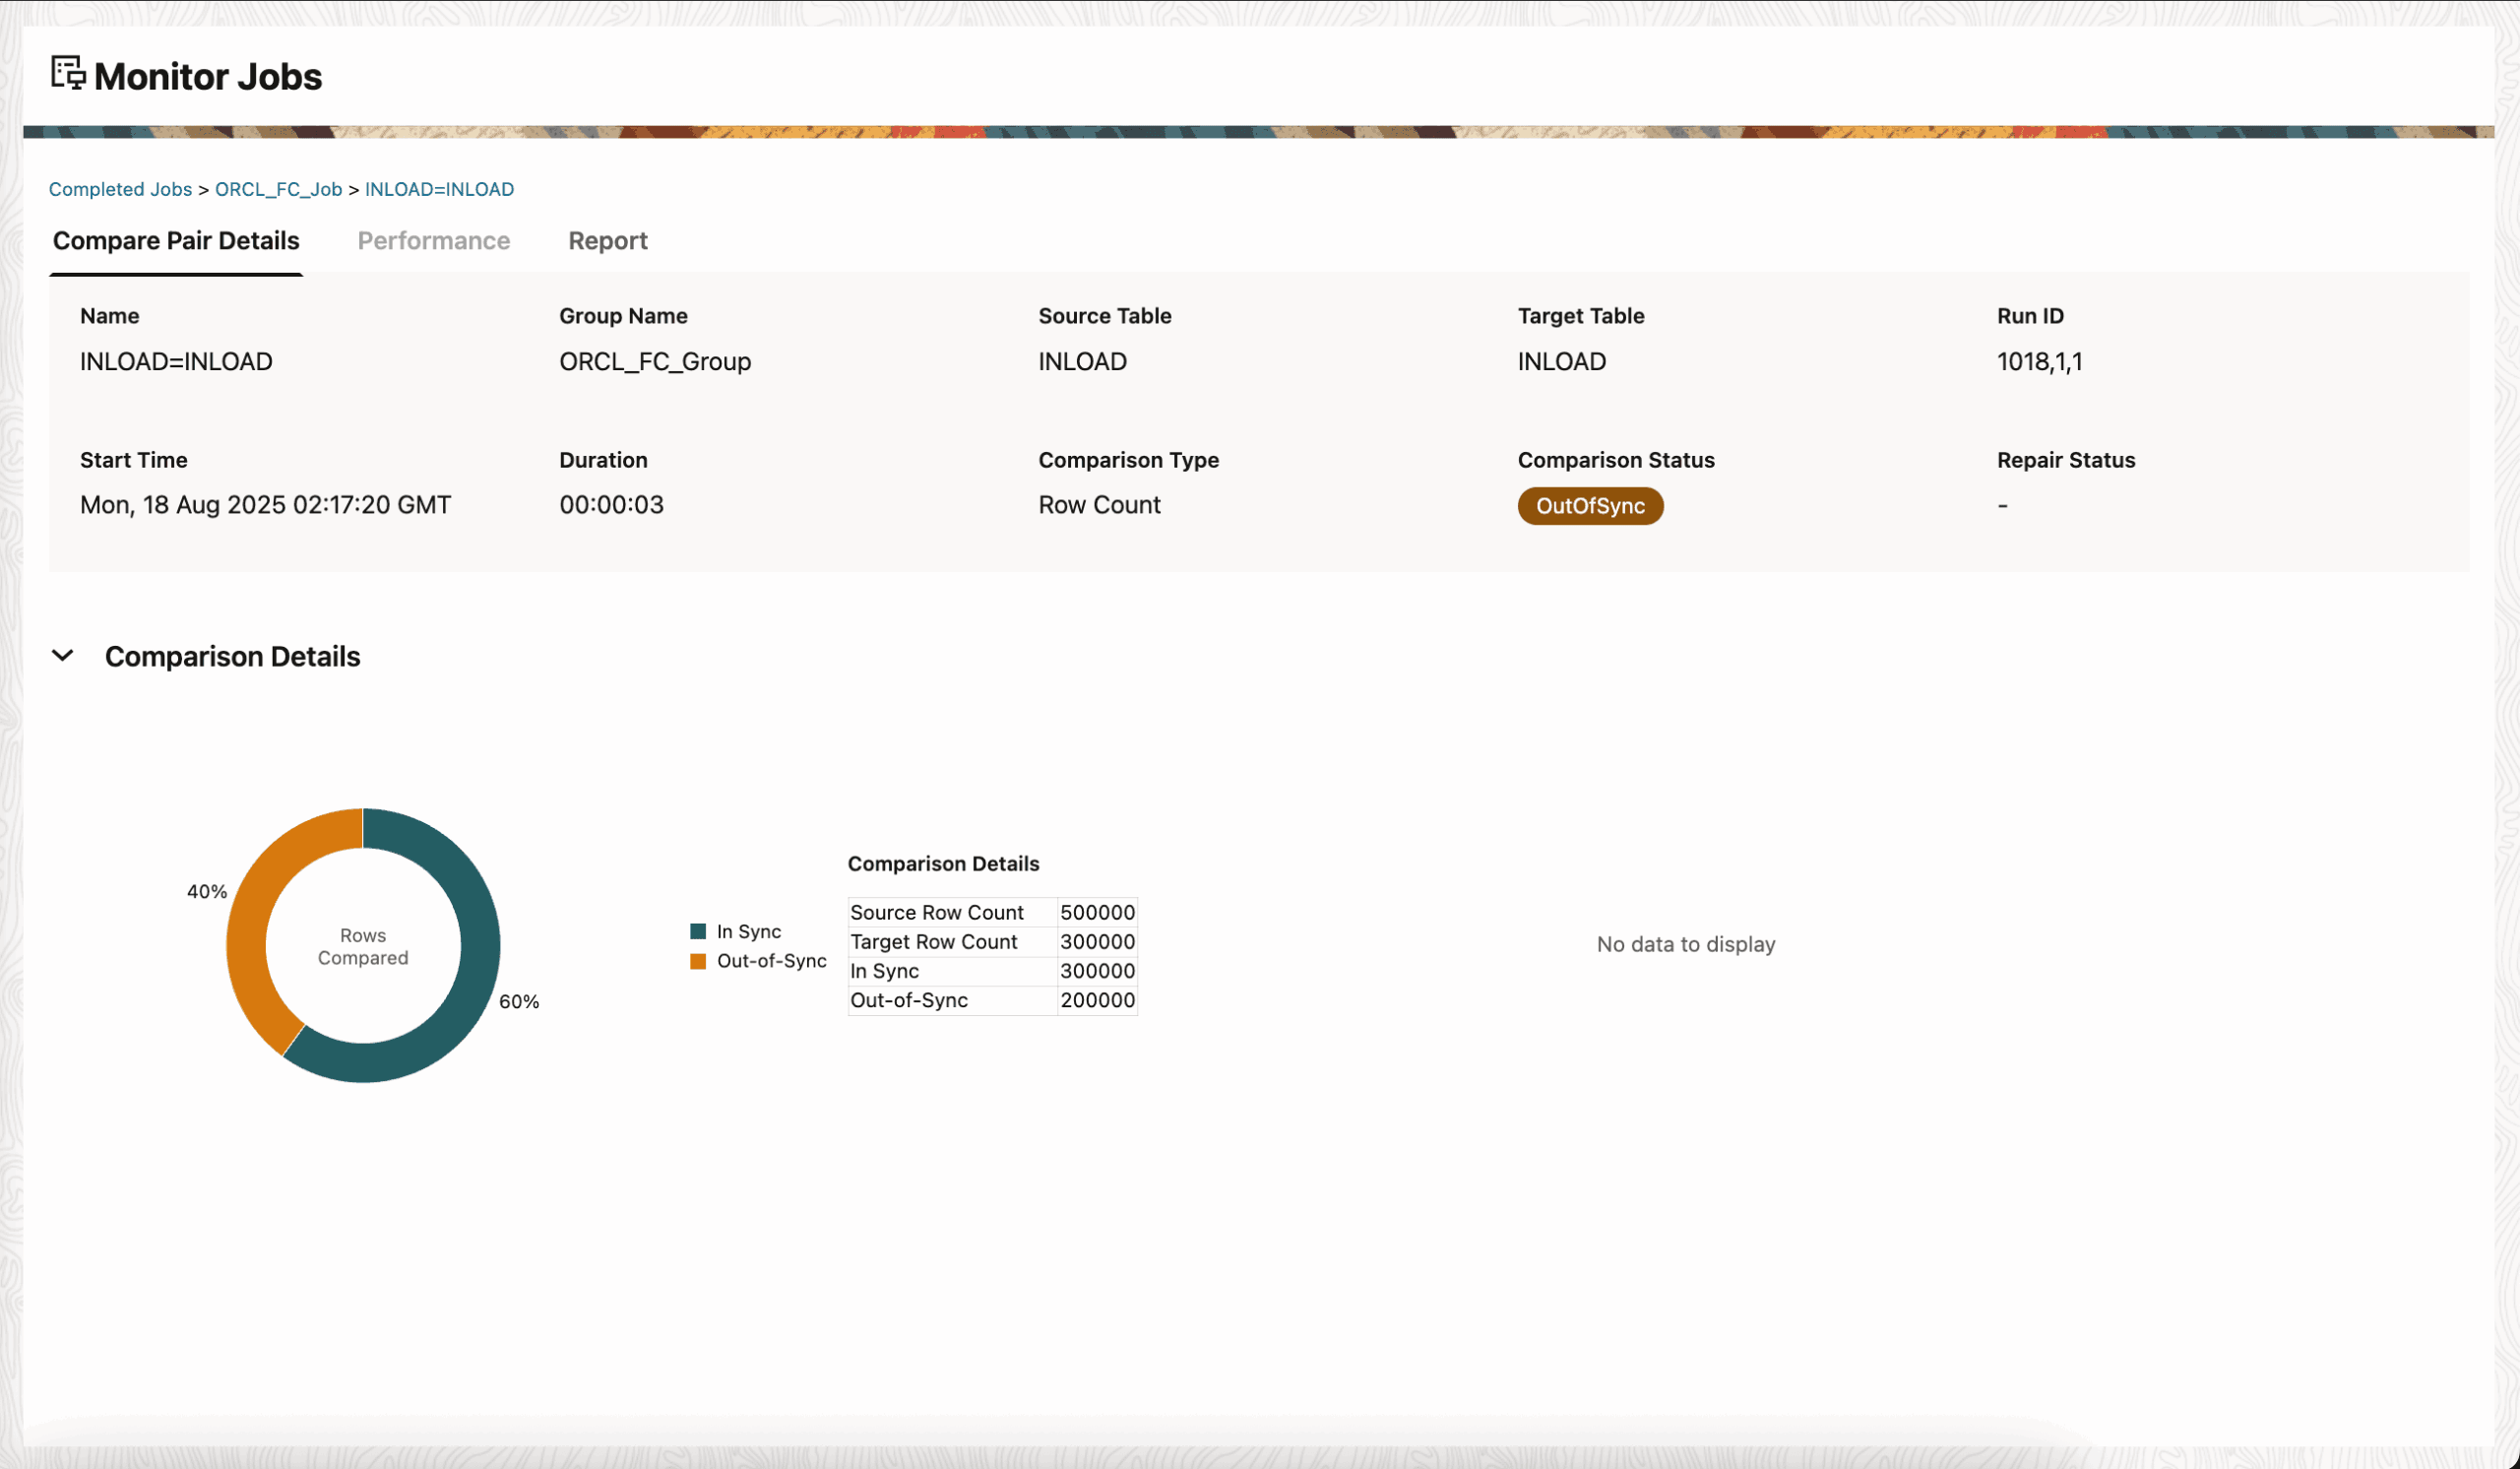
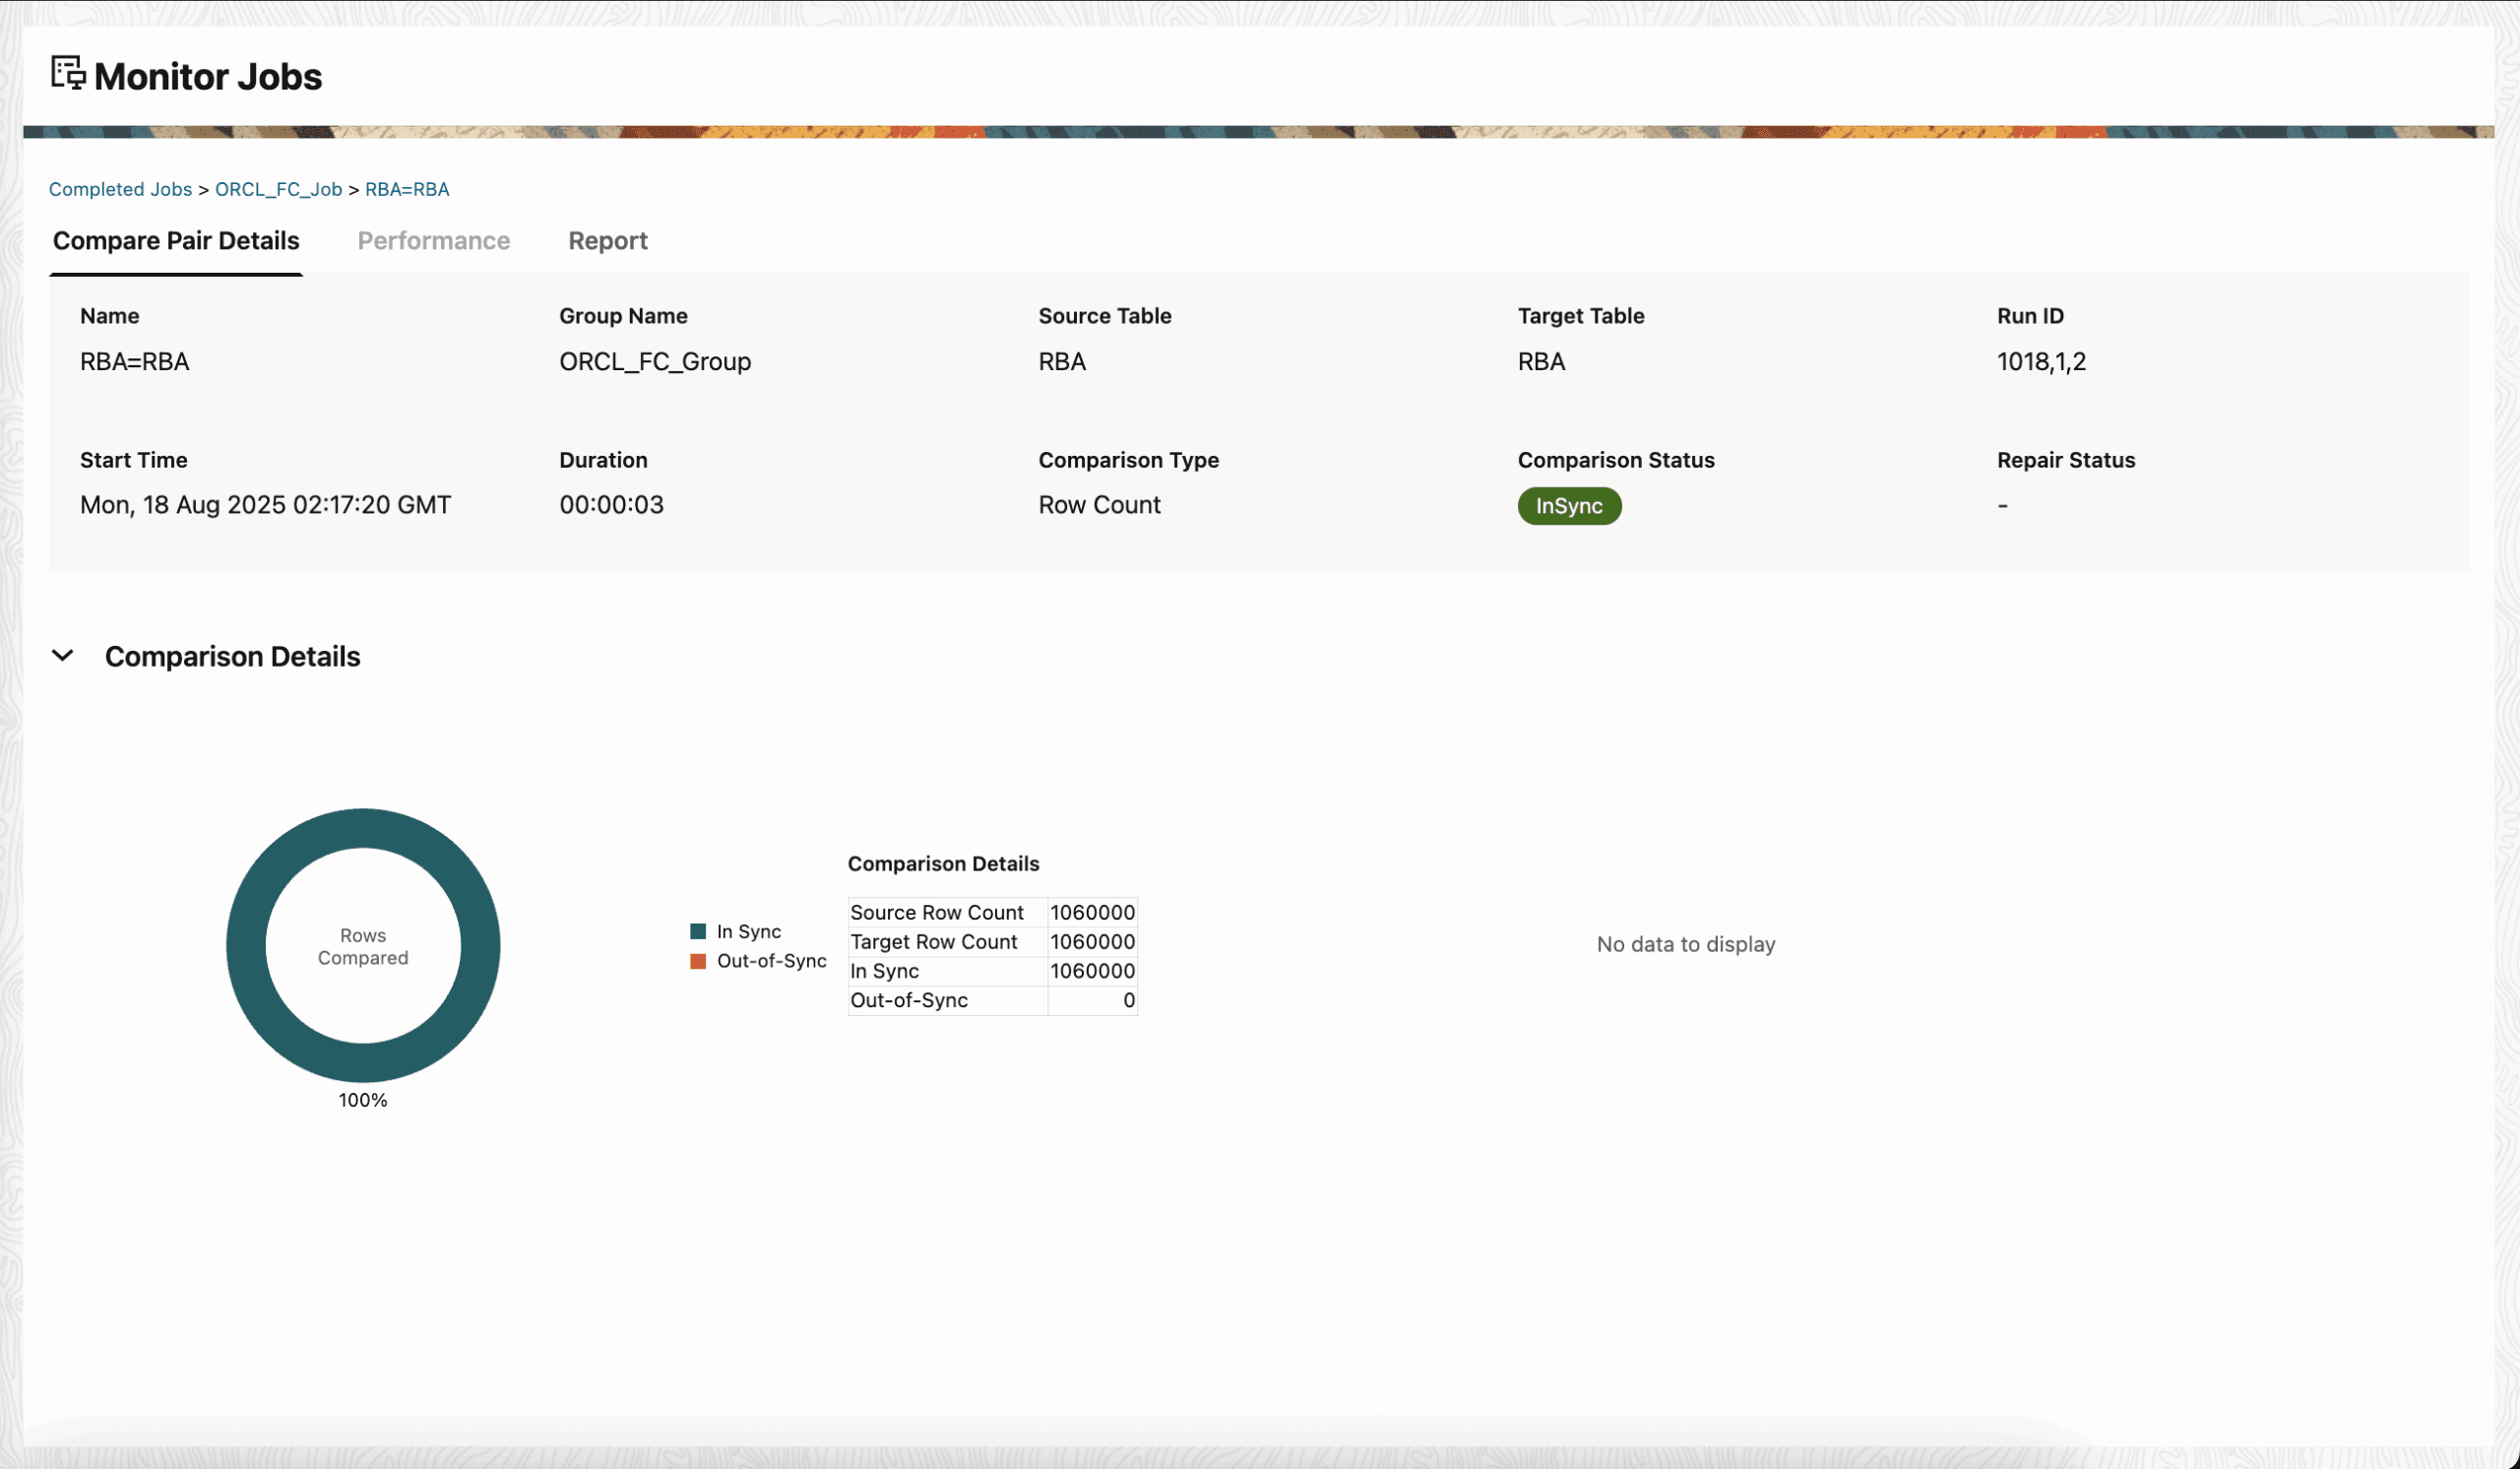
This “Row Count” comparison type is particularly useful for initial checks or when a rapid assessment of data volume consistency is required, without the need for a detailed, column-by-column data validation. The traditional “Full” option remains available for comprehensive data comparisons.
Hope you enjoyed the post! Cheers :-)


 Total Users : 1892173